45
Installing the duct for exhausting
version
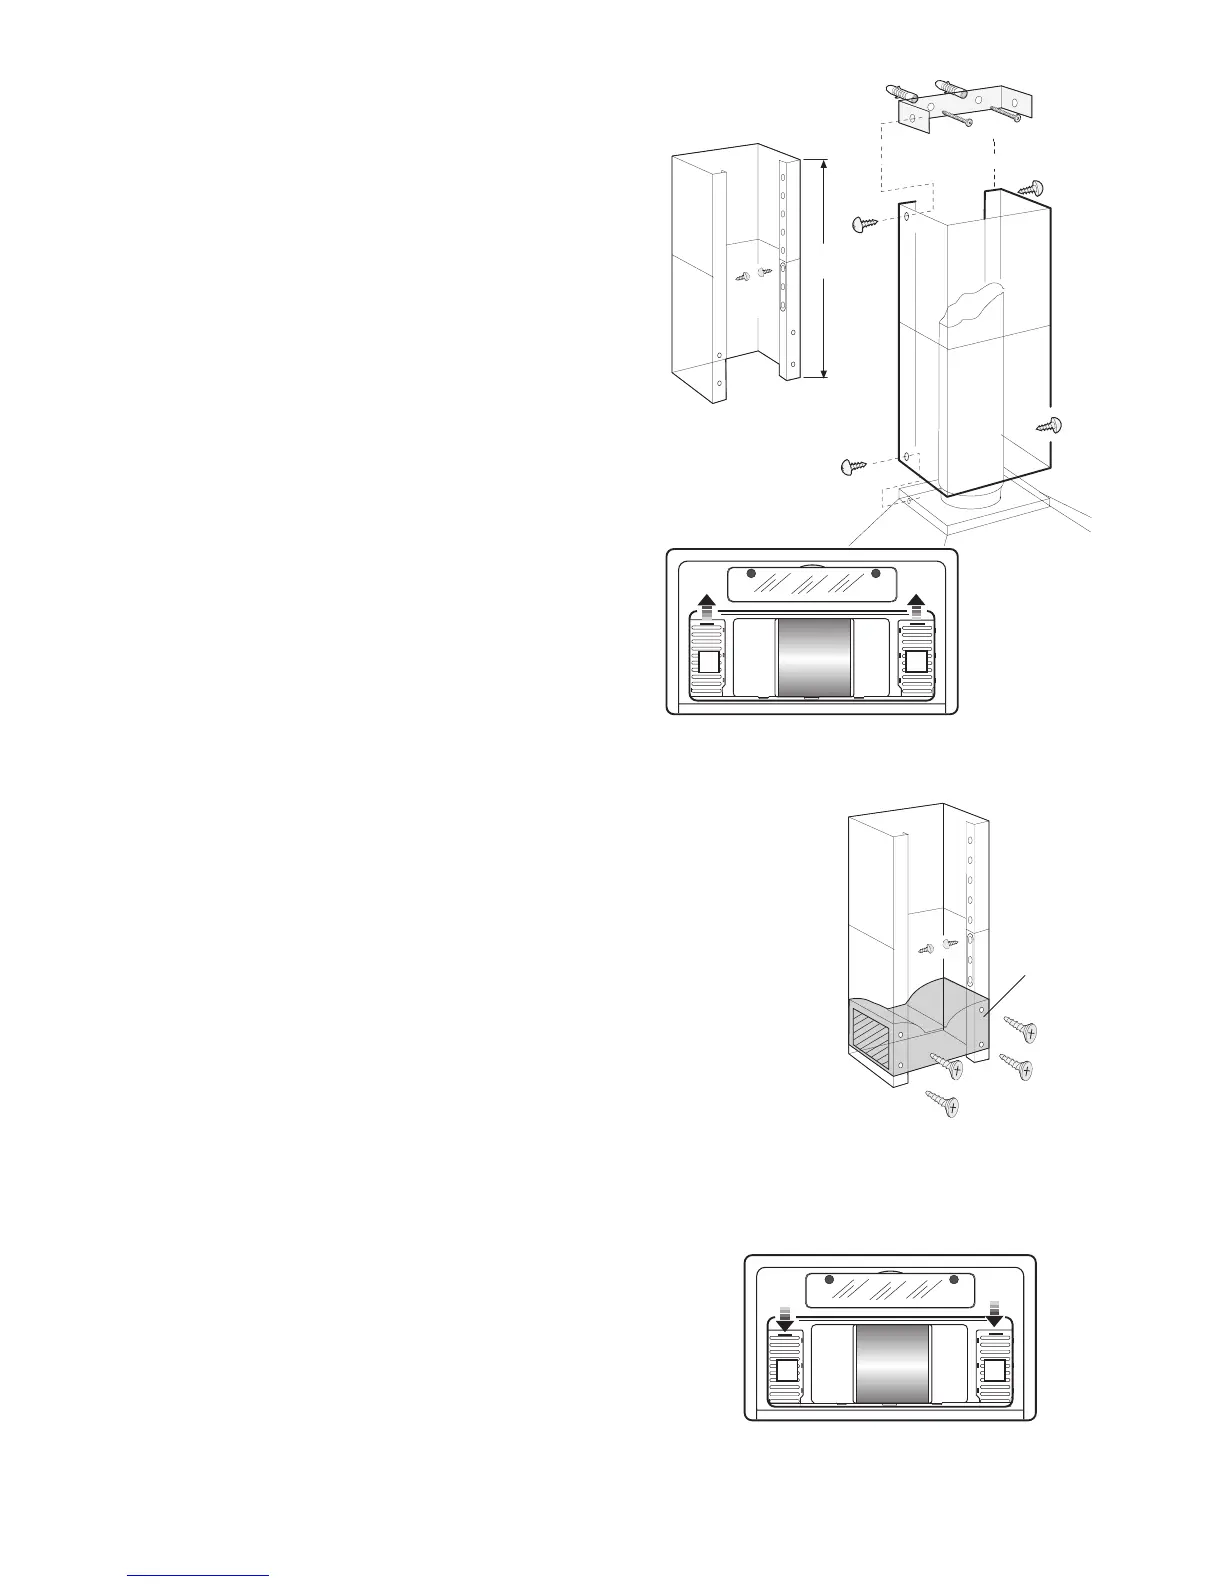
● Fasten the top support H (fig. 9) to the wall
close to the ceiling on the perpendicular of the
bottom connections. To do use the two Ø 5x45
screws and Ø 8mm plugs supplied as standard
equipment.
● Mount the evacuation flex tube on the outlet A
fig. 2.
If a no return valve is used check that it can
open correctly and is not blocked by the flex
tube
● Take the measure h (fig. 9) between the ceiling
and the hood top, and adjust the duct to this
height. Fasten it with the screws M (fig. 9).
● Insert the duct with the slots downwards and
fasten it with the two top screws and the two
bottom screws K (fig. 9).
● On the version EFC 935 X check that the two
internal shutters S (Fig. 9) are open.
Installing the duct for recycling
into the room (Carbon filter
version)
Perform the same operations described in the
preceding paragraph with regards to:
● Fastening of top support H
● Adjustment of duct
If a no return valve in duct A (fig. 2) is
mounted it should be removed.
Before mounting the duct, fasten, with the
screws supplied, the air conveyor N inside
the duct (fig. 10).
Mounting of carbon filter
● Remove the grease filter by pushing it towards
the back of the hood and pulling it downwards.
● The hood with the denomination EFC 935 X has
two internal shutters S (fig. 11) behind the
grease filter. These are at delivery open. Before
mounting the carbon filter they should be shut.