Fig.10
Cut this to fit your window
Fig.11
s
12.7mm
crews
19mm screws or 12.7mm
hex head cap screws
Window stool
Window slider kit
Fig.12
Fig.13
Foam seal B
Fig.14
Foam seal A
(adhesive type)
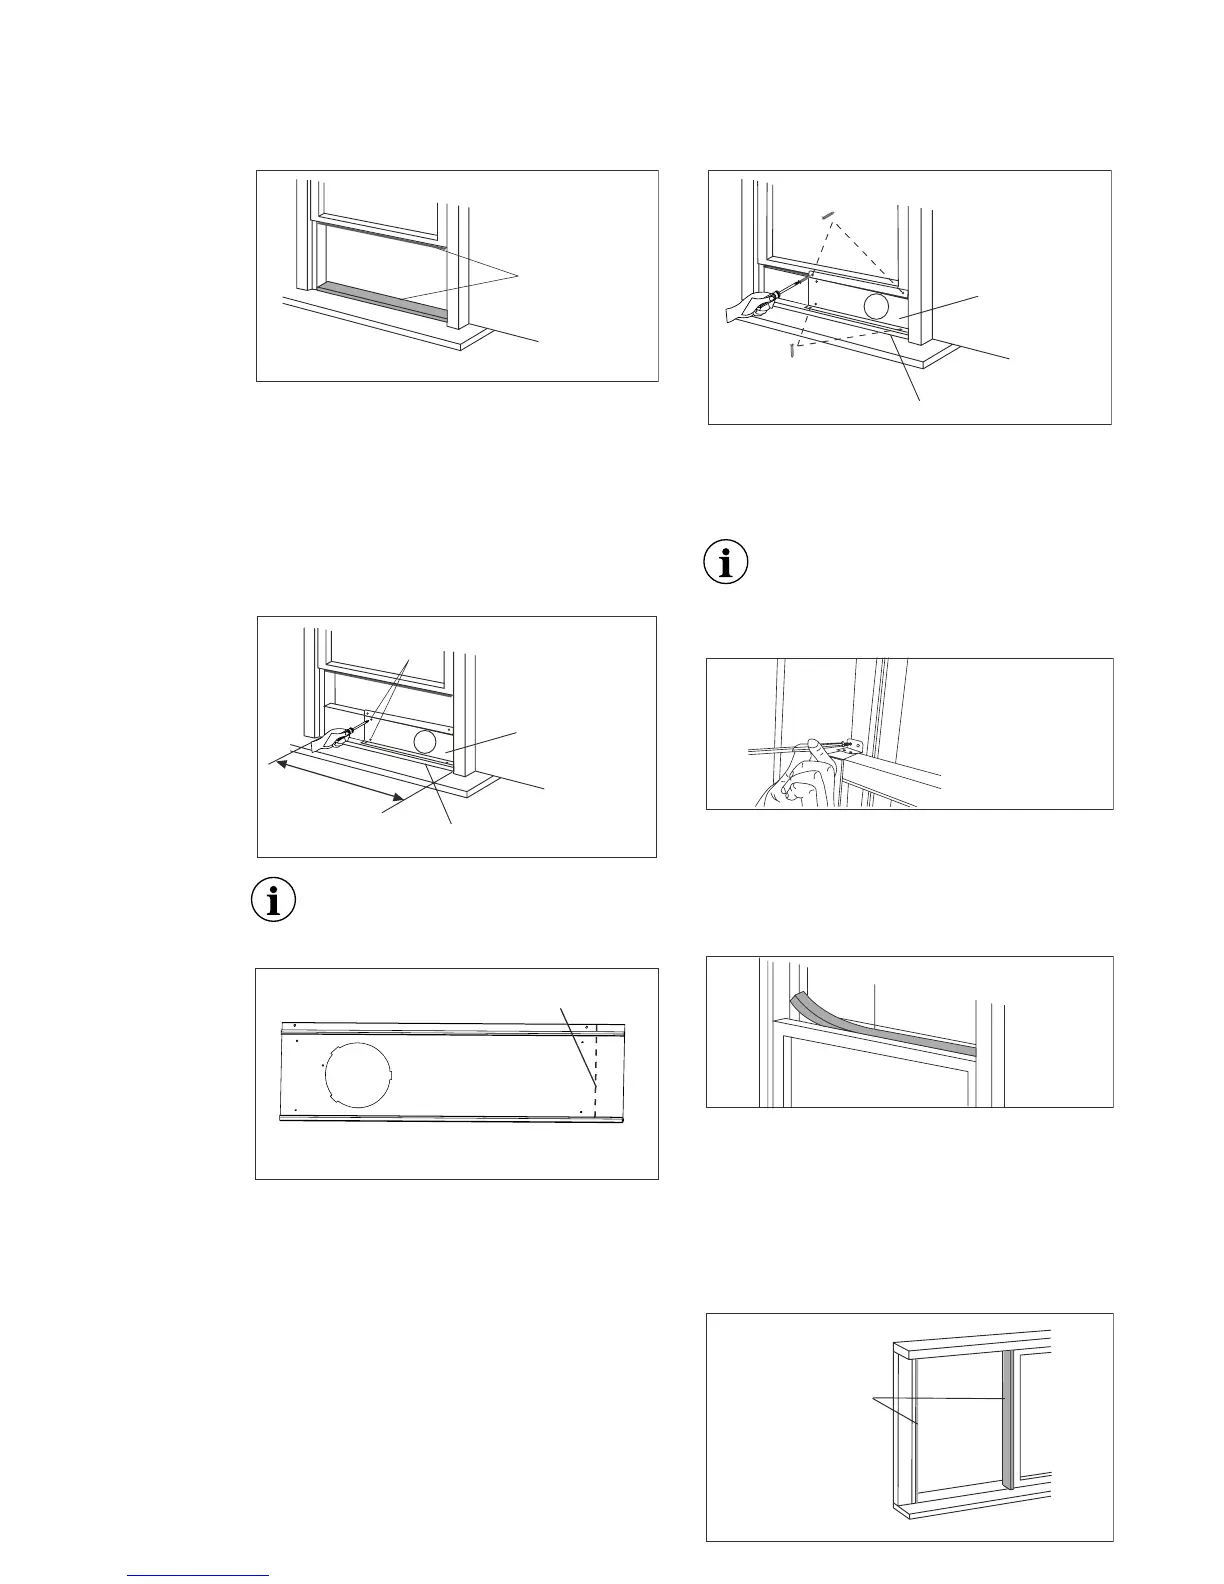
2. Open the window sash and place the
window slider kit on the window stool
(Fig�9)� Attach the window slider kit to
the window stool� Adjust the length of
the window slider kit according to the
width of window� Screw down the two
screws on the window slider kit� See
Fig�9�
1. Cut the foam seals A(adhesive type) to
the proper lengths and attach them to
the window frame� See Fig�14�
4. Drive two 12�7mm screws to secure the
window slider kit to the window sash�
(Fig�11)
5. Secure the window slider kit to the
window stool(Fig�11):
A: For wooden window: Use 19mm
screws for securing�
B: For Vinyl-Clad windows: Use 12�7 hex
head cap screws for securing�
7. Cut the foam seal B to an appropriate
length and seal the open gap between
the top window sash and outer window
sash, as shown in Fig�13�
6. To secure lower sash in place, attach
right angle sash lock with 12�7mm
screw as shown(Fig�12)�
3. Close the window sash securely against
the window slider kit�(Fig�11)
Cut the adjustable window slider kit
if the width of window is less than
67�5 cm (Fig�10)�
It is difcult to lock the windows
with the safety lock for Vinyl-Clad
windows, so you can use lock by
window itself�
Fig.9
screws
Window slider kit
Window stool
67.5cm~123cm
Fig.8
Foam seal A
(adhesive type)
5.2 Installation in a sliding sash
window