16
LOCK
17
KEYCOdE
18
SERVICE dAY
19
PASSWORd
YOUR CODE
20
VERSION
TEMP. IN AUTO
TEMP IN MANU
OPER HOURS H.C.
TEMP 2Nd SENS
8
20
VERSION (restoring the default settings)
Firmware version, informative parameter only.
If you press the “
“ button long (for about 3 s), the RESET message appears shortly on the LCD and
the thermostat returns to the default settings!
KEY LOCK
This is used for locking the controls as a protection against undesirable interference of a foreign person.
16
KEY CODE
This constant can be set if CONST 16 = YES. It is used for setting the code by which you will be able to
activate the controls. Set a four-digit combination (range from 0 to 9).
The keys will be locked within 1 minute (after opening the basic display). The “ ” symbol appears on
the LCD. If you press the “
“ or “ “ button, the LCD asks you to enter the key code; after entering
the correct code, you are able to make any changes (the controls are functional again). The controls will
automatically be locked again after you fi nish the setting (within approx. 1 min).
17
BOILER INSPECTION REMINDER
Set the date on which you want to be informed about the necessity of the prescribed boiler service. At the
required time, the “MAINTENANCE NECESSARY” message and the “ ” symbol will appear on the bot-
tom line of the LCD (you can cancel the message by setting a new date for the next boiler maintenance!).
18
Set YES/NO by turning the “ “ button and press the “ “ button to confi rm.
Gradually set 4 digits by turning the “
“ button; confi rm each setting with the “ “ button.
RECOMMENDATION: - Record the key code in the table
- You can cancel the code by setting CONST 16 to NO, or by restoring the
default settings of the thermostat (see CONST 20).
- in case of loss of the code, it is necessary to bring the thermostat to factory settings using pressing
buttons RESET (see page 1) and MENU (will erase all settings changes).
Gradually set the day, month and year by turning the“ “ button, confi rm each setting with the “ “.
(NO set by default)
(1.1.2032 set by default)
19
PASSWORD
(not set by default)
It is used for locking the constants related to the given control settings. Suitable for service technicians.
After a numerical code has been entered, the user cannot change constants No. 4, 5, 6 and 10.
If you open the CONST mode and browse the constants, the “ ” symbol appears next to the constants
locked; if you turn the “
“ button, the password is required! Unless you enter the password, the con-
stants remain locked. To try to unlock them again, you must exit the CONST mode and browse up the
constant locked again.
Turning the “
“ button, gradually enter four digits and confi rm each setting with the “ “.
USER TIPS
QUICK CHANGE OF REQUIRED TEMPERATURE / PROGRAM IN THE AUTO MODE
Press twice the
“ “ ; the required temperature starts fl ashing on the display. Change the required tempera-
ture by turning the “ “ button and press the “ “. The change will last until the next program change.
Press twice the “ “; the required temperature starts fl ashing on the display. Change the required tempe-
rature by turning the “ “ button and press the “ “. The change will last until the next manual temperature
change.
Press thrice“ “, the setting programm starts fl ashing on the display. Change it by turning “ “
button and press the
“ “.
SMS form: Temp xx (where xx are only integers within the range of CONST2 and CONST3)
Change of the desired temperature; the change will last until the next temperature change given
by the program.
QUICK CHANGE OF REQUIRED TEMPERATURE IN THE MANU MODE
SMS form: Temp xx (where xx are only integers within the range of CONST2 and CONST3)
Change of the desired temperature; the change will be permanent.
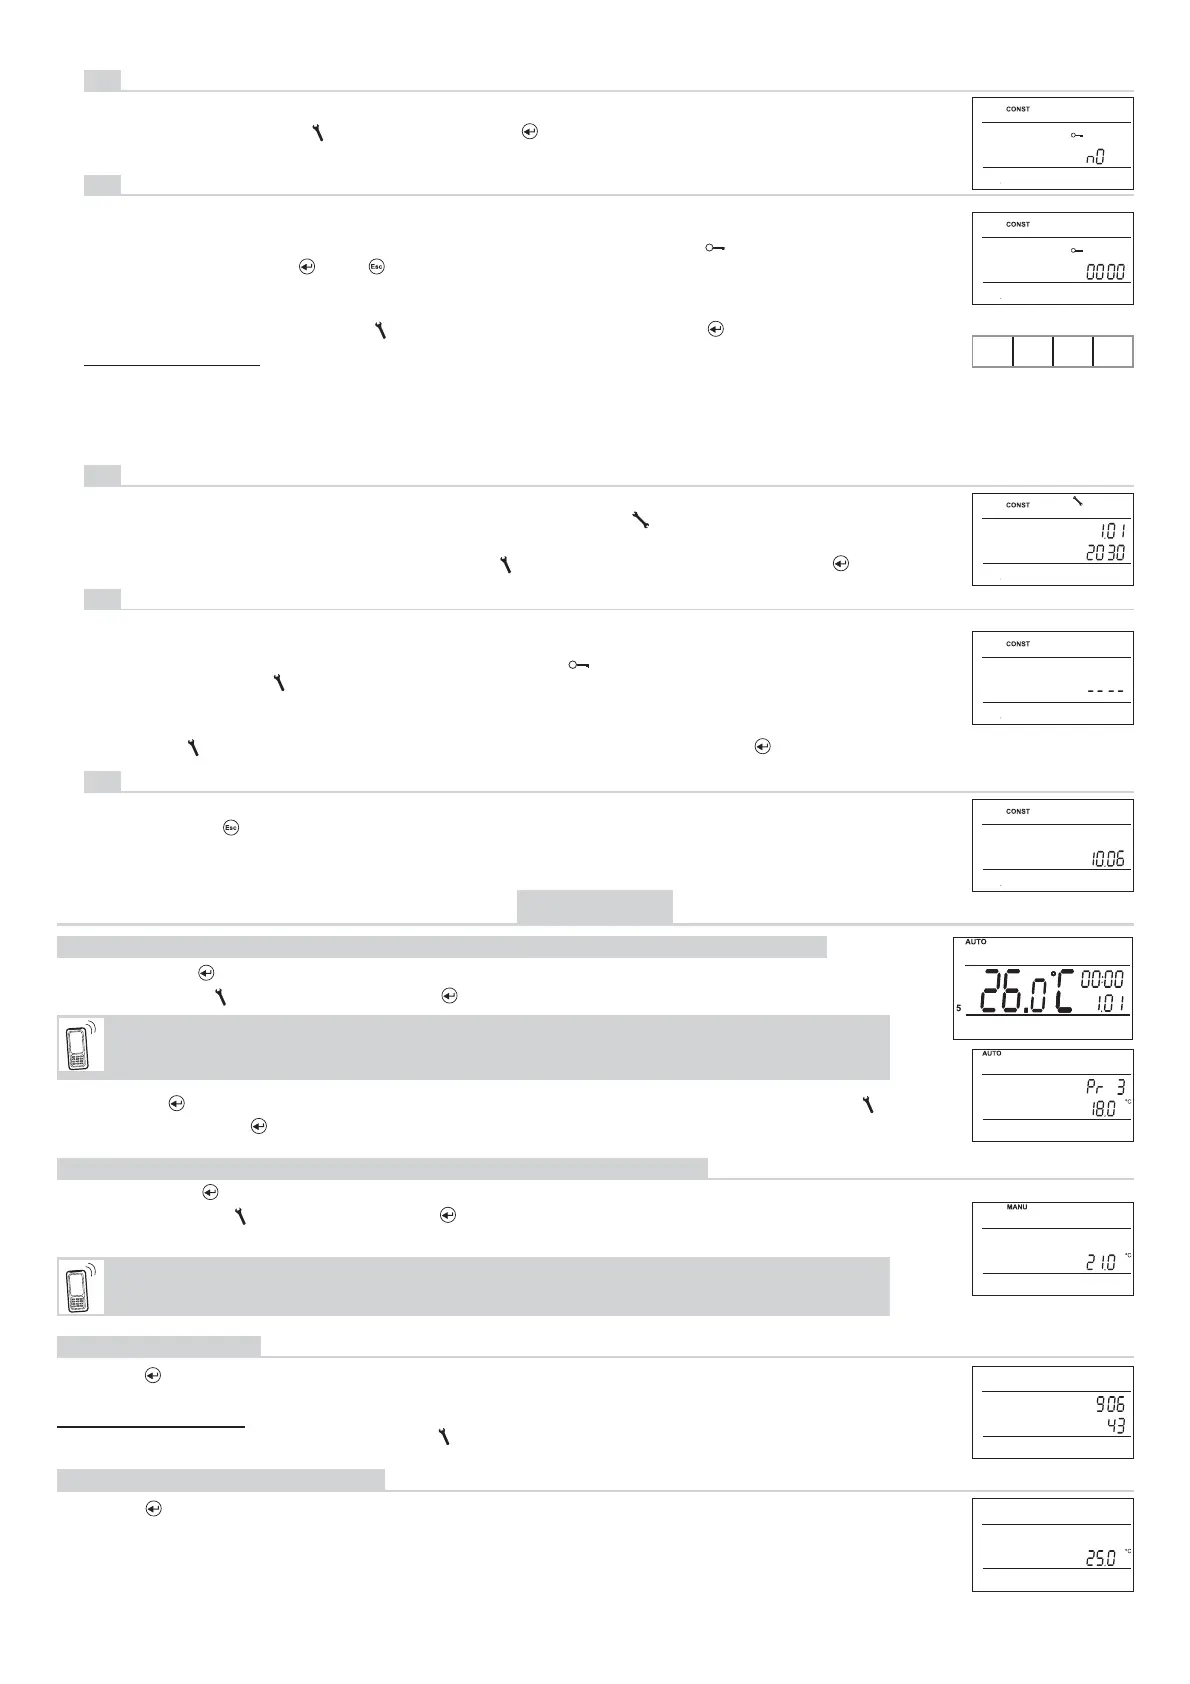
OPERATIONAL HOURS
Push the “ “ button four times. The boiler operating hours appear on the LCD. The fi gure on the picture
means 906 hours 43 minutes.
Resetting the counter:
When operational hours are displayed, turn the “ “ button anti-clockwise.
EXTERNAL SENSOR TEMPERATURE
Push the “
“ button fi ve times. The current temperature of the external sensor appears on the LCD; the
value is only informative, and appears only if the external sensor is monitoring the maximum fl oor temperature
(see CONST 12, page 7).
 Loading...