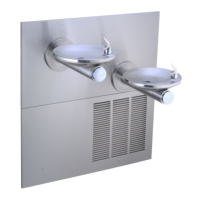
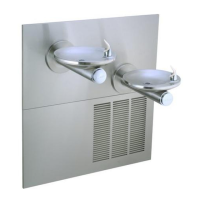
ERPB2-8C, ERPB2-8RAC, ERPBV2-8C, ERPBV2-8RAC, LRPB2-8C, LRPB2-8RAC, ERPB2-8C*2C, ERPB2-8C*3C
ERPB2-8GRNC*A, ERPB2-8GRNRAC*A, LRPB2-8GRNC*A, LRPB2-8GRNRAC*A
97924C (Rev. J - 07/16)
Page 1
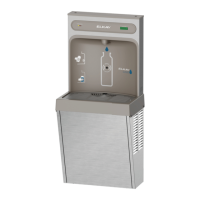
ERPB2-8C ERPB2-8RAC
SWIRLFLO
®
Refrigerated fountains with FLEXI-GUARD
®
INSTALLATION, CARE & USE MANUAL
Review these instructions before beginning installation. Be sure that installation
conforms to all plumbing, electrical and other applicable codes.
When installation is complete, ensure these instructions are left in the plastic bag
provided inside the installed unit for future reference.
Service to be performed by authorized service personnel only.
INSTALLER
NOTE: It is common practice to ground electrical hardware such as telephones, computers and other devices
to available water lines. This can, however, cause electrical feedback in the plumbing circuit, which
results in an “electrolysis” effect occurring in the fountain. This may result in water which has a
metallic taste to it or has a noticeable increase in the metallic content of the water.
When inspecting plumbing circuit, remember the line may be grounded some distance from the
installation, and may occur outside the building or area in which the unit is being installed.
This condition can be avoided (in most cases) by using recommended materials during installation.
Any drain ttings provided by the installer should be made of plastic which will electronically isolate
the fountain from the remainder of the building’s plumbing circuits.