SECTION III
Sewing Basics
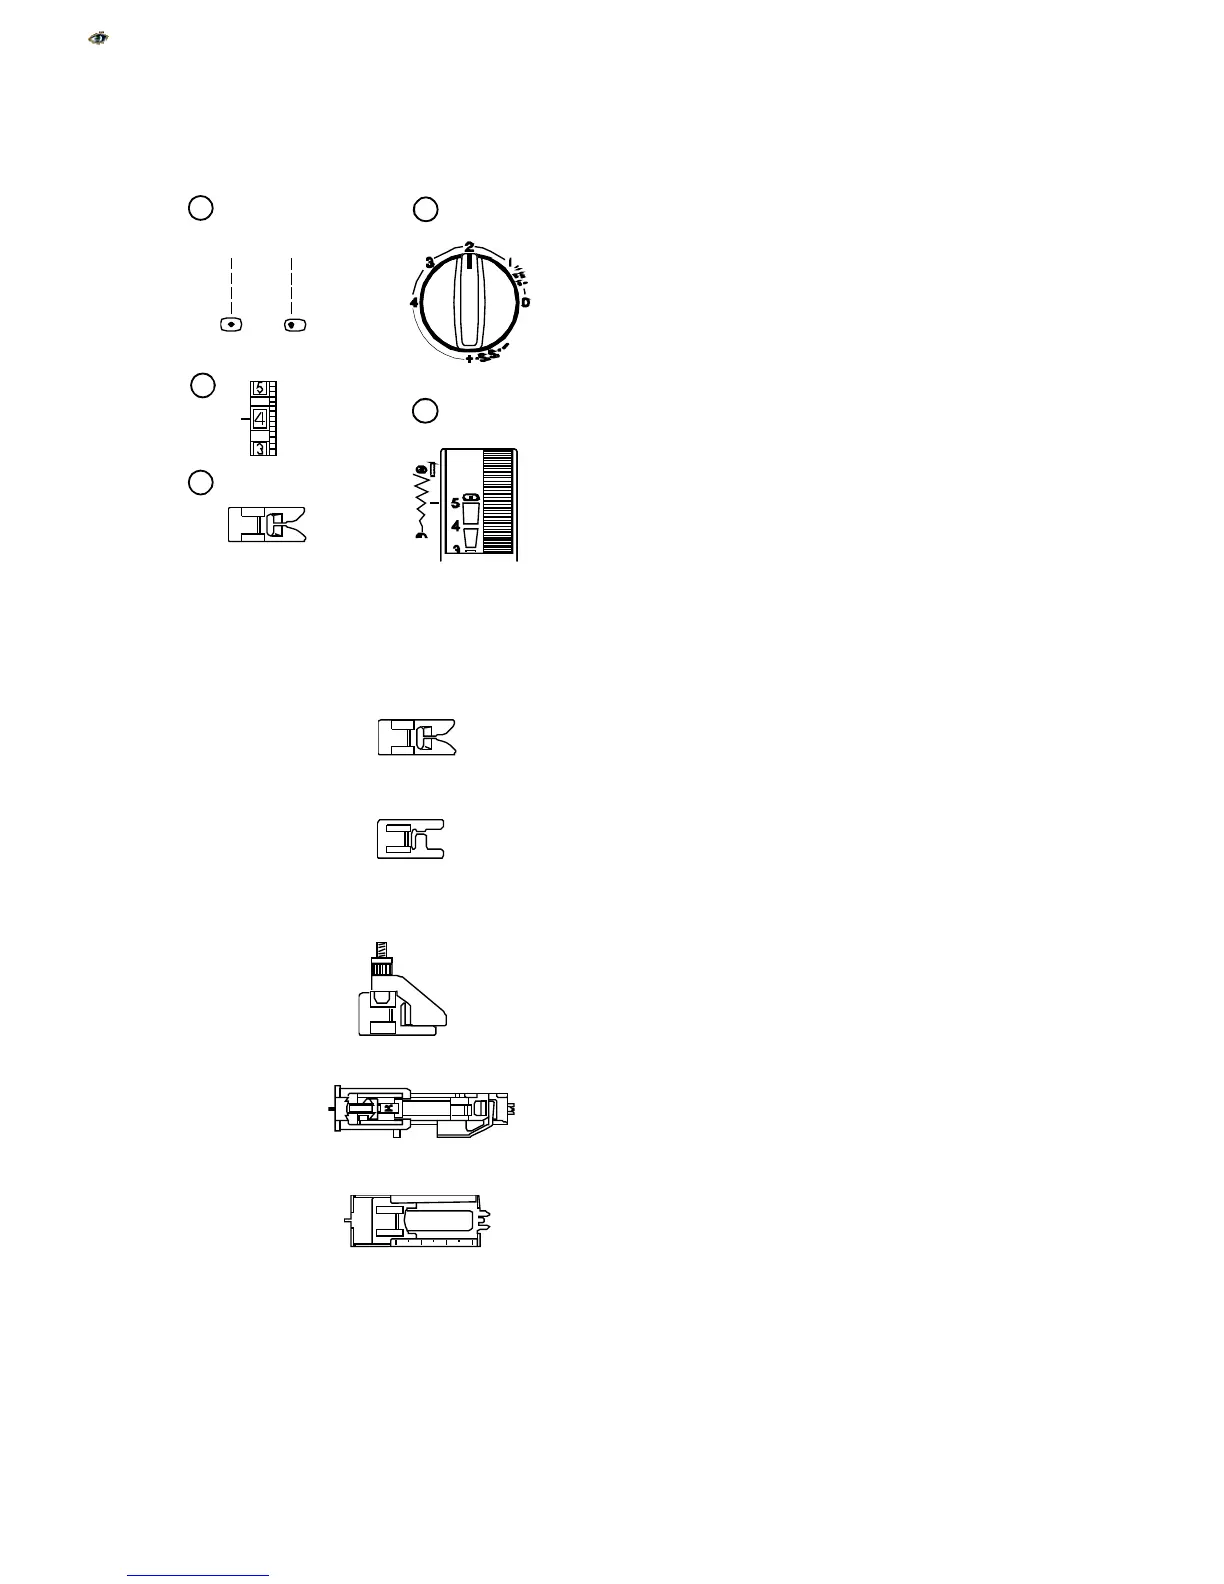
Example Of How To Read the Machine Set-
Up Information
Set Stitch Selection Knob
j
Set stitch selection knob on straight stitch.
Set Stitch Length Knob
k
Set stitch length knob according to fabric weight
(see page 18).
Set Thread Tension Dial
l
Set thread tension to 4. The fabric, thread and
number of layers of fabric might change where
tension should be set.
Set Stitch Width/Needle Position Dial
m
Move the Stitch Width/Needle Position Dial to 5
for center needle position or 0 for left position.
Which Presser Foot to Use
n
Use presser foot shown for the best sewing re-
sult.
Metal foot – Used mainly for straight and zigzag
stitches longer than 1.0.
Satin stitch foot (Model 2130 only) – The cutout
on the underside of the foot is designed for
dense stitch formation. Ideal for satin and deco-
rative stitches.
Zipper foot (Model 2130 only) – Use when sew-
ing zippers into place to avoid the foot riding on
top of the zipper coil.
Blind Hem foot –
The adjustable guide ensures
that the needle catches only one or two fibers of
the hem.
R: Automatic buttonhole foot (Model 2130 only) –
Place button in foot. The machine will automati-
cally sew the correct size.
4-step buttonhole foot (Model 2110 only) – Use
the measurements on the foot to make a
properly sized buttonhole.
17
1
2
3
4
5