EasyManua.ls Logo

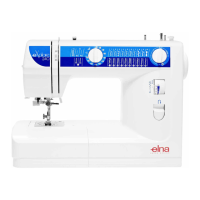
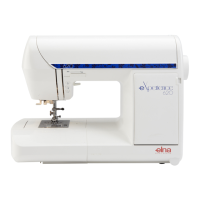
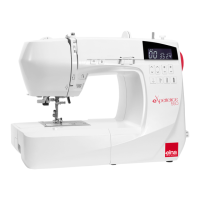
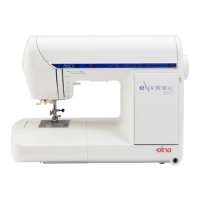
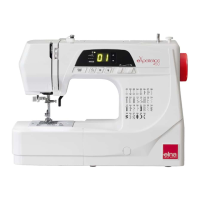
ELNA eXplore 240 User Manual

ELNA eXplore 240
90 pages
To Next Page IconTo Next Page
Page #1 background imageLoading...
Page #1 background image
Instruction Manual | Mode d’emploi | Gebrauchsanleitung
eXplore 220-240

Table of Contents

Other manuals for ELNA eXplore 240

Questions and Answers:

ELNA eXplore 240 Specifications

General IconGeneral
TypeElectronic
Adjustable Stitch LengthYes
Adjustable Stitch WidthYes
Stitch Width7 mm
Stitch Length5 mm
Free ArmYes
LCD ScreenYes
Speed ControlYes
StitchesDecorative, Stretch
Weight6.0 kg

Summary

IMPORTANT SAFETY INSTRUCTIONS

SECTION 1 Machine Parts and Functions

Part Names

Lists and identifies all parts of the sewing machine.

Standard Accessories

Lists and identifies included accessories for the sewing machine.

Extension Table (Accessory Storage Box) and Free Arm

Provides additional sewing space and can be removed for free arm sewing.

Centimeter/Inch Measurements

Tool on the machine front for quick measurements.

Circular Sewing Pivot Points

Holes on the extension table for sewing circles and scallops.

Foot Pressure Dial

Adjusts pressure based on fabric weight for optimal sewing.

Additional Presser Foot Clearance

Raises presser foot higher for easy removal or thick fabrics.

How To Snap Presser Foot Off and On

Step-by-step instructions for attaching and detaching the presser foot.

How To Remove and Attach the Shank

Guide for removing and attaching the presser foot shank.

Seam Allowance Lines

Lines on the needle plate for measuring seam width.

How To Drop the Feed Dog

Instructions for lowering the feed dog for special sewing techniques.

Stitch Selection Knob

Controls the type of stitch selected by turning the knob.

Stitch Length Knob

Adjusts the length of the stitch for different sewing needs.

Fine Tuning Stretch Stitches

Allows adjustment of stretch stitches for proper appearance.

Stitch Width/Needle Position Dial

Controls stitch width and needle position for various stitches.

Reverse Stitch Lever

Allows sewing backwards by pressing the lever.

Thread Tension Dial

Adjusts needle thread tension for balanced stitches.

SECTION II - Getting Ready to Sew

Selecting the Correct Needle and Thread

Guidance on choosing appropriate needles and threads for different fabrics.

Changing the Needle

Step-by-step guide on how to replace the sewing machine needle.

Needle Definitions

Identifies and explains the parts of a sewing machine needle.

Connecting the Machine to Power Supply

Instructions for safely connecting the sewing machine to an electrical power source.

For Your Safety

Important safety precautions related to electrical connection and operation.

Foot Control and Sewing Speed

How foot control determines sewing speed.

Operating Instructions (U.S.A. only)

Specific operating notes for users in the USA.

Removing the Bobbin Case

Steps to remove the bobbin case for access.

Spool Pins

Instructions for using spool pins for thread spools.

Winding a Bobbin

Detailed steps on how to wind thread onto a bobbin.

Inserting the Bobbin

Instructions for correctly inserting the bobbin into the bobbin case.

Threading the Machine

Step-by-step guide to threading the sewing machine with thread.

Needle Threader

Instructions for using the built-in needle threader.

SECTION III - Sewing Basics

Example Of How To Read the Machine Set-Up Information

Guide to interpreting machine settings for various stitches.

Set Stitch Selection Knob

How to set the stitch selection knob for straight stitch.

Set Stitch Length Knob

How to set the stitch length based on fabric weight.

Set Thread Tension Dial

How to set the thread tension, adjustable for fabric and layers.

Set Stitch Width/Needle Position Dial

How to set stitch width and needle position for center or left needle.

Which Presser Foot to Use

Guidance on selecting the appropriate presser foot for specific sewing tasks.

Straight Stitch

Instructions for sewing a basic straight stitch for seams and other tasks.

Starting To Sew

Initial steps for beginning a sewing project.

Finishing Off a Seam

How to secure and finish the end of a seam.

Changing Sewing Direction

How to pivot and change sewing direction mid-stitch.

Gathering

Technique for creating gathers or shirring on fabric.

Zipper Insertion

Detailed instructions for inserting zippers into garments.

Pintucks

Instructions for creating decorative pintucks on fabric.

Twin Needle Hem

How to create a hem using a twin needle, ideal for stretchy fabrics.

Zigzag Stitch

Explanation and uses of the versatile zigzag stitch.

Overcasting

Using zigzag stitch to finish raw seam edges and prevent fraying.

3-Step Zigzag

A stitch for finishing edges or mending tears, providing a flatter finish.

Mending a Tear

How to repair tears in fabric using sewing techniques.

Stretch Blind Hem

Instructions for sewing blind hems on knit or woven fabrics.

Shell Tuck

A decorative hem finish for lingerie and tricot fabrics.

Box Stitch

Attaching elastic directly to fabric without a casing.

Automatic Buttonhole

How to create automatic buttonholes using a special foot.

4-Step Buttonhole

How to create buttonholes using a 4-step manual process.

Corded Buttonhole

How to sew buttonholes reinforced with cording for extra strength.

SECTION IV – Stretch Stitches

Triple Seam

A strong, durable stitch for elasticity and strength, good for reinforcing seams.

Decorative Stretch Stitches

Using stretch stitches for decorative hems on knit fabrics.

Super Stretch Stitch

Stitch for sewing swimwear and velour, providing maximum stretch and strength.

Double Overlock Stitch

Finishes seam edges similar to a commercial overlock machine.

SECTION V – Satin Stitches

Scallop Edges

Using a scallop satin stitch to finish edges decoratively.

SECTION VI - Taking Care of Your Machine

Cleaning the Bobbin Case and Hook

Instructions for cleaning the bobbin area to prevent stitching issues.

Cleaning the Feed Dog

How to clean dust and lint from the feed dog teeth.

Oiling

Guide on where and when to oil the sewing machine.

Changing the Light Bulb

Instructions for replacing the sewing machine's light bulb.

TROUBLESHOOTING

Related product manuals