58
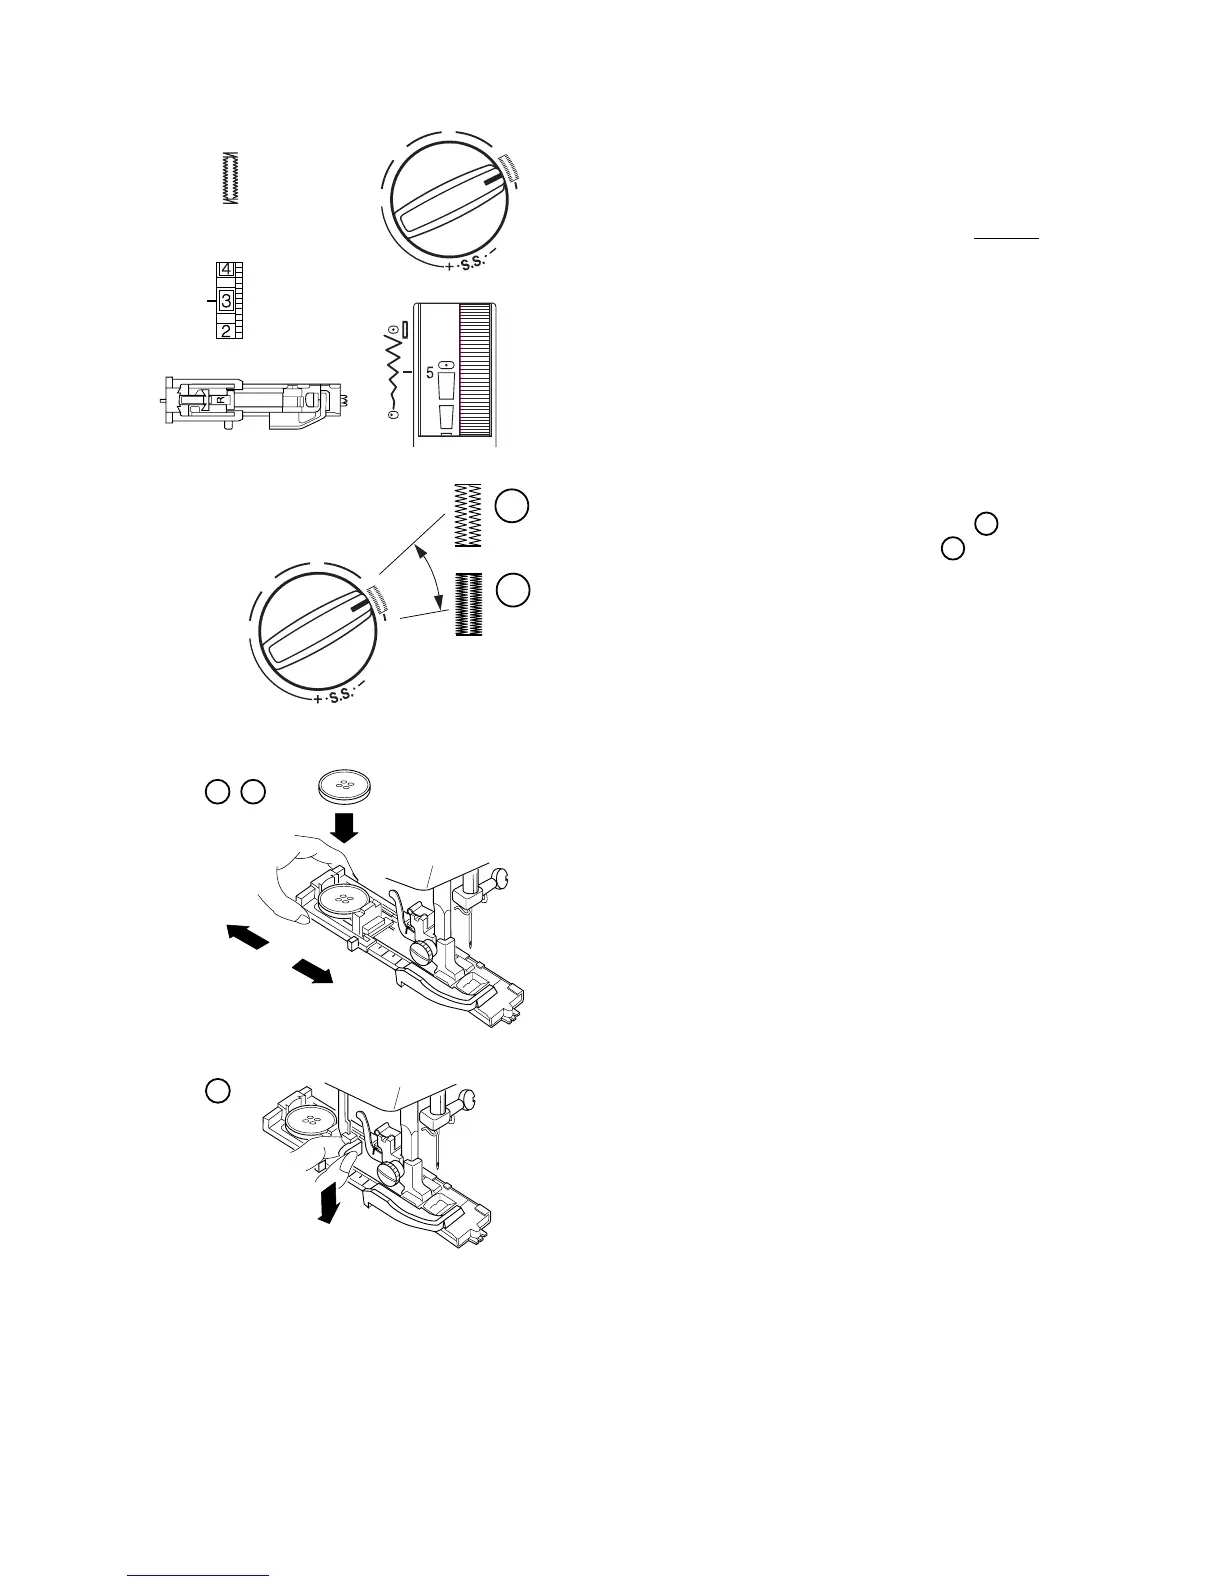
Automatic Buttonhole
(Model 240 Only)
All buttonholes should use interfacing that is the
same weight as the fabric. Interfacing is especially
important when sewing on stretch fabrics. Always
make a test buttonhole on extra fabric before sewing
on your garment.
Use a shorter stitch length for finer fabrics . Use a
longer stitch length for heavier fabrics .
1. Attach the automatic buttonhole foot. Make sure
the button opening is at the back of the foot
when it is attached.
2. Pull open the button holder to the back and
place the button in it. Push the holder together
tightly around the button.
Placing the button in the automatic buttonhole
foot automatically sets the size of the buttonhole.
The button holder on the foot adjusts for a button
up to 2.5 cm (1”) in diameter.
3. Pull the buttonhole lever down as far as it will go.
A
A
B
1
2
3
0
1
2
3
4
4