18
Needle Definitions
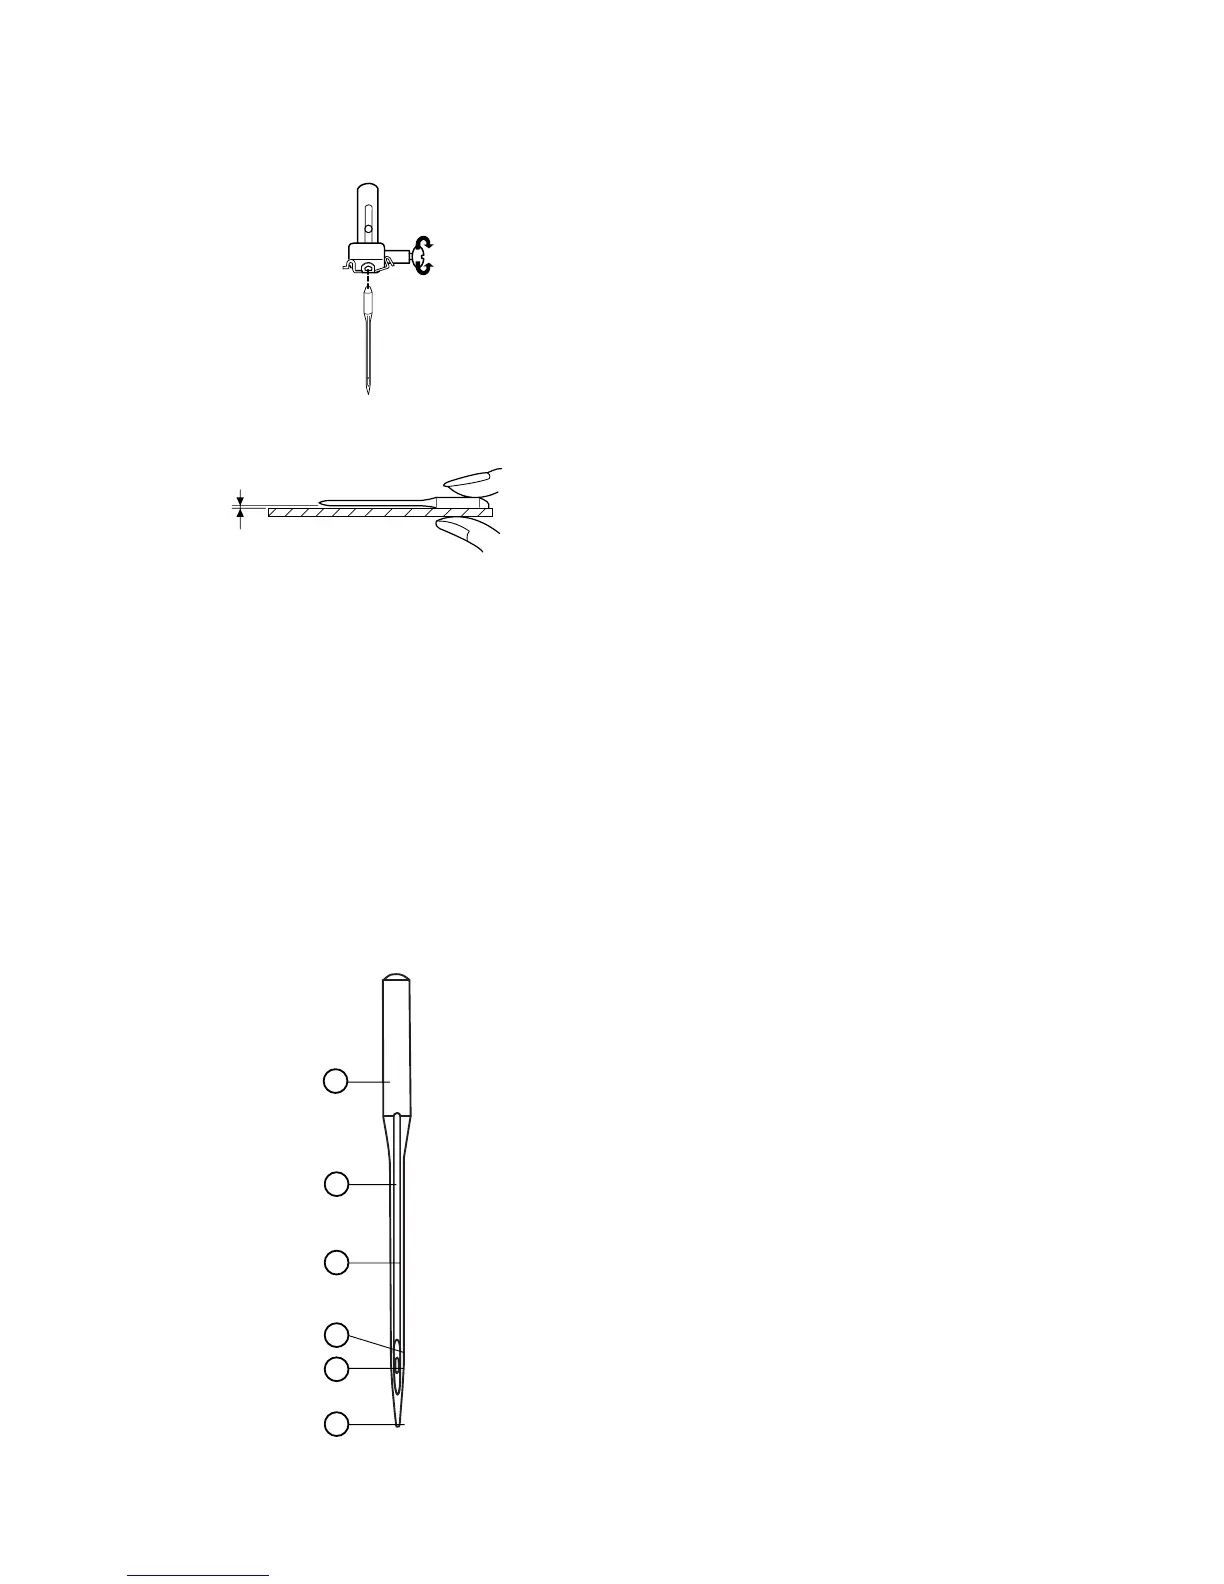
The illustration identifies the main parts of a sewing
machine needle.
1. Body
2. Shaft
3. Long groove (round side of needle)
4. Short groove (flat side of needle)
5. Eye
6. Point
1
2
3
4
5
6
Changing the Needle
Turn off the machine. Turn the flywheel toward you
to raise the needle. Lower the presser foot.
Turn the needle clamp screw counterclockwise to
loosen.
Remove the needle from the clamp.
Insert the new needle into the clamp with the flat
side to the back, pushing it up as far as it will go.
Tighten the clamp screw firmly.
To determine if the needle is defective, place the flat
side of the needle on something flat (a needle plate,
piece of glass, etc.). The gap between the needle
and the flat surface should be even.
Never use a bent or broken needle. It may cause
skipped stitches or thread breakage. Defective
needles can ruin the fabric.
Always purchase good quality needles. Change
needle often.