15
7. Adjustment of Needle Bar Height
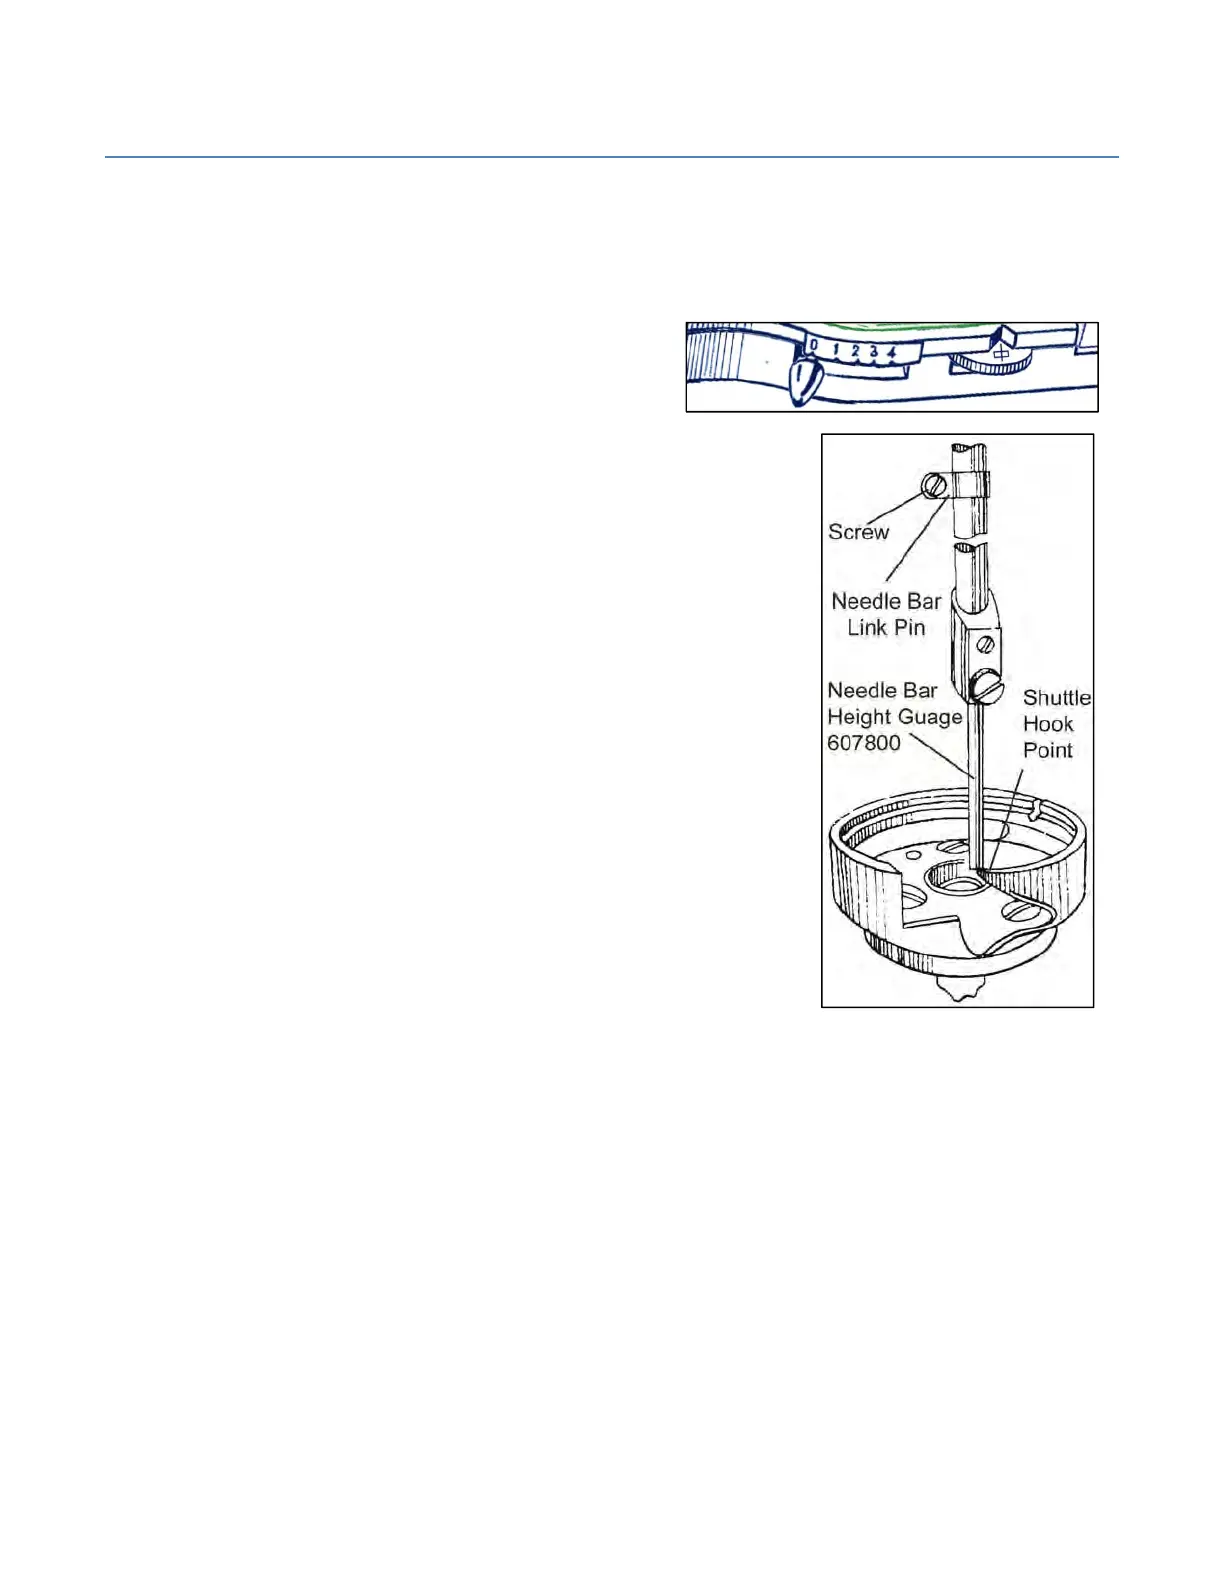
Theneedlebarheightiscorrectlyadjustedwhenthepointoftheshuttlehookjusttouchesthelowerendofthe
gaugeNo.607800whilepassingbelowthisgauge.Ifthisisnotthecase,adjustasfollows:
Removeneedle,presserfootandneedleplate,theninsertneedlebarheightgaugeNo.607800.
Stitchwidthknobat"0."
SetCenteringDialatCenterPosition.
Removegaugeandclosefrontcover.Replaceneedleplate,presserfootandneedle.
Itisessentialaftertheaboveadjustmenttocheckalsotheclearancebetweenneedlesandpointofshuttlehook
whenusingthedoubleneedleclamp(topreventskipstitchingandneedlebreaking).
Turnflywheeltowardsyouandcheckwhetherpointofshuttlehookjust
touchesgentlytheflatatthebottomofthegauge.
Ifneedlebarissettoohigh,proceedasfollows:
Lowerpresserfootlevertoopenfrontcover.(Threadtake‐uplevermustbe
inaraisedposition.)
Turnflywheelslowlytowardsyouuntilpointofshuttlehookisjustbelowthe
needlebarheightgauge.
Loosenscrewinneedlebarlinkpinandlowertheneedlebaruntilgauge
restsuponpointofshuttlehook.
Tightenscrewinneedlebarlinkpinafterthisadjustment.
Ifneedlebarissettoolow,followthesameprocedureasabove,butafter
looseningthescrewintheneedlebarlinkpin,raisetheneedlebarabovethe
shuttlehooktobegin.


 To Next Page