EasyManua.ls Logo

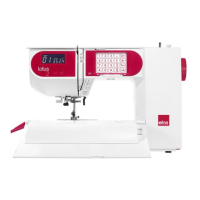
ELNA XQUISIT 2 User Manual

ELNA XQUISIT 2
163 pages
To Next Page IconTo Next Page
Page #1 background imageLoading...
Page #1 background image
INSTRUCTION MANUAL
09.04 – English Elna International Corp. SA
Printed in JAPAN
www.elna.com

Table of Contents

Questions and Answers:

ELNA XQUISIT 2 Specifications

General IconGeneral
TypeElectronic
Stitch Patterns/Stitches200
Maximum Stitch Length5 mm
DisplayLCD
Free ArmYes
Built-in Needle ThreaderYes
Power Requirements220-240V, 50Hz

Summary

IMPORTANT SAFETY INSTRUCTIONS

DANGER - To reduce the risk of electrical shock

Precautions to prevent electric shock hazards when using the appliance.

WARNING - To reduce the risk of burns, fire, electric shock or injury to persons

General warnings and precautions for safe operation and handling.

SECTION I Machine Parts and Functions

Machine Parts

Identifies and describes the main physical components of the sewing machine.

Standard Accessories

Lists and illustrates the various accessories included with the sewing machine.

Attaching and Removing Presser Foot

Step-by-step instructions for changing the presser foot.

Presser Foot Definitions

Presser Foot Definitions

Explains the function and use of various presser feet.

Adjusting Foot Pressure

Adjusting Foot Pressure

Instructions on how to modify foot pressure for different fabric types.

Controlling Sewing Speed

Controlling Sewing Speed

Methods and controls for adjusting the machine's sewing speed.

Machine Operation Keys

Machine Operation Keys

Explains the function of the primary control keys on the sewing machine.

SECTION II Getting Ready to Sew

Selecting the Correct Needle and Thread

Guidance on choosing appropriate needles and threads for various fabrics.

Needle Definitions

Explanation of different sewing needle types and their applications.

Changing Needles

Changing Needles

Procedure for safely replacing the sewing machine needle.

For Your Safety

For Your Safety

Essential safety guidelines to follow before operating the machine.

Connecting Machine to Power Supply

Connecting Machine to Power Supply

Steps for connecting the sewing machine to the electrical power source.

SECTION V Decorative Sewing

Operation Keys

Explanation of the function of key controls for machine operations.

LCD Keys

Describes the function of various keys displayed on the LCD screen.

How to Program Decorative Patterns

Instructions for programming sequences of decorative patterns.

Scissors and Lock/Reverse Keys

Explains the function of thread cutting and reverse stitching keys.

LCD Keys

Winding Bobbin from Top Spool

Winding Bobbin from Top Spool

Instructions for winding thread onto a bobbin from an upper spool.

Inserting the Bobbin

Inserting the Bobbin

Procedure for correctly placing the bobbin into the bobbin case.

Automatic Top Threading

Automatic Top Threading

Guide for the machine's automated top thread path setup.

Manual Top Threading

Manual Top Threading

Steps for manually threading the machine's top thread.

Automatic Needle Threader - Manual Operation

Automatic Needle Threader - Manual Operation

Instructions on how to manually operate the automatic needle threader.

Test Sewing

Test Sewing

Recommended practice before sewing on the actual project.

How to Access Utility, Heirloom and Quilting Groups and Folders

Navigation guide for selecting stitch groups and folders.

How to Select a Stitch

How to Select a Stitch

Steps to choose and display a specific stitch pattern on the LCD.

Starting to Sew

Starting to Sew

Instructions on how to begin the sewing process.

Thread Tension

Thread Tension

Explanation of how to adjust thread tension for optimal stitch quality.

Stitch Width and Length

Stitch Width and Length

How to adjust stitch width and length parameters for various sewing needs.

Stitch Length Key

Stitch Length Key

Function of the key used to control and adjust stitch length.

Scissors Key and Lock/Reverse Key

Scissors Key and Lock/Reverse Key

Explains the function of thread cutting and reverse stitching keys.

SECTION III On-Screen Manual

Personalized Machine Settings

Personalized Machine Settings

Customizing machine preferences and default settings for personal style.

SECTION IV Sewing Techniques

Straight Stitch

Basic sewing stitch for seams and straight lines.

Zigzag Stitch

Zigzag Stitch

Versatile stitch for finishing edges, narrow hems, and appliqué.

Buttonholes

Buttonholes

Guide to selecting and sewing different types of buttonholes.

Buttonholes, 4-step

Buttonholes, 4-step

Buttonholes suited for corded, novelty, or decorative openings.

SECTION VI Getting Ready to Embroider

Attaching Embroidery Foot J

Instructions for attaching the embroidery foot J.

Installing Embroidery Unit

Steps for installing the embroidery unit onto the sewing machine.

Removing Embroidery Unit

Procedure for safely removing the embroidery unit.

Quilting

Walking Foot

Welcome Screen

How to Access Alphabets and Designs

Navigation guide for accessing built-in embroidery alphabets and designs.

Embroidery Cards (Optional)

Automatic Bobbin Winding

Automatic Bobbin Winding

Function for automatic bobbin thread winding during embroidery.

Threading the Machine

Threading the Machine

Instructions for threading the machine's top thread.

Preparing the Fabric

Preparing the Fabric

Guidance on preparing fabric and using stabilizers for embroidery.

Embroidery Frames

Embroidery Frames

Details on the different sizes and types of embroidery frames.

Securing Fabric in Frame/Hoop

Securing Fabric in Frame/Hoop

Instructions for properly hooping fabric in the embroidery frame.

Attaching Frame/Hoop

Removing Frame/Hoop

SECTION VII Embroidery

Embroidering a Single Design

Step-by-step guide for embroidering a single design.

Pattern Size

Final Layout

Embroidering a Single Character (Letter)

Embroidering a Single Character (Letter)

Guide for embroidering a single letter or character.

Embroidering More Than One Letter

Embroidering More Than One Letter

Guide for embroidering multiple letters together.

Embroidering Multiple Lines of Letters and Adding/Editing a Design

Embroidering Multiple Lines of Letters and Adding/Editing a Design

Guide for combining multiple lines of text and editing designs.

Temp Embroidery Memory

Temp Embroidery Memory

Temporarily saves embroidery progress if power is interrupted.

Permanent Memory

Permanent Memory

Stores embroidery designs permanently in the machine's memory.

Multiple Hoop Embroidery – Characters

Multiple Hoop Embroidery – Characters

Guide for embroidering characters across multiple hoops.

Multiple Hoop Embroidery With Designs

Multiple Hoop Embroidery With Designs

Guide for embroidering designs across multiple hoops.

Continuous Embroidery Frame

Continuous Embroidery Frame

Using the frame for creating continuous borders.

Repositioning Frame After Embroidery Begins

Repositioning Frame After Embroidery Begins

How to reposition the frame after starting embroidery.

Thread Breaks

Troubleshooting steps for needle or bobbin thread breaks.

SECTION VIII On-Screen Manual

Personalized Machine Settings – Embroidery

Customizing machine settings for embroidery.

SECTION IX Maintenance

Cleaning the Bobbin Area

Procedure for cleaning the bobbin area and hook.

Cleaning the Hook Area and Feed Dog

Steps for cleaning the hook area and feed dog.

Troubleshooting

Troubleshooting

Common problems and their solutions for machine operation.

Related product manuals