Quick Start Guide Minipack PS System 356808.103, 1v2-2008-10
11
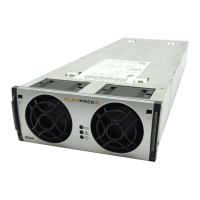
4. Mount all Minipack rectifier modules in the power shelves (keep original location)
o Plug all rectifiers firmly inwards ⎯ one module at a time, allowing a 2s delay ⎯ to plug
them in the same self location. Secure them with the locking screws. Refer to page 3.
o Mount Minipack blind covers over unused positions
5. Ensure that the Smartpack and all rectifier modules are working: LEDs are ON
o Verify correct operation, by monitoring the modules’ LED lamps and display:
No alarm are present on rectifiers. The Smartpack displays fuse alarms
6. Connect the a PC to the PS system (to facilitate operation)
o Plug a standard USB A-B cable between the PC and the Smartpack controller
o Start PowerSuite on the PC; select: Start > All Programs > Eltek Valere> PowerSuite
Refer to chapter “
Installing PowerSuite page 13, if required
o On the toolbar, click the “Connect” button to establish connection
7. Measure and adjust DC output voltage
o Read the DC output voltage on the controller’s display
o With a multi-meter, measure the DC output voltage at the most accessible point, e.g.
between the common DC rail and the lower connection of one of the priority load MCBs
o If required, adjust the voltage using the controller’s front keys or via PowerSuite
8. Verify the alarm relays are working correctly (alarm relay test)
o Run the alarm relay test using the controller’s front keys (refer to page 12) or via
PowerSuite (select the menu Go > Output Test)
9. Make sure the System Setup is in accordance with configuration
o Verify system settings using the controller’s front keys or via PowerSuite
o Use the opportunity to enter site related information, number of used AC phases,
type of batteries, etc.
Load Adjustments
Power is ON!
Now, you can begin with stage III, where you will adjust again the output voltage to the
battery voltage, and connect the batteries and the load. Carry out the following:
10. Adjust DC output voltage to measured battery voltage
o Measure the battery voltage is within range (check connections have correct polarity)
o Adjust DC output voltage — using the controller’s front keys (refer to page 12) or via
PowerSuite— to equal the measured battery voltage.
(Important adjustment to avoid arcing when connecting the batteries)
11. Unplug all rectifiers but one, and connect the battery fuses /MCBs
(CAUTION: Have only one rectifier connected, when switching ON the battery fuses.
Thus, avoiding damaging all rectifiers, due to possible incorrect polarity connections, etc.)
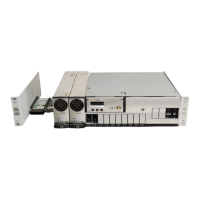
o Disconnect all rectifiers but one, by unlocking the locking screw and pulling them
partially out. Do NOT physically remove them from the power shelf
o Switch ON all battery fuses or MCBs
12. Adjust DC output voltage again to equal the nominal battery voltage
o Adjust DC output voltage — using the controller’s front keys or via PowerSuite — to
equal the nominal battery voltage (or the nominal load voltage, when not using batteries)
13. Plug in again all rectifiers, and verify the rectifiers’ current sharing
o Connect all rectifiers again by pushing them firmly inwards ⎯ Repeat step 4, in stage II
o Wait for about 2 min., and check — using the PowerSuite application —that each of the
rectifiers delivers the same output current. A deviation of 1A is acceptable.
14. Connect the load breakers and verify that no alarms are displayed
o Switch ON all load MCBs/ fuses
o Verify correct operation: rectifiers and controller display no alarms
Device
hazard
Device
hazard
III
Commissioning
 Loading...