1. Apply multi-purpose corrosion protection grease on the valve spindle to ease
mounting and avoid corrosion.
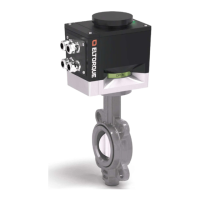
2. Make sure that the valve and actuator are placed in the same position (closed).
3. Lift the actuator onto the valve; align its valve adapter with the valve spindle
and lower the actuator onto the valve flange.
4. Ensure that the spindle and valve mounting holes fit directly to the actuator.
5. In cases where square reducers are needed always insert two pieces with
QT250. The QT800 only has room for one.
6. Check that the actuator is correctly positioned on the valve. The actuator’s
interface box should be placed in the same direction as the piping direction,
see Figure 19.
If square reducers are needed, se chapter 3.9.10 Additional information
adaption actuator/valve on page 31.
7. Remove the top cover and use the hand wheel to turn the actuator and align
the fastening holes of the valve flanges, see chapter 5.1Manual operation.
8. Insert the fastening screws and use washers according to specifications. For
screw dimensions see Figure 20 and Figure 21.
Tighten fastening screws to the specified torque, see Table 22: Screw torque on
page 81.

 Loading...