Figure 3
The device is shipped with the manual standby function disabled. If
you prefer to have this function enabled, the LS 50 must first be
switched to programming mode. To do so, press keys „T1”, „T2” and
„T3” together at the same time. When the LS 50 is in programming
mode, this is indicated by the ,,Prog” segment; (see Figure 4).
Figure 4
Now in programming mode the manual standby function can be
enabled by pressing key „T1". The arrow segment appears above this
key; (see Figure 5). Pressing „T1” again disables the function again
and the arrow segment disappears. After a period of three seconds
after the last time a key was pressed the LS 50 quits programming
mode automatically and returns to normal display.
Figure 5
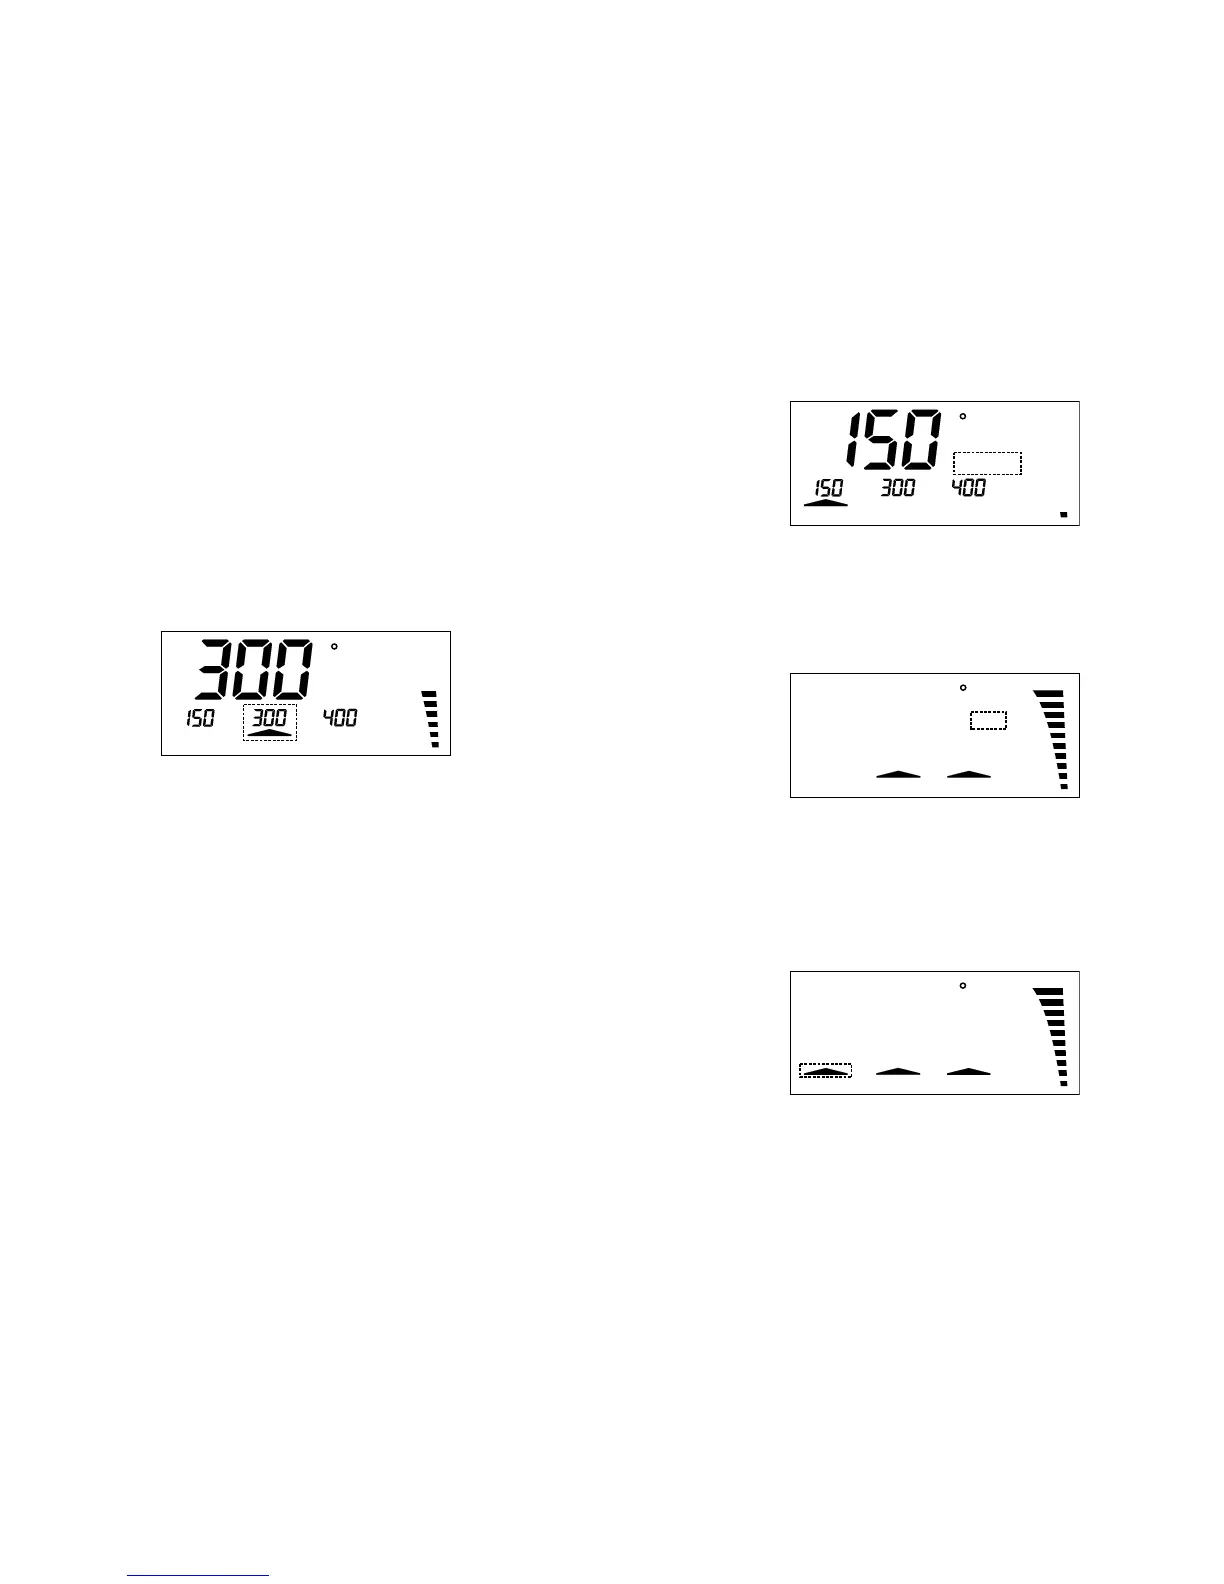
a button. The device is shipped with the following set point temperatures
already programmed: 150 °C, 300 °C, and 400 °C.
These programmed set point temperatures are indicated above the
keys „T1”, „T2” and „T3” in the display. When one of these keys is
pressed, the assigned temperature is used as the set point. After one
of these keys has been pressed, the main display section shows the
assigned temperature for approximately three seconds and then
switches back to showing the current actual temperature.
An arrow above one of these keys signals that the assigned programmed
temperature has been activated as set point; (see Figure 2).
Figure 2
C
Power
5. Modifying the programmed set point temperatures
If you prefer to have different set point temperatures programmed,
these can easily be modified. To do so, the key below the temperature
you wish to change (T1, T2, T3) must be pressed and held down.
While this key is held down, the assigned temperature can be adjusted
up or down by pressing the „+” / „-” key. As soon as you release the
keys, the new temperature value is saved.
6. Manual standby function
In jobs involving long pauses between soldering actions it makes good
sense to lower the temperature of the soldering iron. This reduces
energy consumption and saves wear on the soldering tip. To do so,
key „T1” can be reprogrammed as stand by key. Subsequently, when
this key is pressed, the soldering iron starts cooling down to the
programmed set point temperature „T1”. This is indicated in the display
by the ,,Standby” segment; (see Figure 3). And as soon as the key is
pressed again the previous set point temperature is re-activated.