28
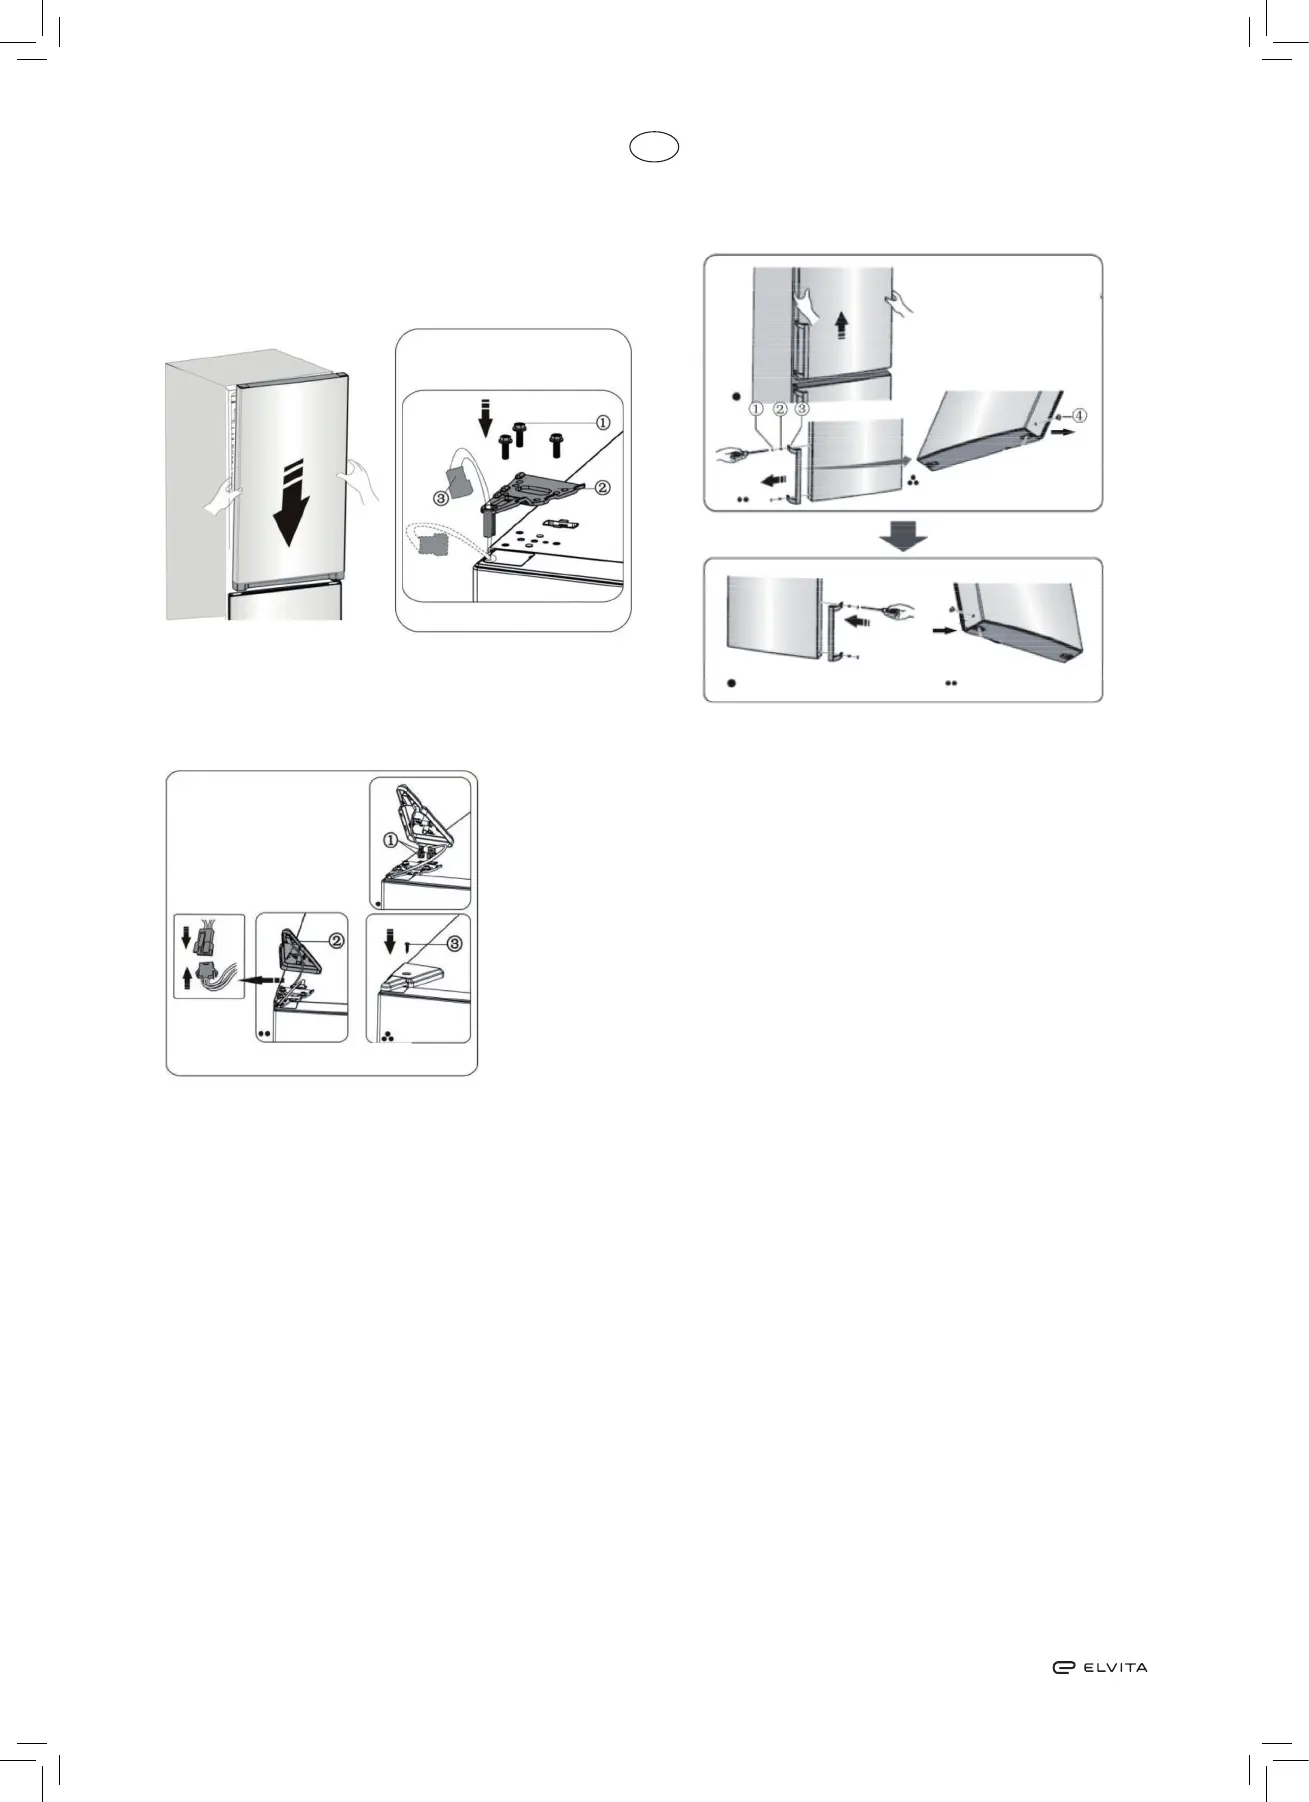
16. Move the upper door to an appropriate position, and
then x part 2 using screws 1. Before xing part 2, pass
connector 3 through hinge 2, referring back to step 3.
(Support the upper door with your hand while installing it.)
17. Connect electrical connector 1 as shown in the picture,
then x with screw 3, referring back to step 2.
18. Open the upper door, ret the door racks, then close the
door.
Note:
lf your appliance has a door handle, you should reverse this
by following the instructions below.
Remove the upper door and place it on a smooth surface
with its outside panel upwards. Prise o part 1 and part 4,
then remove screws 2, as shown in the picture. Transfer
handle 3 to the right side, x it with screws 2, and t part 4.
1. Electrical connector
2. Upper hinge cover
3. Self-tapping screw
1. Special ange screws
2. Upper hinge
3. Electrical connector
1. Handle covers
2. Special screws
3. Handle
4 Screw hole cover
 Loading...