PAMPER. PAMPER.
2726
Fitting a tyre or tube
When changing a tube or tyre, rst check the condition of the rim base, rim, tube and tyre. Make
sure you use the same tyre and tube sizes as the original.
Disassembly
• Deate the tube and place the tyre beads
in the bottom of the groove of the rim.
• Using a tyre lever, remove one side of
the tyre from the rim. Be careful not to
damage the rim or pinch the tube when
using them.
• Replace the inner tube and/or the tyre.
Assembly
• Inate the inner tube slightly.
• Place the valve in the hole provided on
the rim and then the inner tube into the
tyre.
• Place one side of the tyre in the bottom of
the rim groove starting at the valve.
• Then use the tyre lever to push the
opposite side of the tyre into the rim,
taking care not to pinch the inner tube
between the tyre and the rim.
• Then inate the inner tube to the
recommended pressure.
• Check the centring of the tyre on the rim.
If it is not good, deate the tube and re-
inate it.
Remember to check your tyre pressure regularly before and after use.
1.
2.
3.
Cross-section of a rim and tyre
1. Tyre and inated tube / 2. Rim / 3. Tyre bead
Wheel axes
The explanations in this chapter are specic to quick release axe systems.
IMPORTANT!
If you want to remove the rear wheel from your bike, the chain should be on the smallest sprocket
and the derailer should be in the disengaged position (if the derailer allows this). To disengage
your derailer, ask your retailer for advice or consult the manufacturer’s instructions.
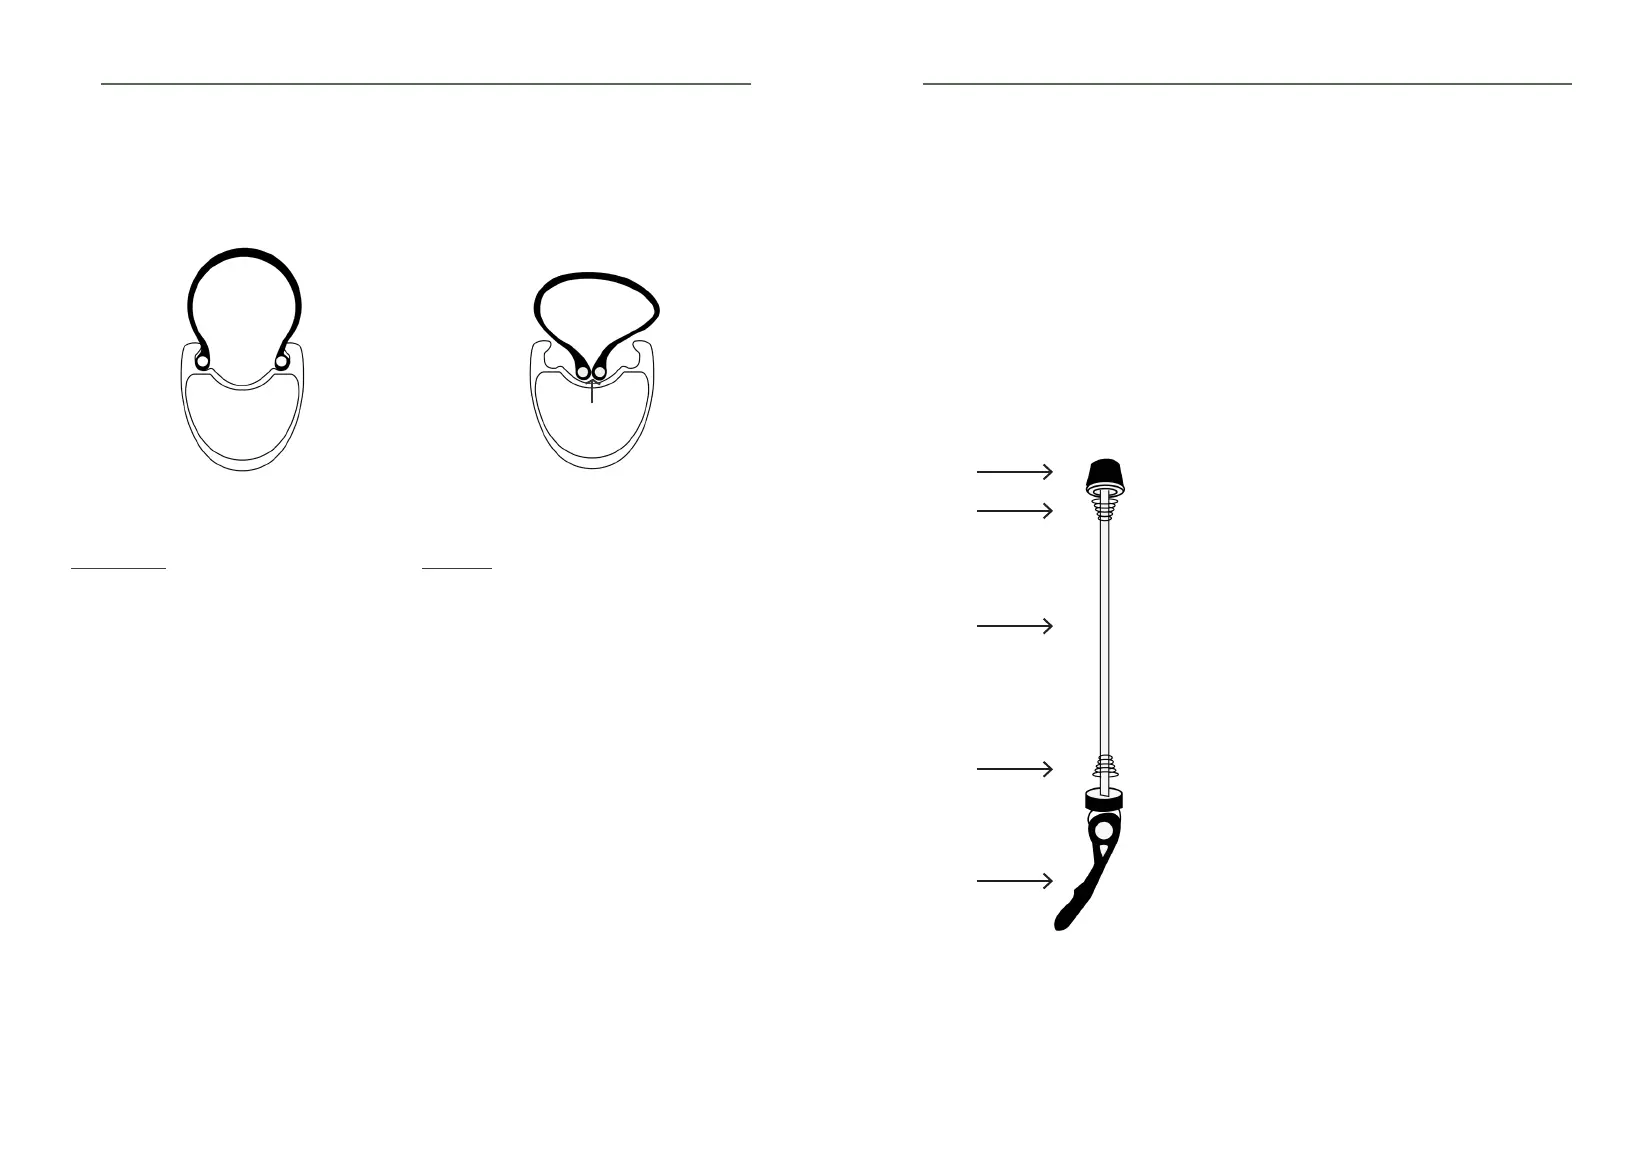
Quick release axe
The quick-release devices are designed to be
operated by hand. Never use a tool to lock or
unlock the mechanism as this may damage it.
To fully understand the manipulations, please
read the glossary below :
1. Nut
2. Conical spring (always the smaller
section towards the center of the
wheel)
3. Stem
4. Conical spring
5. Lever
Procedure for reliable wheel clamping with
quick-release axes
If you want to disassemble the YUVY wheel,
please follow this procedure:
• Open the axe lever. Loosen the nut on the
other side of the axe by hand until there is
enough clearance to remove the wheel (it
is not necessary to remove the axe from
the wheel hub).
• Check that the conical springs are on both
sides of the hub and that the smallest
circumference of the conical springs is
on the same side the centre of the wheel.
• Place the wheel on the fork or frame,
making sure that the axe is in the correct
position. The wheel should normally be
centred, as should the disc in relation to
the caliper.
• Tighten the clamping nut by hand until it
touches the fork or frame legs..
• Close the quick-release lever with the
palm of your hand parallel to the fork
or dropout, making sure you have
the recommended tightening. The
word «CLOSE» is now visible. The
recommended tightening is achieved
when the locking lever is halfway
hardened. If the lever is too tight, simply
loosen the bolt nut slightly. If the lever is
not tight enough, then tighten the nut to
the recommended tightening.
1.
2.
3.
4.
5.
WARNING!
The wheel axes are essential safety components on your bike. Make sure you follow the
instructions below, otherwise you risk losing parts and falling.
Never apply the lock while leaning on the brake disc!
An incorrectly tightened or centred wheel can lead to the risk of accidents and serious injury to
the user.
4. 4.
 Loading...