PAMPER. PAMPER.
2928
4.3 Brakes
The adjustment of your derailer was carried out before your bike was delivered and therefore you
should not have to do it yourself. However, if you need to adjust the derailer directly, due to the
possible lengthening of the cable, we advise you to contact a local bicycle professional.
Chain tension
The chain is tensioned by means of a chain tensioner located on your rear derailer. It is advisable
to check its correct operation regularly. To do this, check the chain tensioner regularly:
• Use your index nger to push the chain tensioner forward a few centimetres of the bike.
• Remove your nger and check that it returns to its original position.
If the chain is loose and/or the tensioner does not return to its original position, have the
mechanism repaired.
With a little experience, you can also follow the
steps below:
1. Place the chain on the smallest sprocket
and release the derailer cable..
2. Adjust the low stop (High) so that there
is perfect alignment between the derailer
pulley and the outer surface of the
smallest sprocket.
3. Operate the derailer by hand to adjust
the derailer low stop to align it with the
largest sprocket.
4.
1. In order to correctly adjust the alignment
of the brake calipers, it is necessary that
they can move sideways. Unlock the 2
caliper screws so that the caliper can
move from left to right in relation to the
disc.
2. Depress the brake lever so that the caliper
sits naturally on the disc.
3. Screw in the caliper bolts just to lock it
and then release the brake.
4. Check that the disc is centred in the
caliper and between the pads. TIP: If it
is not, pull the wheel out, push the pads
back into the caliper, reassemble and
then go back to step 1.
5. Tighten the caliper bolts to the
manufacturer’s specied torque with the
torque spanner.
The brake is now adjusted. If the pads and
discs are new, it is important to break them in
before setting off on the road (see 3.4)
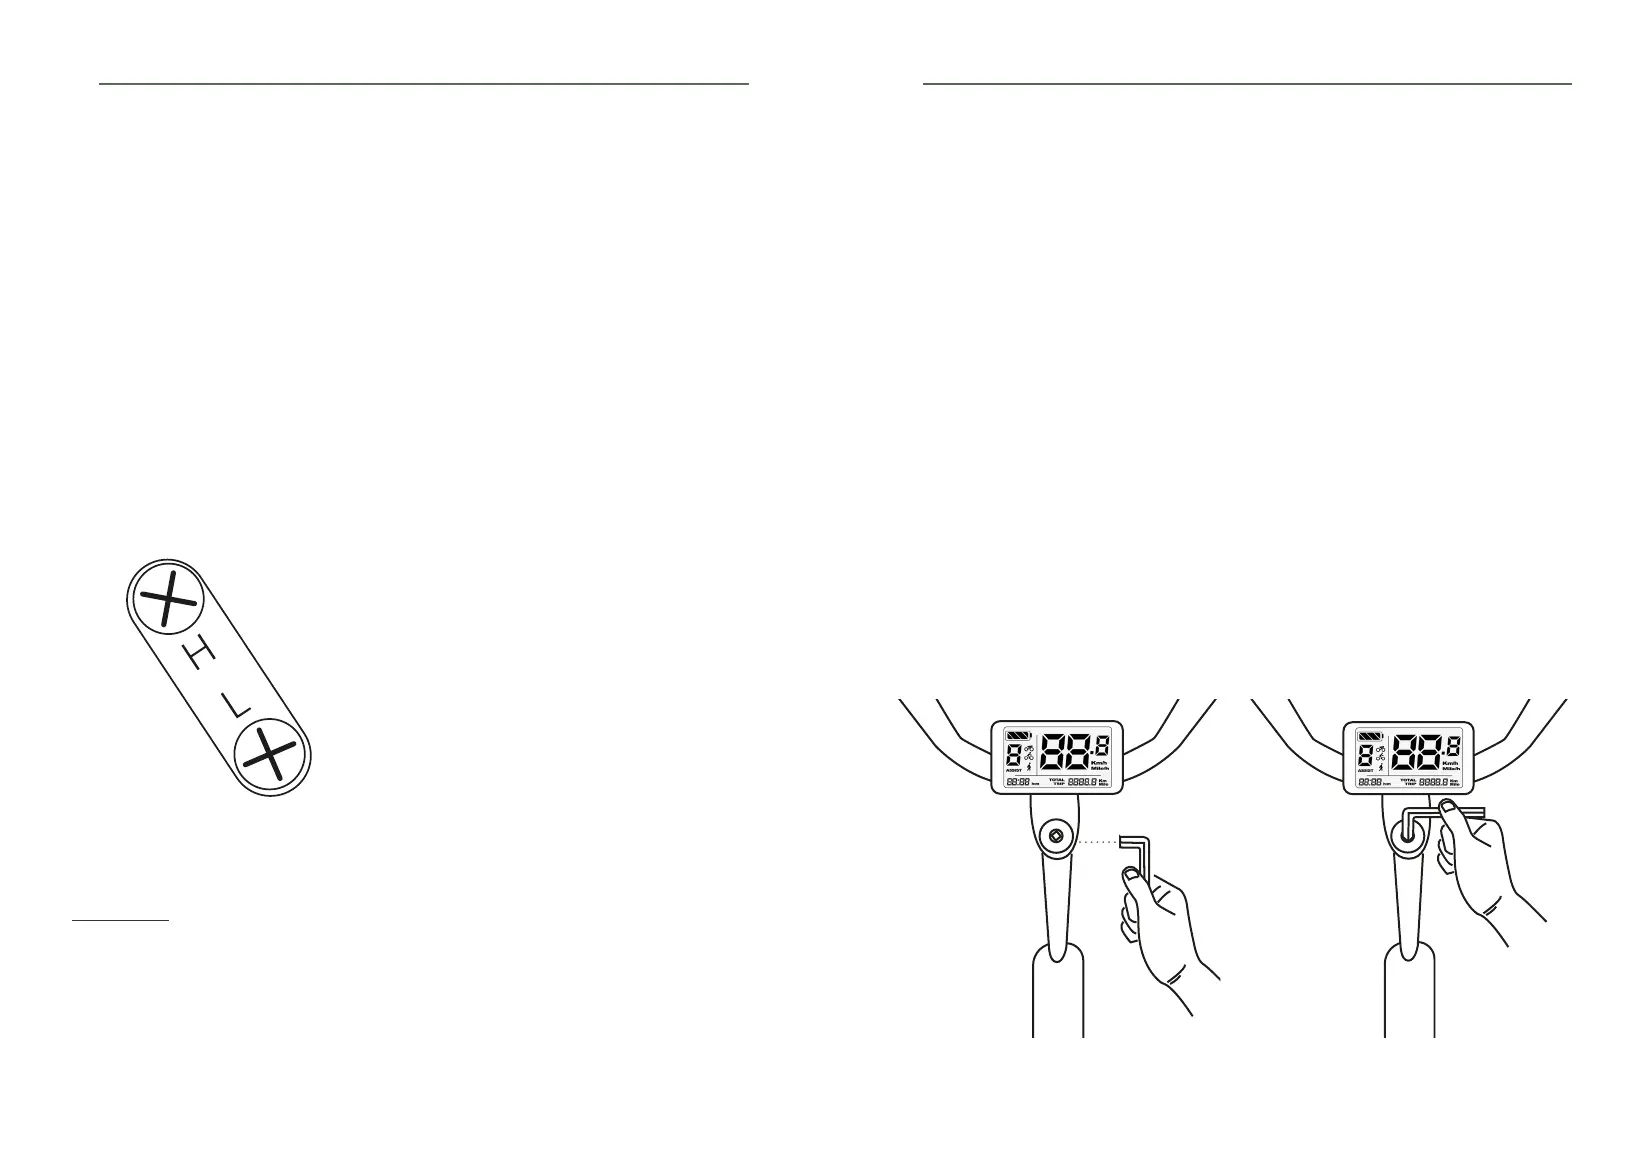
4.4 Derailer
1. Unscrew the screw(s) of the stem.
(Image 1)
2. Then screw the screw into the cap
gradually and without force until the play
disappears.
(Image 2)
3. Check that there is no more play in the
fork. It should be able to turn smoothly,
no friction or resistance should be felt
when turning.
4. Tighten the stem bolts to the
recommended torque. (Image 1)
4.
4.5 Headset
1. 2.
The headset consists of two bearings and cups placed at each end of the bushing.
Our bike has an «A-head» headset: the clearance is adjusted by means of the round cover on top
of the stem.
The headset is under great stress. It is therefore possible for it to become loose.
WARNING!
Riding with play in the headset can damage your headset and even the frame.
To check if your headset is correctly adjusted, there is a simple test:
• With the front brake applied, try to move the bike back and forth. You will immediately notice
that there is some play.
If you have noticed play in the steering, take the following action:
WARNING! If you cannot get your indexing system to work properly, contact your retailer so
that he can check the various adjustment elements and the alignment of the derailleur hanger.