4.
Tinyhawk III VTX
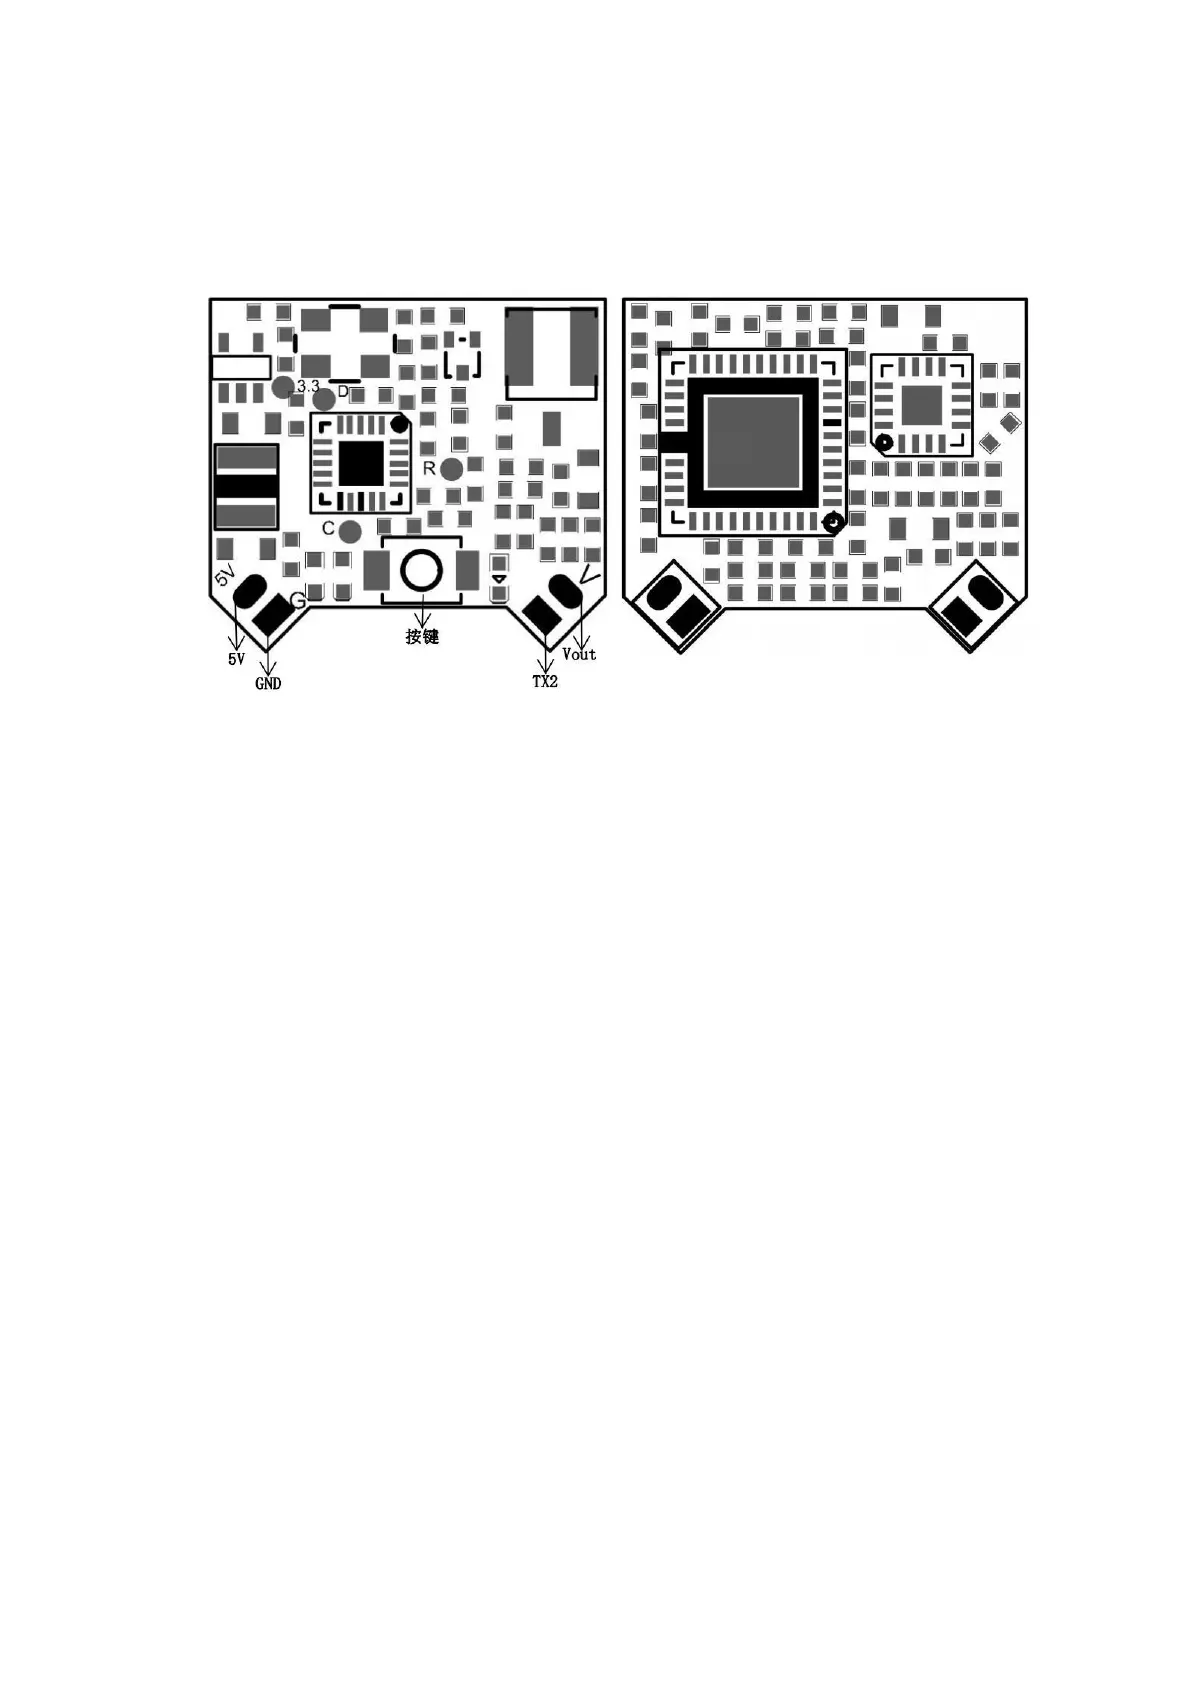
4.1 Tinyhawk III VTX
4.2 Changing VTX setting via Betaflight OSD
Tinyhawk III is equipped with SmartAudio and is already configured with stock settings.
The SmartAudio line is operated on UART 2 TX.
Follow the prompts on the screen to enter the main setting menu. The throttle is in the
middle, the direction is to the left, and the pitch is up (THROTTLE MID+ YAW LEFT+
PITCH UP) to enter the OSD parameter adjustment menu, as shown in Figure 1.
In the menu interface, switch the pitch up/down (PITCH) and select the menu option.
Move the cursor to "FEATURES" and stir the ROLL lever to the right to enter the next
menu. as shown in Figure 2. Use the PITCH joystick to move the cursor to "VTX SA", as
shown in Figure 3. Then pull the roll (ROLL) lever to the right to enter the VTX
configuration menu, as shown in figure4.
In the menu of VTX SA, we can configure BAND, CHAN and POWER. Pull the PITCH lever
to move the cursor up and down to select the VTX option that needs to be set. Once the
parameters are set, move the cursor to "SET", then turn the joystick to the right, enter
"SET" and select "YES", turn the joystick to the right to save the set parameters, as shown
in Figure 5.
In the VTX SA menu, move the cursor to "CONFIG" to enter the menu; move the cursor to
"PIT FMODE" and pull the ROLL lever to the right to turn off the VTX power supply.as
shown in figure6.