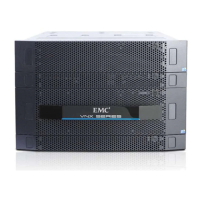
1.1. Locate the PLocate the Product ID/SN frroduct ID/SN from the prodom the product serial numbeuct serial number tag (PSNr tag (PSNT) located at tT) located at the back of he back of thethe
DPE as shown inDPE as shown in Fi
Figugurere 66..
2.2. Record Record this number this number to use wto use when you hen you register register the product the product during syduring system setup stem setup steps.steps.
IMPORTANTIMPORTANT
Be careful when you slide the enclosure into the rails. The Be careful when you slide the enclosure into the rails. The PSNT tag on the PSNT tag on the back of the enclosureback of the enclosure
as shown inas shown in Fi
Figugurere 66can inadvertently become jammed, cut off, or block the enclosure seating.can inadvertently become jammed, cut off, or block the enclosure seating.
PSNT tag on the rear of the 3U DPEPSNT tag on the rear of the 3U DPE
3.3. Slide the disk prSlide the disk processor enocessor enclosure (DPclosure (DPE) into the 3U DE) into the 3U DPE rails in the PE rails in the cabinet. Ensucabinet. Ensure that there that the
enclosure is fully seated in the cabinet. The rail stops in the back will seat into the back of theenclosure is fully seated in the cabinet. The rail stops in the back will seat into the back of the
enclosure at the correct depth, and the enclosure at the correct depth, and the front of the enclosure will be flush with front of the enclosure will be flush with the cabinetthe cabinet
face.face.
4.4. When the DWhen the DPE is in plPE is in place, iace, insert annsert and tighted tighten all of the scn all of the screws arews as shown ins shown in Fig
Figururee 7 o7 on pn pageage 1717..
It may be easier to iIt may be easier to install the screws working in a diagonal pattern, such as bottom left nstall the screws working in a diagonal pattern, such as bottom left andand
top right, bottom right and top left.top right, bottom right and top left.
Disk-processor enclosure
Disk-processor enclosure rearrear
AACC
DDCC
!!
11
00
XX
AACC
DDCC
X4X4

 Loading...