Installing 2U DAE railsInstalling 2U DAE rails
Install the DAEInstall the DAE
1.1. Slide the diSlide the disk-arrsk-array enclosure ay enclosure (DAE) in(DAE) into the DAE to the DAE rails in rails in the cabinet. the cabinet. Ensure Ensure that thethat the
enclosure is fully seated in the cabinet. The rail stops in the back will seat into the back of theenclosure is fully seated in the cabinet. The rail stops in the back will seat into the back of the
enclosure at the correct depth, and the enclosure at the correct depth, and the front of the enclosure will be flush with front of the enclosure will be flush with the cabinetthe cabinet
face.face.
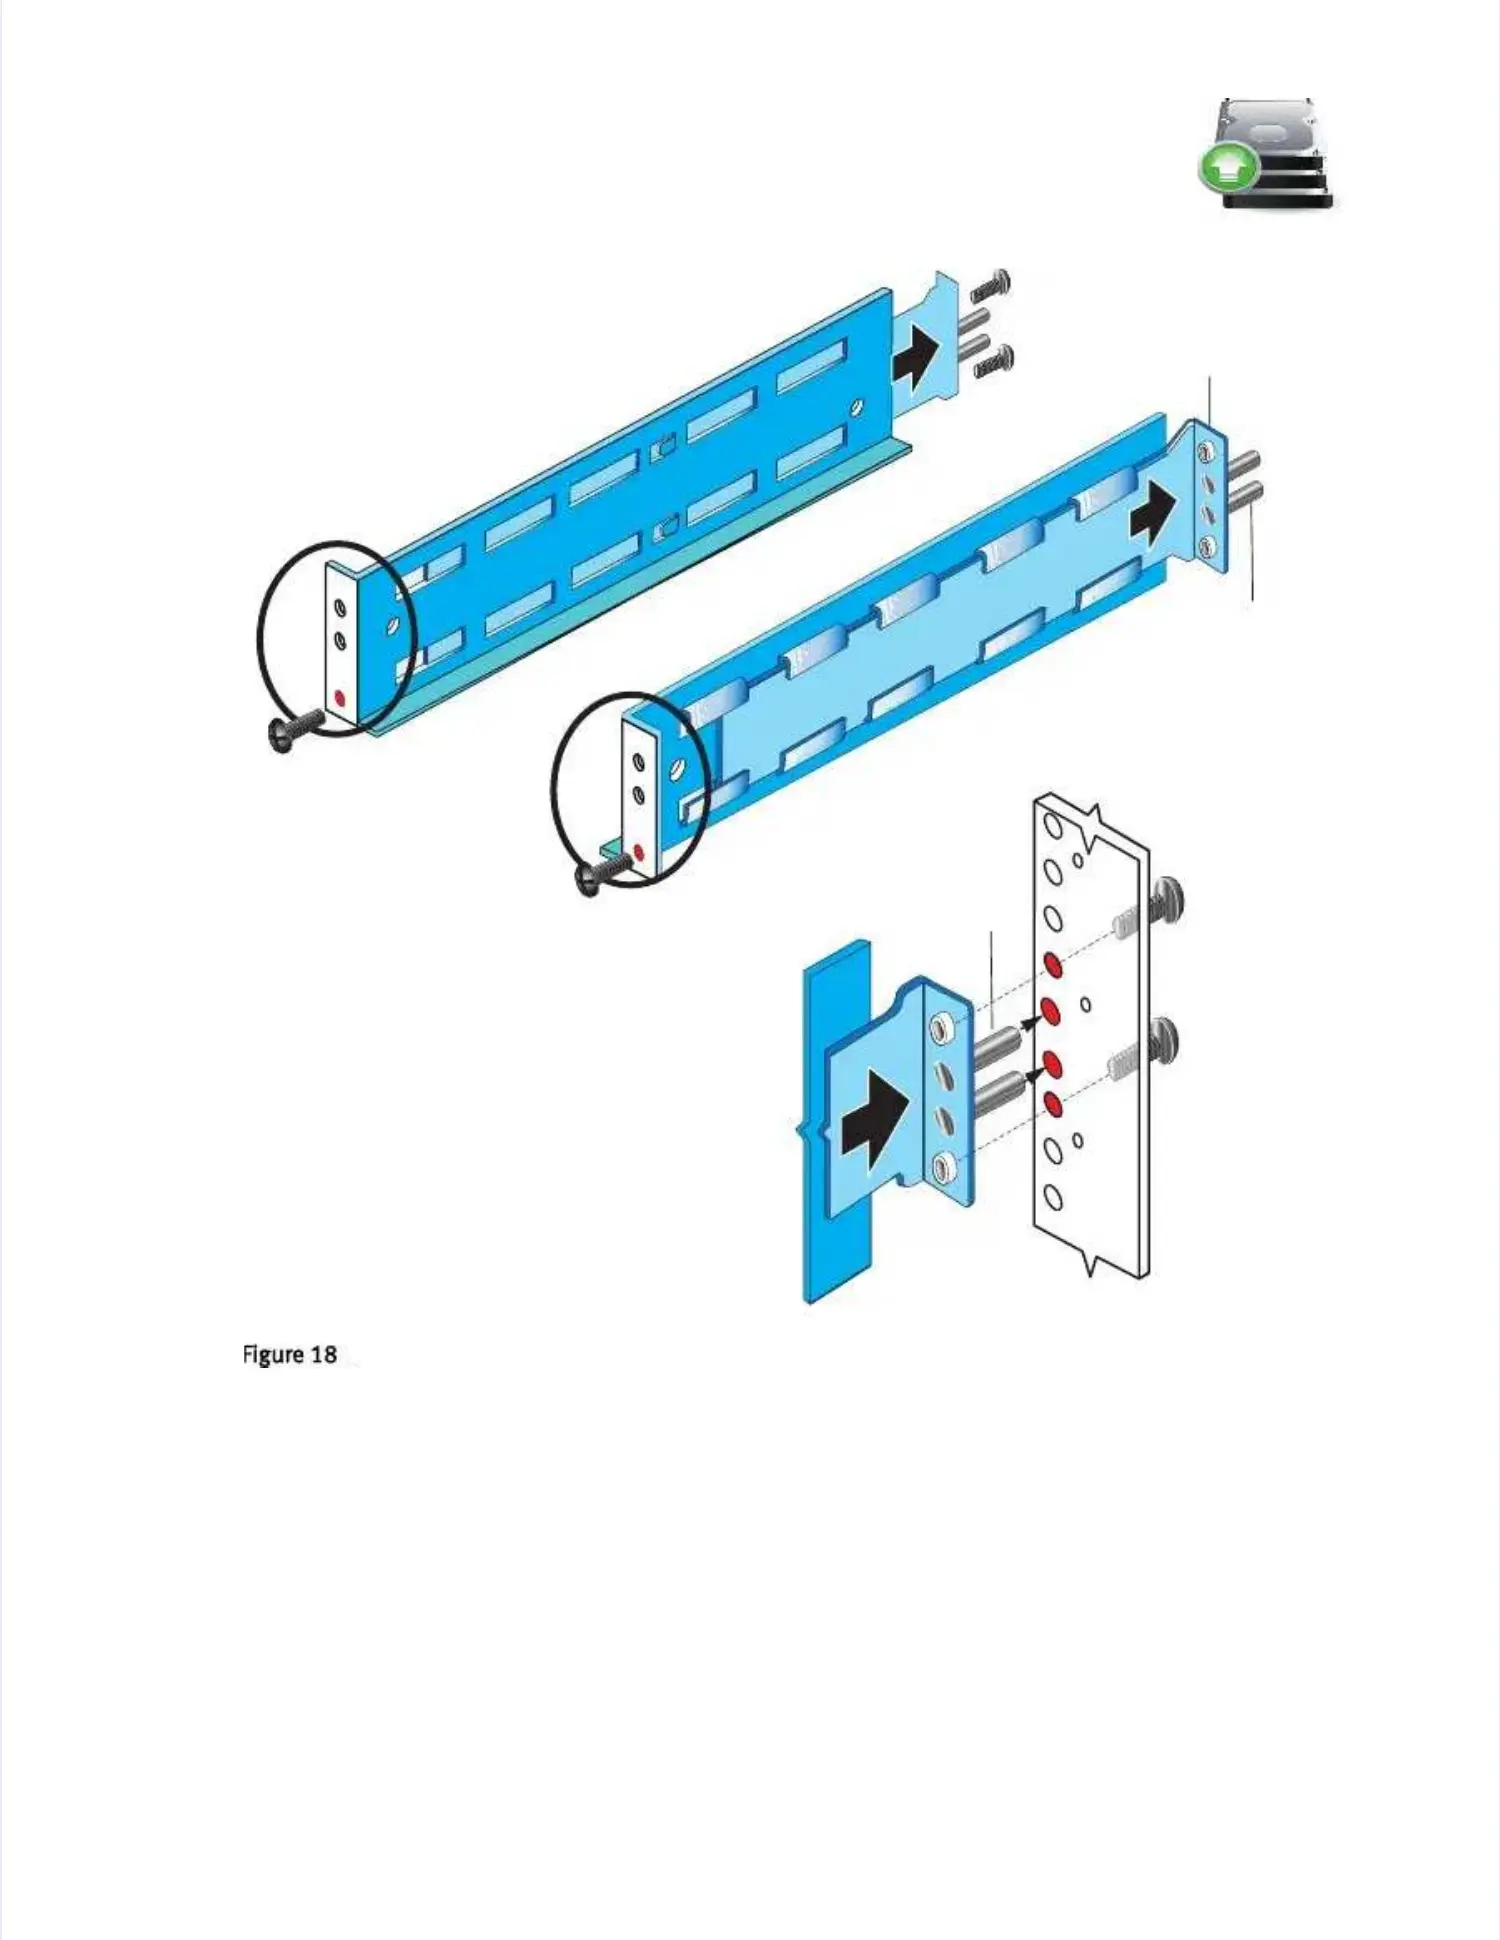
2.2. When the DAE When the DAE is in placeis in place, insert and tighten , insert and tighten all of the screwall of the screws. It may be es. It may be easier to inasier to install thestall the
screws working in a diagonal pattern, such as bottom left screws working in a diagonal pattern, such as bottom left and top right, bottom right and top right, bottom right and topand top
left.left.
3.3. RepRepeat, aeat, as apps approprropriate, iate, with owith other ther DAEsDAEs..
A
A
lignmlignment pinsent pins
ThrThreadedeaded
screwscrew
holehole
Rear detailRear detail
FrontFront
VNX-000755VNX-000755
LL
RR
2 screws2 screws
2 screws2 screws
AAlignmlignment pinsent pins
1 screw1 screw
1 screw1 screw

 Loading...