Installation, Operation and Maintenance Manual
VA-DC-000-1879 Rev. 0
April 2021
19
Section 5: M18 Reassembly Instructions
M18 Reassembly Instructions
5.3.23 Install the control pointer (25 - 150) onto the control valve stem (20 - 10 - 280).
5.3.24 Install the control knob (25 - 200) onto the control valve stem (20 - 10 - 280).
5.3.25 Retain the control knob (25 - 200) on the control valve stem (20 - 10 - 280) with
acorn nut (25 - 450) and lock washer (25 - 460).
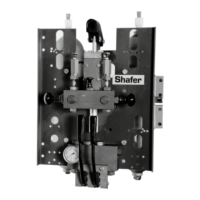
5.3.26 Install the manifold (20 - 10 - 10) onto the mounting bracket (30 - 90) using four
countersunk flat socket screws to retain the manifold to the mounting bracket.
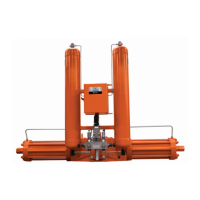
5.3.27 Install the M18 package/mounting bracket (30 - 90) onto the actuator housing
mounting pad using four socket cap screws (30 - 110) and lock washers (30 - 120).
NOTE:
If the M18 pump is equipped with Auto Reset then do steps 5.3.28 and 5.3.29 or
if Non-Auto Reset M18 skip steps 5.3.28 and 5.3.29.
5.3.28 Install the male swivel elbow to the air pressure cylinder (80 - 90).
5.3.29 Install the bracket (80 - 50) on the reservoir side of the manifold (20 - 10 - 10) and
retaining the bracket with two socket cap screws (80 - 10).
5.3.30 Reinstall any piping that was removed from the M18 package.
Table 1. M18 Hydraulic Override Stroke
Pin Postion 1 Pin Postion 2 Pin Postion 3
M18 M18 M18
Override
Module
Outboard
Strokes
Inboard
Strokes
Outboard
Strokes
Inboard
Strokes
Outboard
Strokes
Inboard
Strokes
Double
Acting
G01DA-M18 25 20 12 9 9 7
G2DA-M18 36 31 17 14 13 11
G3DA-M18 63 53 30 25 23 19
G4DA-M18 136 117 63 55 50 43
G5DA-M18 275 231 128 107 100 84
G7DA-M18 486 418 225 194 176 151
G8DA-M18 784 663 363 307 283 240
G10DA-M18 1,700 1,479 787 684 614 534
G13DA-M18 3,886 3,454 1,798 1,598 1,402 1,246
Spring
Return
G01SR-M18 23 N/A 11 N/A 9 N/A
G2SR-M18 44 N/A 21 N/A 16 N/A
G3SR-M18 74 N/A 35 N/A 27 N/A
G4SR-M18 154 N/A 71 N/A 56 N/A
G5SR-M18 319 N/A 148 N/A 115 N/A
G7SR-M18 486 N/A 225 N/A 176 N/A
G8SR-M18 784 N/A 363 N/A 283 N/A
G10SR-M18 1343 N/A 622 N/A 485 N/A
G13SR-M18 Consult Factory
 Loading...