14
U.L. Model No.: CF144 & CF152
8.1: Preset Memory Feature
Y
our Emerson receiver is equipped with a preset memory
feature. If the AC supply to the receiver is powered
through a wall switch, when the switch is turned OFF,
the control will remember the light intensity and fan speed.
W
hen the switch is turned back ON the light and fan will
resume operation as they we re prior to the switch being
turned OFF.
8. Remote Control Procedures
8.3: Setting Operating Frequency
of Remote Control
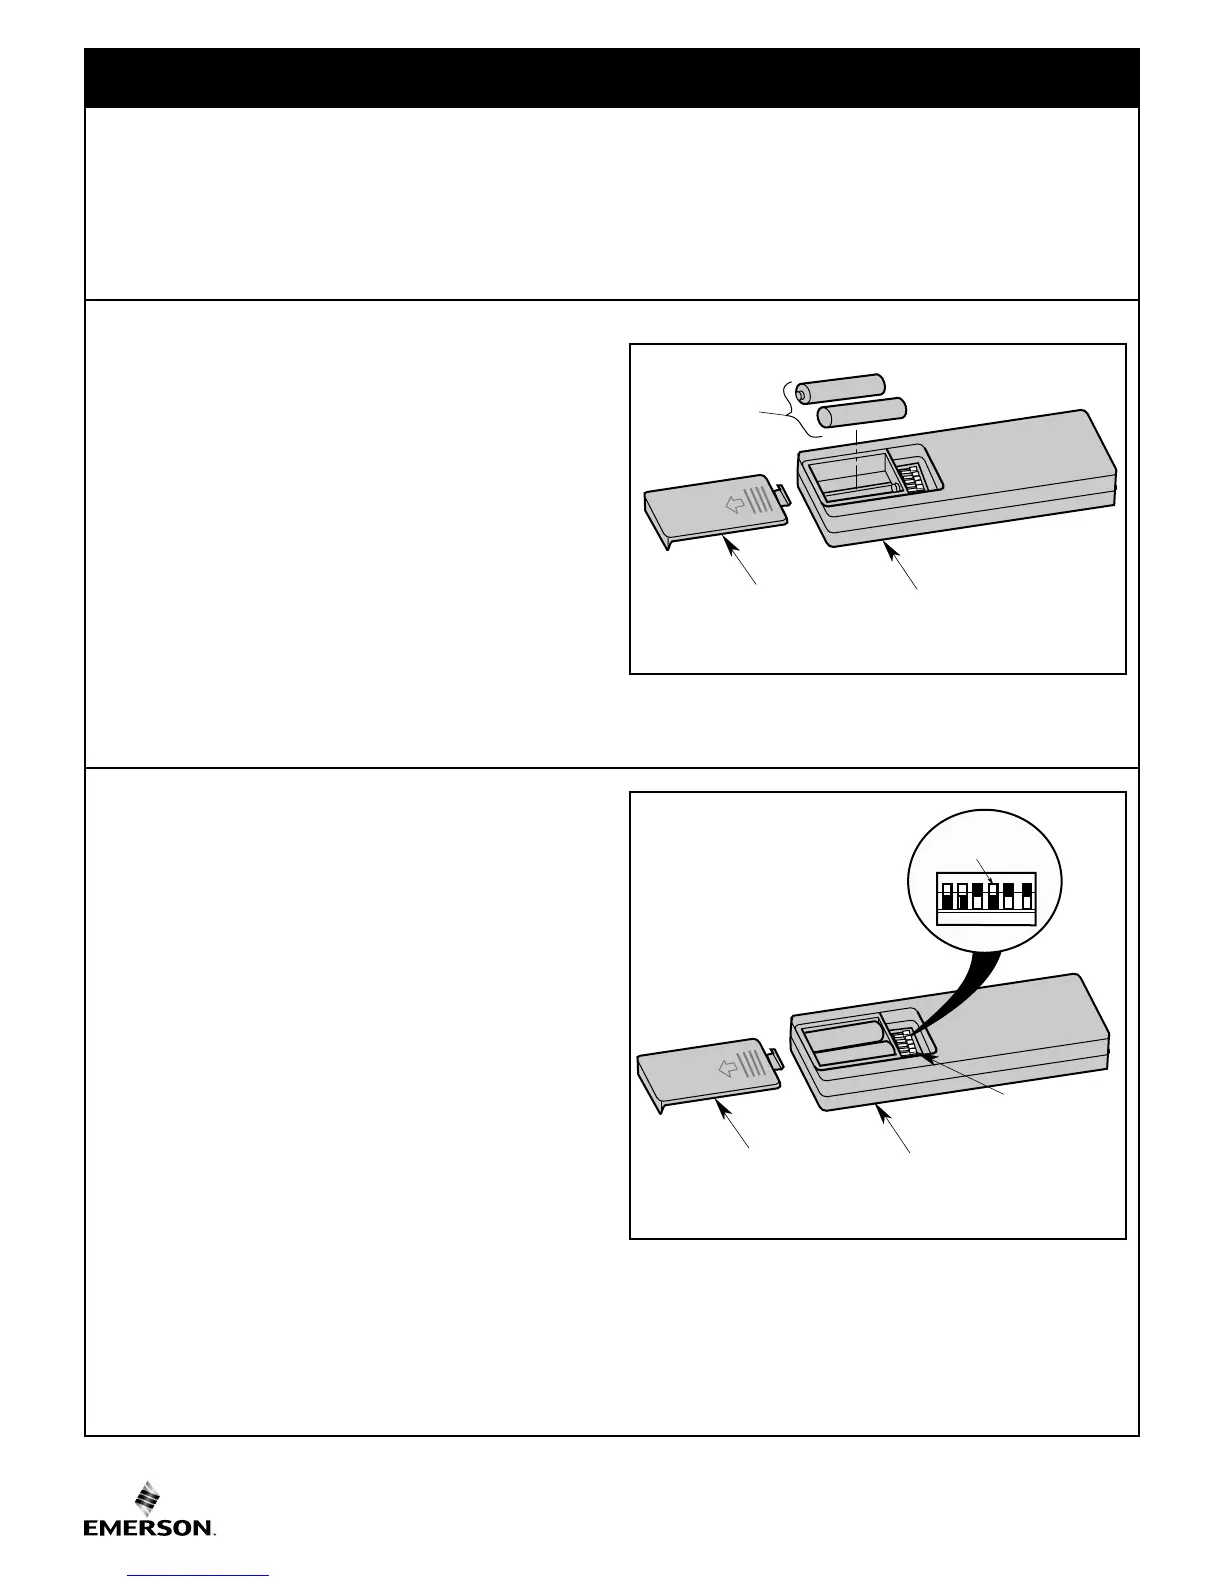
Remove the battery cover by pressing firmly below the
arrow and sliding the cover off the control
(Figure 22).
Your remote control has code switches which must be set
in one of 32 possible code combinations.
The five levers (numbered 1, 2, 3, 4, and 5) on the
switches are factory-set in the ON (up) position. Change
the switch settings as follows:
Slide the five switch levers in the remote control to your
choice of ON (up) or down positions. Use a ball-point pen
or small screwdriver and slide the levers firmly up or down
(Figure 22).
The sixth switch marked ON and I is for dimming control of
lights: Set switch to ON to allow for dimming of the lights.
Set switch to I for no dimming of the lights such as for
fluorescent bulbs.
CODE
SWITCHES
REMOTE CONTROL
BATTERY
COMPARTMENT
COVER
REMOTE CONTROL
LEVERS
ON
1
2 34
5 I
Figure 22
8.2: Installation of Batteries
The remote control transmitter is powered by two AAA
alkaline batteries (not included).
To prevent possible battery leakage damage, be sure to
remove the batteries when the control is not to be used for
an extended period of time.
Remove the battery cover by pressing firmly below the
arrow and sliding the cover off the remote control.
Install two new AAA alkaline batteries into the battery
compartment following the correct battery placement
printed on the compartment (Figure 21).
NOTE: Never use old and new batteries together in
unit.
Replace the battery compartment cover by sliding the
cover back onto the remote control.
R
E
M
O
T
E
C
O
N
T
R
O
L
B
A
T
T
E
R
Y
C
O
M
P
A
R
T
M
E
N
T
C
O
V
E
R
T
W
O
A
A
A
B
A
T
T
E
R
I
E
S
Figure 21
NOTE: If your fan and light go on and off without
using your control, you may be getting interference
from other remote units such as garage door openers,
car alarms or security systems.
To remedy this situations, simply change the
combination code in your remote control transmitter.