1. ALARM 1 Radio/Buzzer Indicators
2. AM Indicator ( ‘On’=AM, ‘Off’=PM)
3. AUX Indicator
4. DAY of WEEK Indicators
5. LOW BATTERY Indicator
6. MHZ (FM Radio) Indicator
7. BT (Bluetooth) Indicator
8. ALARM 2 Radio/Buzzer Indicators (located on back of unit)
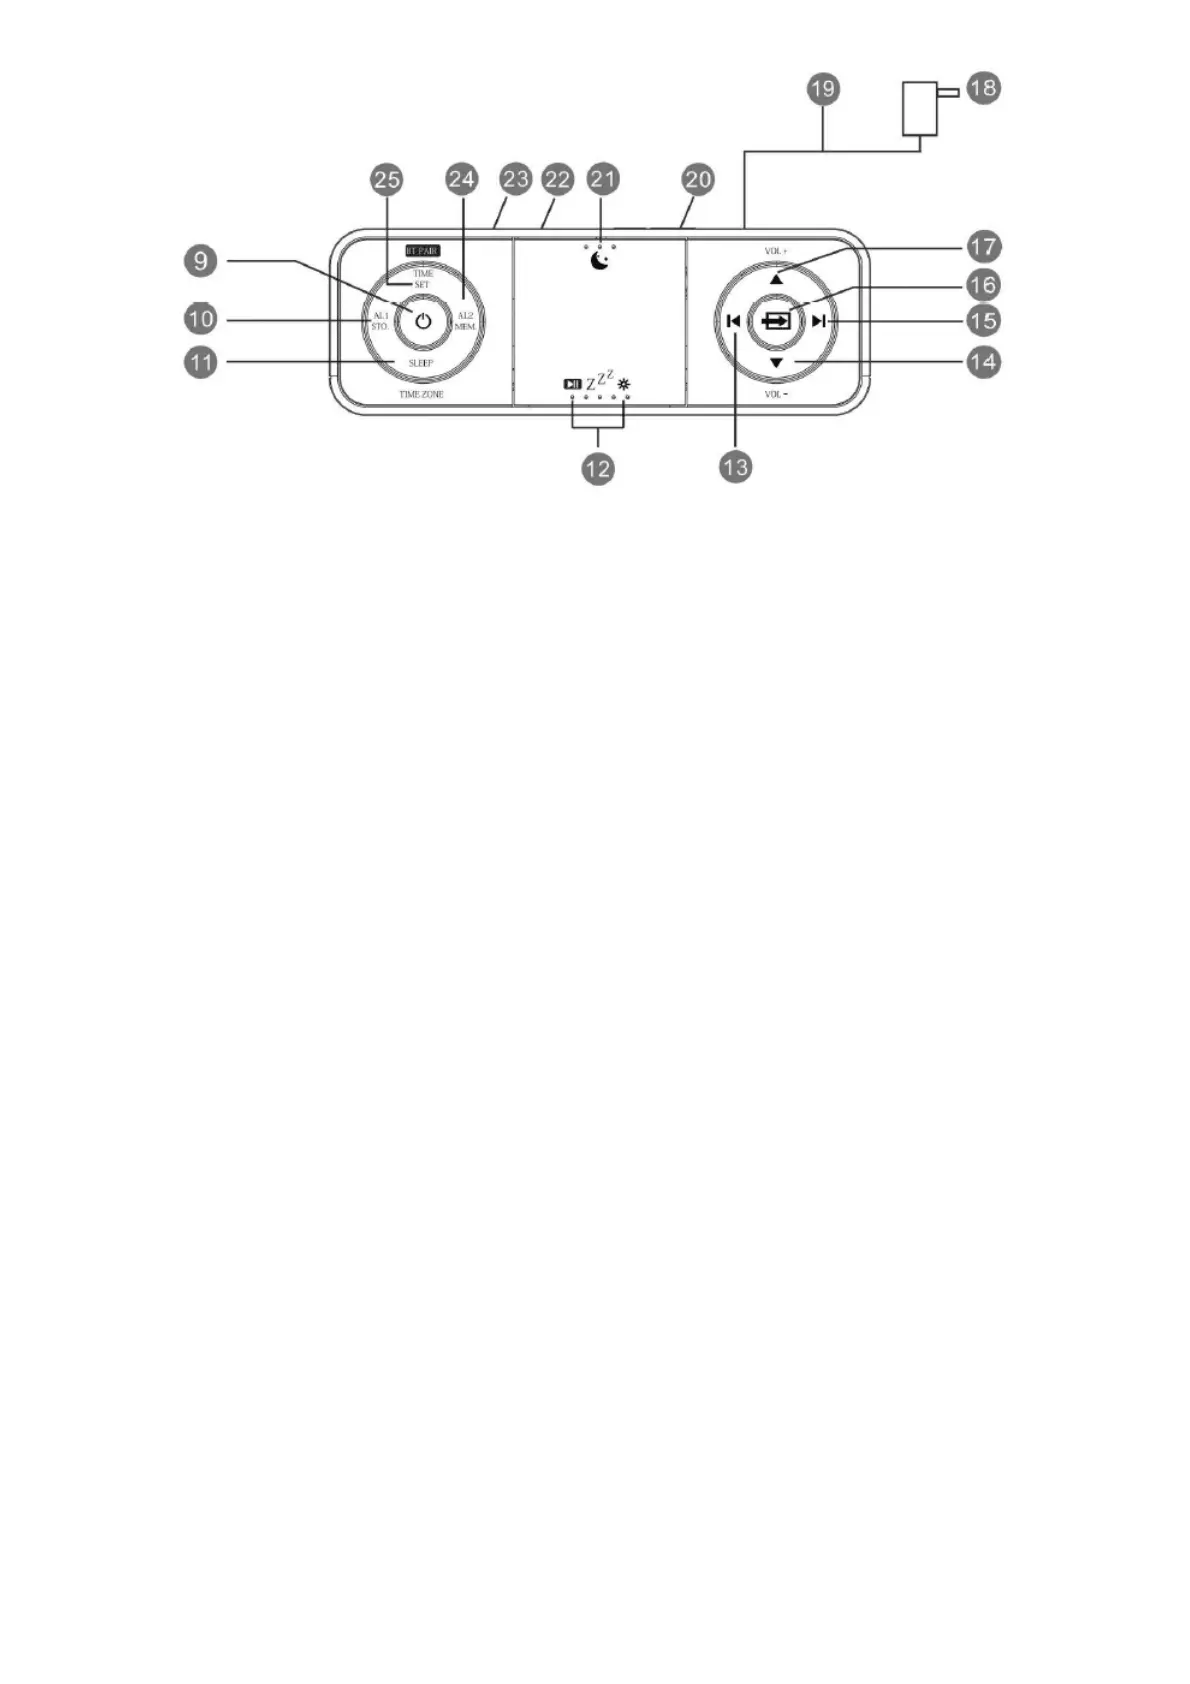
9. POWER ( ‘On’/Standby) Button
10. ALARM 1/STORE(FM station ) Button
11. SLEEP/TIME ZONE Button
12. PAUSE/SNOOZE/DIMMER Button
13. SET/TUNE DOWN Buttons
14. VOLUME- DOWN Button
15. SET/TUNE UP Button
16. SOURCE (FM, Bluetooth, AUX) Button
17. VOLUME+ UP Button
18. AC Adapter
19. FM Antenna(cable)
20. BACKUP BATTERY Compartment
21. Night Light On/Off Button
22. USB Charge Out
23. AUX IN Jack
24. ALARM 2/MEMORY(FM station)
25. TIME SET/FM Frequency Display
7. Setting the Time Zone
Initial Default Setting at Clock Mode
The first time you connect your new SmartSet® clock radio to the AC outlet the internal computer will
automatically set the time correctly for the Eastern Time Zone, which is the initial default setting. The
display will scan for a few seconds and then show the correct Day and Time in the Eastern zone. If you
live in the Eastern Time zone, there’ nothing else to do.
Your clock is set correctly and running.
If you don not live in the Eastern Time zone you must change the default zone display to your own
zone. You only do this one time and the SmartSet®will remember the new default zone setting and
will always return to that setting after power interruption.
There are 7 time zones programmed into your SmartSet®clock radio as follows: