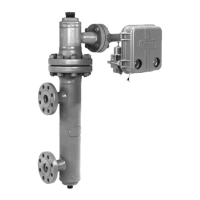
Type LR125
14
Table 8. Troubleshooting Guide
ISSUE POSSIBLE SOLUTION
Outlet pressure suddenly rises above
setpoint and approaches inlet pressure
• If travel indicator is in UP position, check restrictor and pilot supply lter for plugging.
• If travel indicator is in DOWN position, check main valve for debris or diaphragm damage.
Outlet pressure normal at low ow but
falls below setpoint at high ow
• Check main valve inlet strainer for plugging.
• Check inlet pressure at high ow condition.
• Check sizing calculations to be sure main valve body is large enough for load.
• Check for undersized or restricted control line (use the minimum size given in step 6 of Type LR125
Installation section).
• Adjust restrictor to a lower setting.
Outlet pressure cycles
• Adjust restrictor to a higher setting.
• Check control line placement. Make sure it is not located in a turbulent area.
• Make sure there is not a restriction in the control line, such as a needle valve.
Fluid leaks from pilot spring case • Replace pilot diaphragm assembly.
Fluid leaks from travel indicator • Replace indicator stem O-ring, if indicator is not desired, convert to a non-travel indicator assembly.
Outlet pressure approaches inlet
pressure when no ow is desired
• Check main valve O-rings for damage or improper installation.
• Check cage and diaphragm surfaces for erosion or trapped debris.
• Check pilot valve plug and seat for seating surface damage or debris.
• Check pilot for trapped debris.
Regulator will not open
• Check for clogged control line.
• Make sure control line is installed and open.
• Check for damage to the main valve diaphragm.
• On new installations, make sure the control line and pilot supply are properly connected.
Regulator will not close
• Make sure the pilot supply is properly connected.
• Check restrictor for clogging.
• Check the main valve diaphragm for damage.
• Check for a broken control line.
High lock-up pressure with slow shutdown • Check for debris on main valve or pilot seat.
High lock-up pressure with fast shutdown • Adjust restrictor to a higher setting.
Note: If you were unable to solve your problem using this troubleshooting guide, contact your local Sales Oce.
Table 9. Type LR125 Torque Values
BODY SIZE,
In. / DN
CAP SCREWS (KEY 3) OR
HEX NUTS (KEY 47)
FLANGED HEX NUT (KEY 13) OR
SOCKET HEAD SCREW
(KEY 129, 1 IN. / DN 25 ONLY)
INDICATOR FITTING OR
INDICATOR PLUG (KEY 19)
Ft-lbs / N•m
1 / 25 75 to 95 / 102 to 129 4 to 6 / 5.5 to 8 90 to 160 / 122 to 217
2 / 50 55 to 70 / 75 to 95 10 to 14 / 14 to 19 90 to 160 / 122 to 217
3 / 80 100 to 130 / 136 to 176 32 to 40 / 44 to 54 200 to 300 / 271 to 407
4 / 100 160 to 210 / 217 to 285 32 to 40 / 44 to 54 200 to 300 / 271 to 407
Table 10. Type MR95H/MR95HP Pilot Torque Values
BODY SIZE,
In. / DN
SPRING CASE BOLTS (KEY 16) ORIFICE (KEY 3) VALVE PLUG GUIDE (KEY 5)
Ft-lbs / N•m
1/2 / 15 10 to 13 / 14 to 18 34 to 38 / 46 to 51 75 to 90 / 102 to 122
 Loading...