2
EMOS spol. s r. o.
EMP911 -manual P5621 0-0-0-K
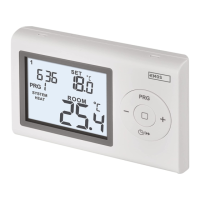
THERMOSTAT EMP911
Thermostat EMP911 is a temperature regulator, which allows controlling and regulating the heating and cooling systems. Please, study this
manual thoroughly before the rst use of the thermostat.
• large multi purpose liquid crystal display (LCD)
• ability to regulate the heating or cooling system
• user dened programme
• 2 temperate setting programmes
• option of manual controls
• adjustable temperature range
Technical parameter
Temperature measurement range: 0 – 40 °C (resolution 0.1 °C)
Temperature regulation range: 5 – 30 °C (steps 0.5 °C)
Temperature precision: ± 1 °C
Clock precision: ±90 s per month
User programmes: manually set
Turn on/o range: 0.2°C through 1,6°C (0.1°C resolution)
Operating temperature: 5 – 40 °C
Storage temperature: 0 – 50 °C
Operating air humidity: 0 – 90 %, non-condensing
Switching: 230 V~ 50 Hz
Max load: 230 V, 6 A resistance type, 2 A inductive type
Size: 125 x 84 x 29 mm (W x H x D)
Battery: 2 x1.5 V AA
Package content
1. thermostat
2. screws (2 pcs)
3. dowels (2 pcs)
4. user manual
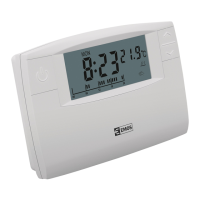
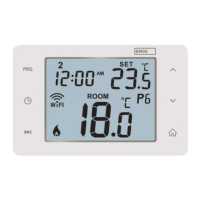
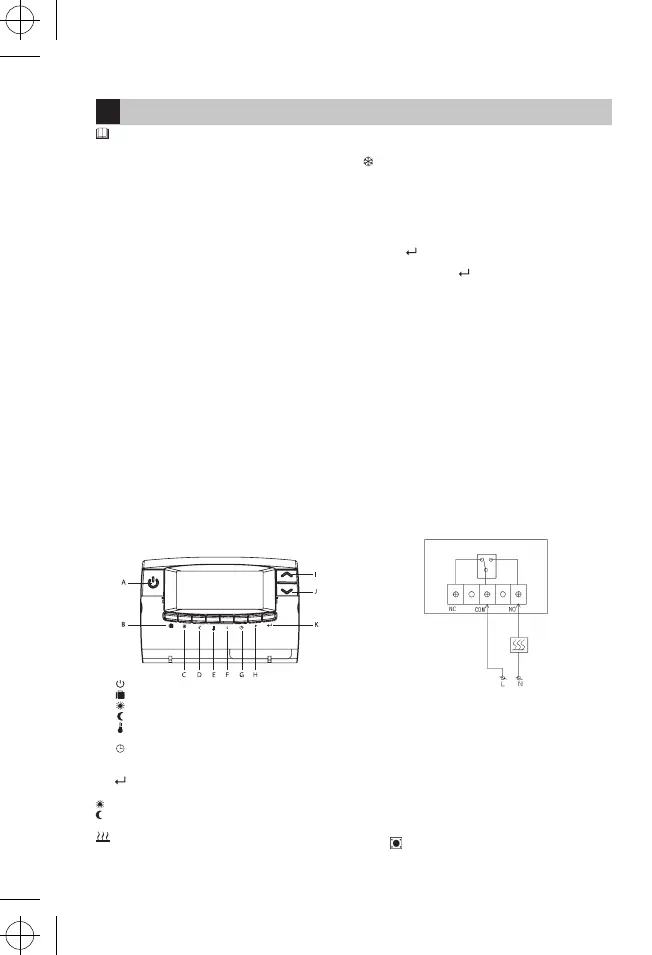
LCD display
1. Temperature
2. Thermal mode indicator, cooling or heating indication
3. Manual controls
4. Holiday function
5. Programme progress indicator
6. Weak battery indicator – lights up, if the battery voltage drops below
certain level. If so, replace the batteries as soon as possible.
7. Time
8. Day of the week
Front panel:
A. Turn the thermostat on/o
B. Holiday function activation
C.
Comfort temperature
D. Economy temperature
E.
Temperature setting
F. S Temperature range setting
G. Time setting
H. P Temperature programmes setting
I./J. ∧ ∨ Change of day, temperature, time
K. Conrming the selection, return to the main menu
Temperature modes
„Sun“ – the comfort temperature (pictogram on the display)
„Moon“ – economy temperature (pictogram on the display). Both the
temperatures can be changed as needed.
- activated heating mode
„snow ake“ – activated cooling mode
Program
EMP911 increases or decreases the room temperature according to a
set programme automatically.
Manual control
If you need to change temperature temporarily and you do not want
to interfere with the set programmes, push the up/down arrow and
set the required temperature. A „hand“ icon will appear. Conrm the
change by
. The selected mode will be terminated by the next
programme change.
To cancel push the button again.
Manual controls have precedence to the set programme.
INSTALLATION
Prior the installation of the thermostat, turn o the power supply.
We recommend the installation should be done by a qualied techni-
cian.
Thermostat location
• The location of the thermostat can aect its function signicantly.
• Place the thermostat in a suitable place, if possible on the inner wall,
where the air circulates freely.
• Choose a place, where the members of your family spend the most
time.
• Do not place the thermostat in direct sunlight – it would not regulate
the room temperature properly.
• Do not place the thermostat near heat sources (such as television,
radiator, fridges) nor near the door, where it would suer from vibra-
tions.
Wiring
On the inner side of the rear cover of the thermostat, there are three
outputs for electricity wiring.
Use a cross screw-driver to release the cover.
There are single-pole double-position contacts (SPDT), marked as COM,
NO and NC. In most cases COM and NO are used.
The contact is illustrated below with its output turned o.
Installation
1. Drill two 6 mm holes in the wall.
2. Insert dowels and screw the left screw with 3 mm tolerance.
3. Hang the thermostat – hang the keyhole opening on the screw head
and slide to the right.
4. Fix the thermostat position by screwing and tightening of the other
screw.
COMMISSIONING
The thermostat starts working as soon as you insert the batteries.
1. Remove the rear cover.
2. Insert two alkali AA batteries (do not use rechargeable batteries)
and the display will light on.
If not, check the battery polarity and use a pen to push the reset
button
.
GB
 Loading...