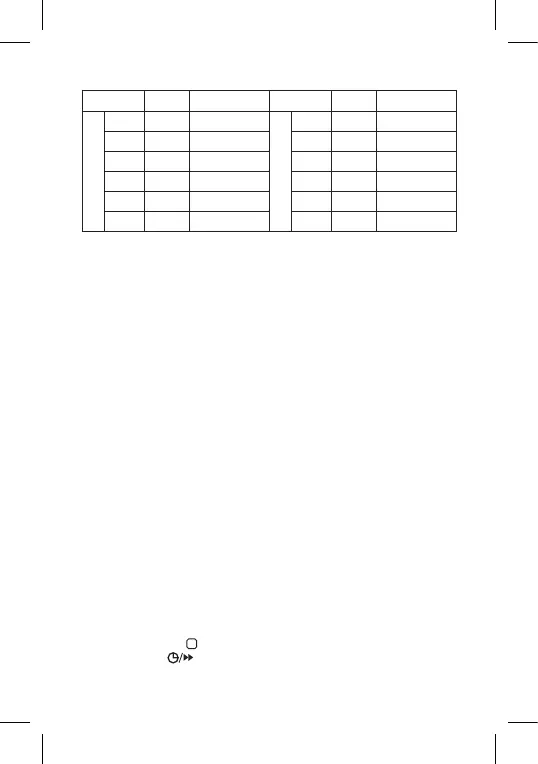
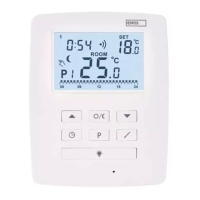
7
Table of preset programmes (6 temperature changes a day)
Time Temperature Time Temperature
Monday – Friday
PRG1 6:00 20°C
Saturday – Sunday
PRG1 7:30 20°C
PRG2 8:00 15°C PRG2 9:30 20°C
PRG3 12:00 15°C PRG3 11:30 20°C
PRG4 14:00 15°C PRG4 13:30 20°C
PRG5 17:00 21°C PRG5 16:30 21°C
PRG6 22:00 15°C PRG6 22:30 15°C
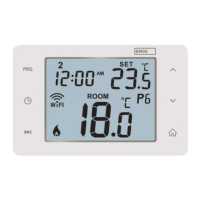
Programme Settings
If the factory preset programmes do not suit your needs, you can adjust
their timing and temperatures.
The day is divided into 6 time periods = 6 temperature changes (the number
of these periods cannot be changed).
1. Press the PRG button; the day number will start ashing.
2. Use the + and – buttons to select days: individual days in the week/
workdays – 1, 2, 3, 4, 5/weekend – 6, 7/whole week – 1, 2, 3, 4, 5, 6, 7.
3. Conrm by pressing PRG; the time value will start ashing and PRG1 will
appear on the screen (indicating the 1st temperature change in the day).
4. Use the + and – buttons to set a time (10 min resolution) where the
1st temperature change should start and conrm with the PRG button.
5. The temperature value will start ashing; use the + and – buttons to
set the temperature of choice and conrm with PRG.
6. The time value will start ashing and PRG2 will appear on the screen
(indicating the 2nd temperature change in the day).
7. Use the + and – buttons to set a time (10 min resolution) where the
2nd temperature change should start and conrm with the PRG button.
8. The temperature value will start ashing; use the + and – buttons to
set the temperature of choice and conrm with PRG.
Repeat the process for the remaining temperature changes (PRG3/4/5/6)
in the day.
Calibrating Room Temperature
The temperature sensor in the thermostat is calibrated from production,
but additional calibration can be done to optimise the thermostat further,
for instance by comparing the measured room temperature with a refer-
ence thermometer.
Press and hold the button for 5 seconds. The SYSTEM table will be
displayed. Press .
CAL will appear on the screen and the temperature value will start ashing.