30794-5-0314Page 44
ACCESSORY SIDE SHELVES INSTALLATION INSTRUCTIONS
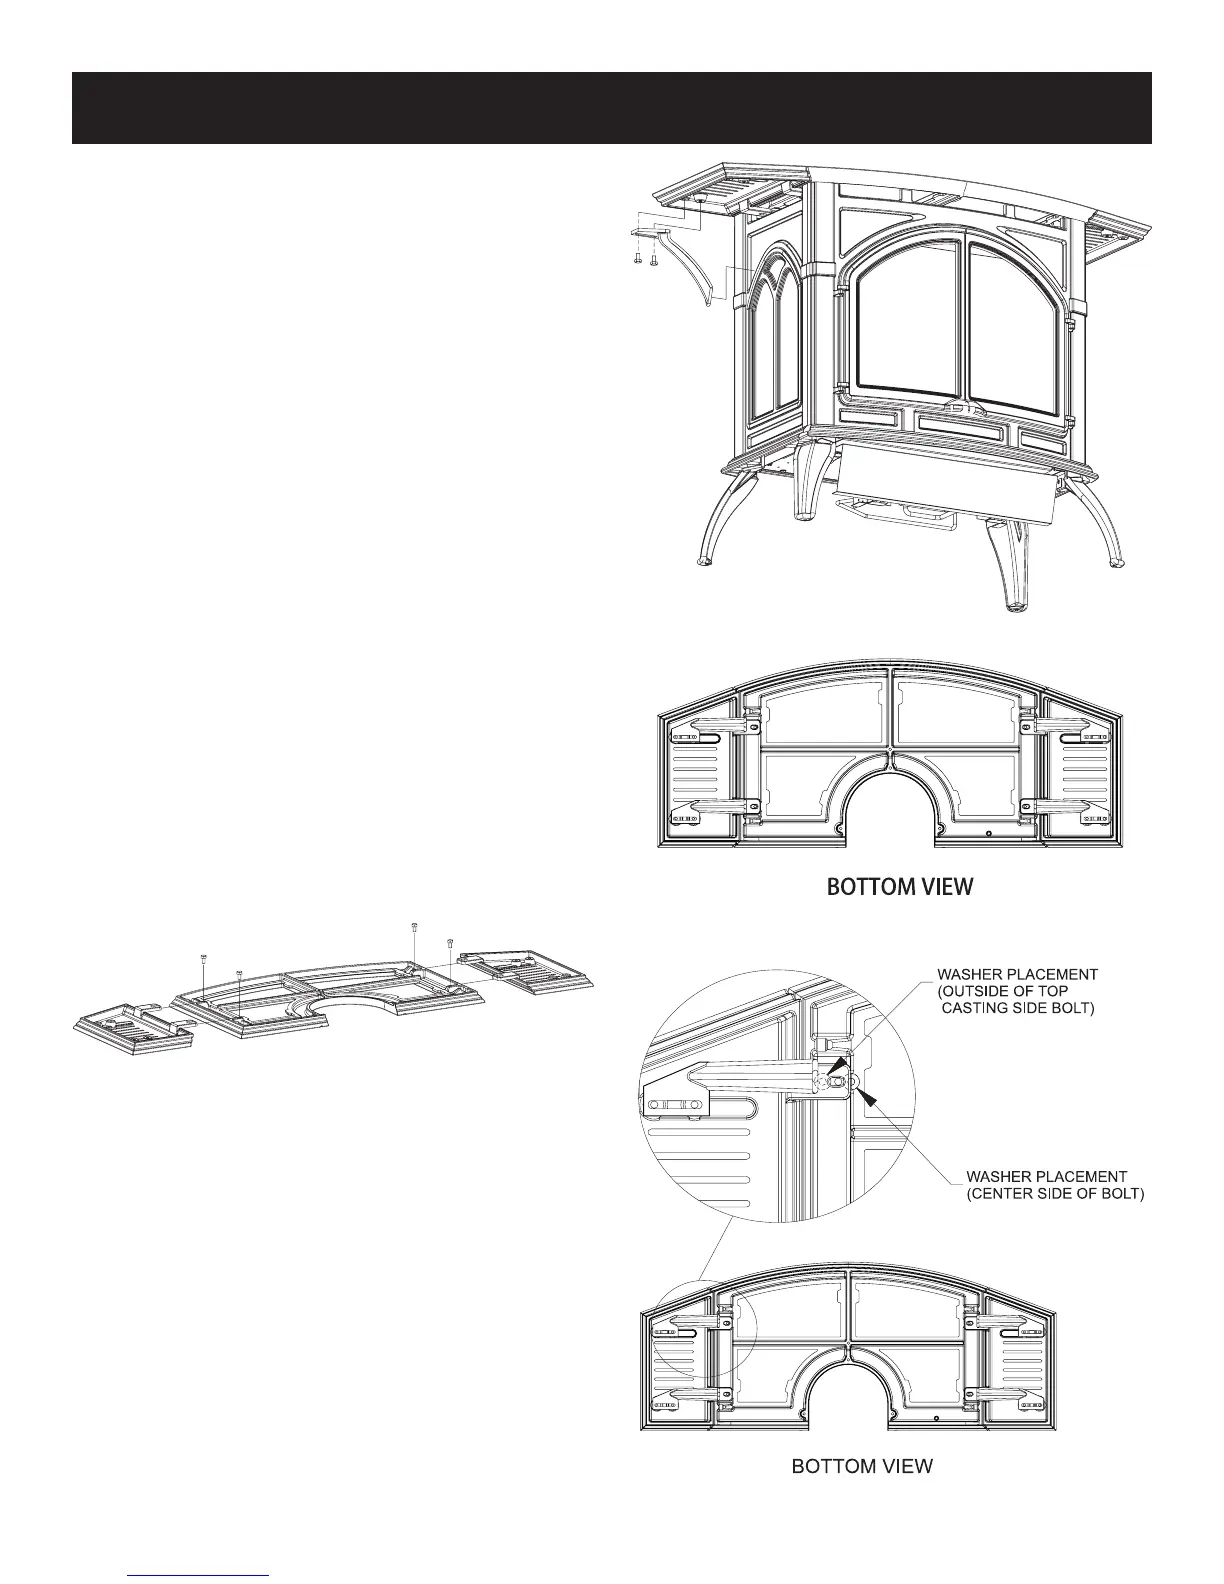
Installing Accessory Side Shelves:
1. Remove cast iron or stone inlay inserts from casting top and
carefully set them aside.
2. Remove cast iron top from stove and place upside down on a
at, soft smooth surface to avoid damage.
3. Remove four ¼-20 hex head bolts from the outer edges of cast
iron top.
4. Place left and right side shelves in place shown in Figure 34.
5. Replace four ¼-20 hex head bolts to attach side shelves to
cast iron top, be sure shelf is tight to casting top before fully
tightening bolts.
6. Remove eight ¼-20 hex head bolts from side shelves.
7. Replace cast iron top on unit.
8. Attach side shelf supports one at a time, using two ¼-20 hex
head bolts per support, sliding support ush to casting before
fully tightening bolts as shown in Figure 35.
9. Replace cast iron or stone inlay inserts into casting top.
Note: Be sure to remove side shelf supports prior to removing
cast iron top to eliminate potential scratching or chipping to the
cast iron sides.
Note: Due to inherent properties of the casting process, non-
combustible shims may be required to level accessory side shelves
to the casting top. These shims are provided in the form of washers
to be used on either side of the bolts. See Figure 34. If accessory
shelf angles downward, toward the oor, washer(s) will need to be
added to the center side of the bolt. Conversely, if the accessory
side shelf angles upward, toward the ceiling, washer(s) will need
to be added to the outside of the top casting side of the bolt. See
Figure 37.
Figure 34
Figure 35
Figure 36
Figure 37