5. Replace all seats and seals as furnished in the Eyewash Ball Valve Repair Kit
(see “6 Spare Parts” on page 6-1).
6. Do the reverse of the above procedure to reassemble the repaired valve. Use a
suitable sealant on the retainer threads and pipe to valve connections.
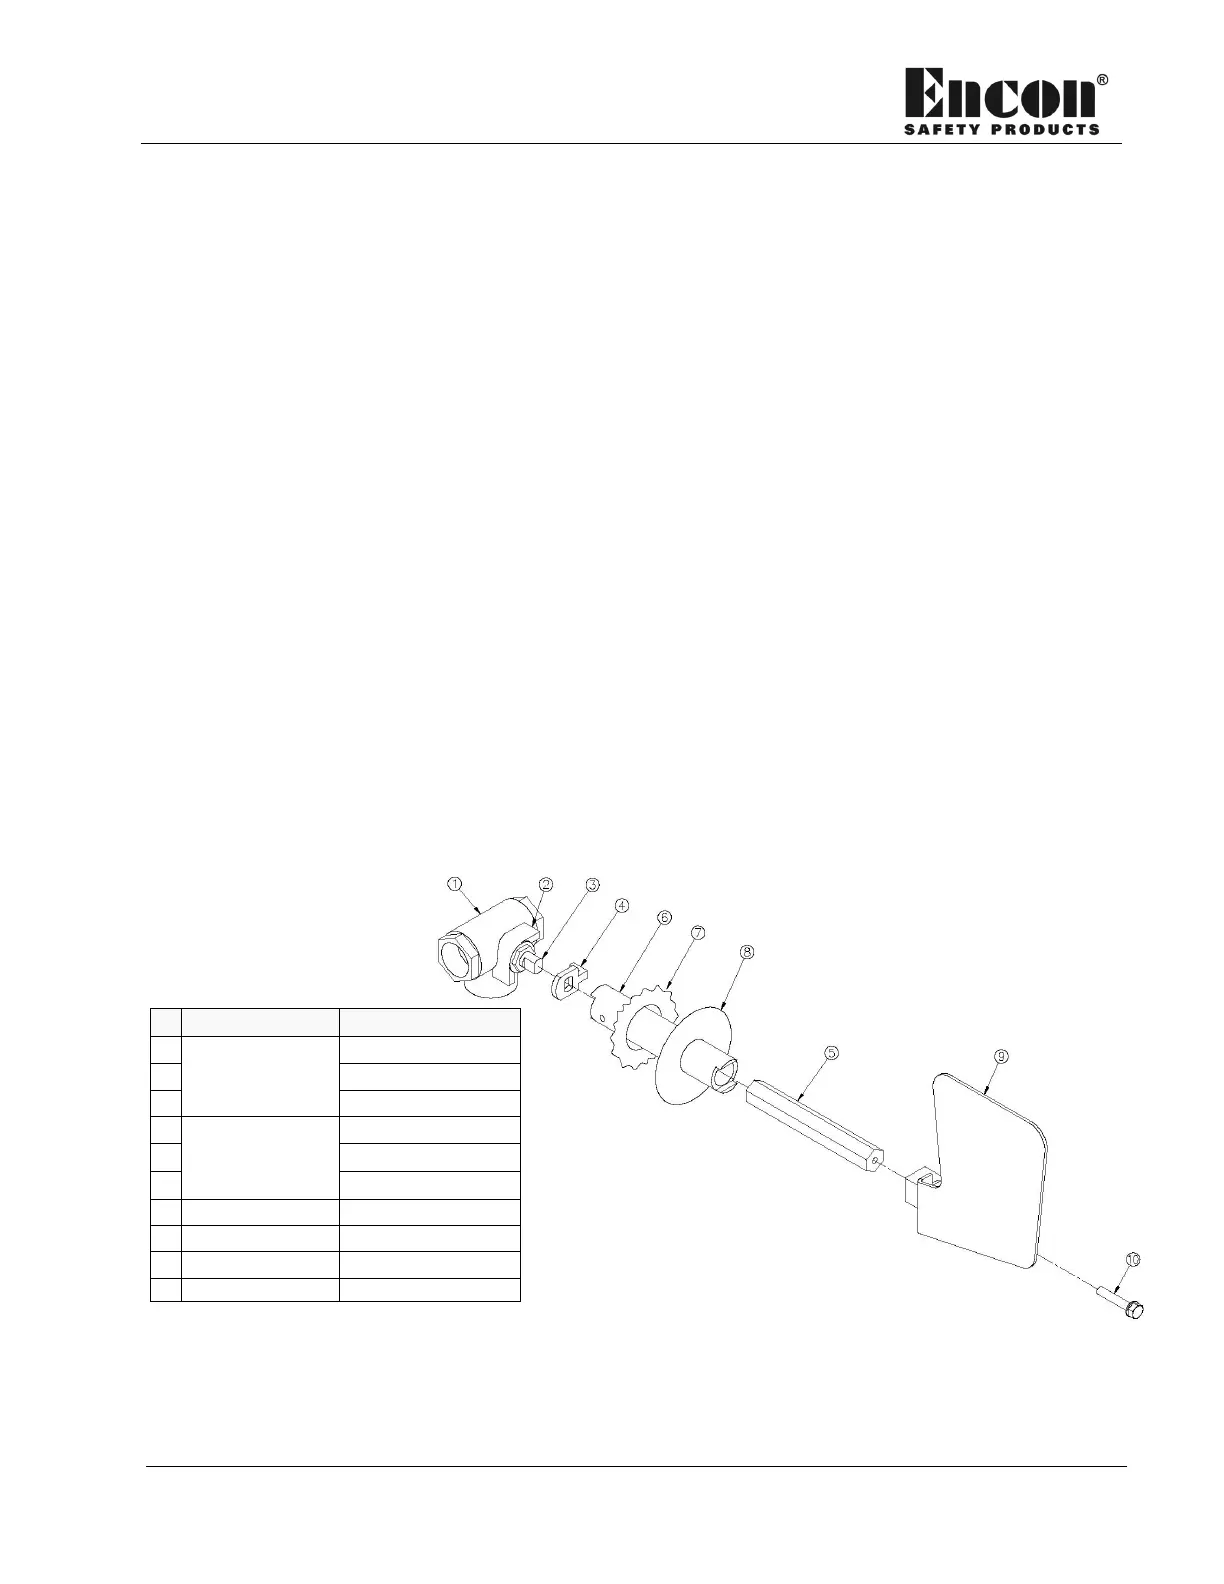
7. As shown in Figure 4-4, locate (#4) valve stop on (#3) valve stem. Ensure the
valve stop fits between the (#2) fixed stops of the valve at the 3 and 6 o'clock
position.
8. Screw the (#5) valve extension on to the (#3) valve stem.
9. Slide the (#6) valve extension sleeve over the (#5) valve extension, locking the
(#6) valve extension sleeve on to the (#4) valve stop.
10. Insert the (#8) valve extension grommet into cover.
11. Slip the (#7) eyewash cover over the (#6) valve extension sleeve.
12. Place the (#9) push plate over the (#5) valve extension and secure by attaching
the (#10) bolt through the (#9) push plate, into the (#5) valve extension.
13. Replace the existing black seal strip to the covers.
14. Test the valve operation by assuring the valve push plate is at 12 o'clock when
the valve is off, and when the valve is completely open, the valve push plate is
at 3 o’clock. Ensure machined part of ball faces forward.
15. Test to ensure the repaired valve opens and closes properly and does not leak
before putting Therma-Flow
®
Plus into service.
1
Existing parts are not included in kit P/N 01052515.
Figure 4-4. Eyewash Ball Valve Extension Kit