2
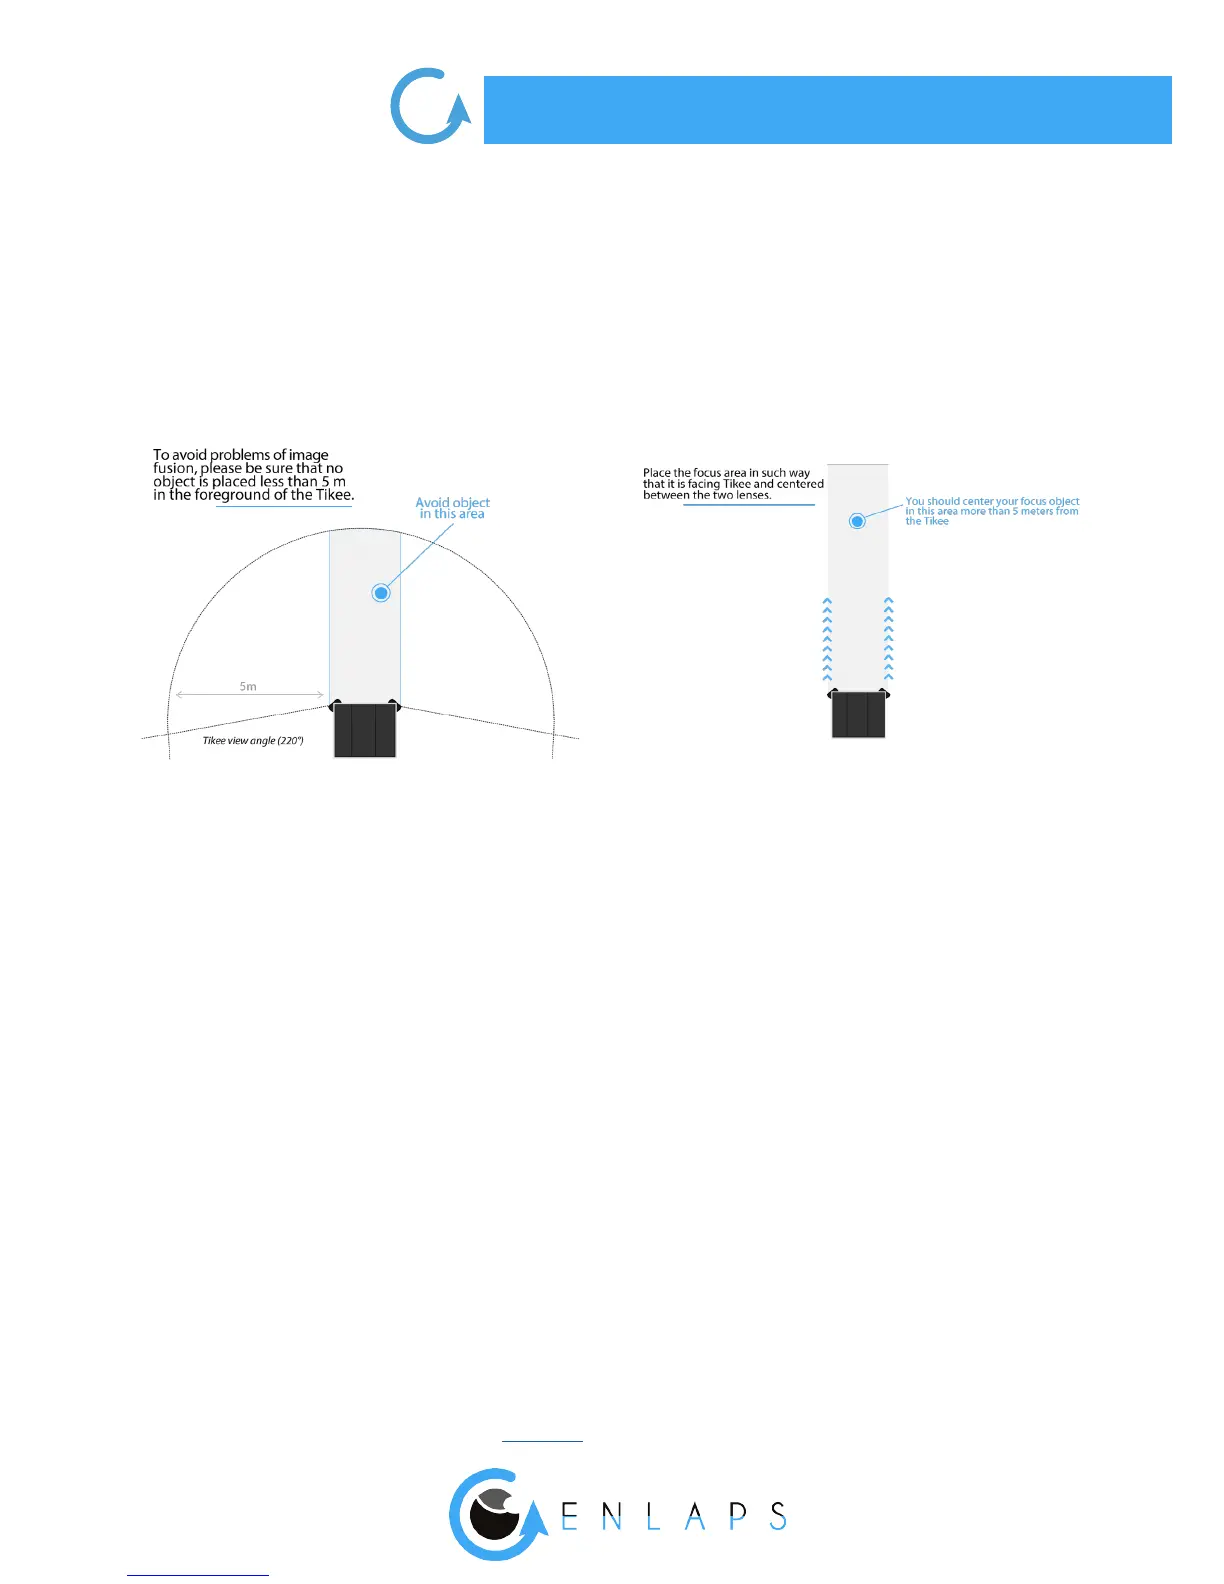
Your Tikee has wide angle optics. When photos are uploaded to the web application, it makes
the fusion of the left image and the right image. The images are rst put at and then
combined to get a single panoramic image.
Therefore we recommend to keep your Tikee the more at possible during the installation
to minimize distortion of the image (you can use a bubble level or your smartphone with a
dedicated mobile application).
Once you have chosen the framing, lock the position of your Tikee so that there is no change in
the framing over the time.
Be sure to use a hard mounting bracket to ensure a same framing of the shooting over the time.
We recommend to use the stainless steel arm designed by Enlaps for Tikee.
. Settings of the solar panel
The autonomy of your Tikee through the solar resource is directly related to the installation
location.
It depends on:
- the shade on the photovoltaic panel during the day (roof, pole, tree,...), the more shade the less
energy is produced;
- the orientation of the solar panel (South in the Northern Hemisphere, North in the Southern
Hemisphere);
- the inclination of the solar panel (at close to the equator, about 30° in France);
- outside temperature (warmer and more performance degrades).
After the desired framing chosen (cf. page 8-9), you have to adjust the position of the solar panel.