Page 30
*(1(5$/23(5$7,1*,16758&7,216
4.
For your convenience, many electrical and mechanical connections have been performed
at the factory. Refer to CUSTOMER WIRING DIAGRAM for other connections.
5.
Be sure all electrical connections are properly made and that all fittings are securely
tightened. Loose electrical connections can cause faulty or erratic operation of the
control or welding machine.
6.
If the machine is air operated, turn on the air supply to the machine. Set air pressure in
accordance with the machine manufacturer's recommendations.
7.
Turn on water. Be sure water is flowing freely in drain. On closed systems check flow
gauge for water flow.
8.
Place WELD/NO WELD switch on control (and/or external WELD/NO WELD
switch)in the NO WELD position.
9.
Program a simple SINGLE SPOT schedule into the control as follows:
NOTE:
Before proceeding, refer to Section 7.0 INTRODUCTION TO PROGRAMMING
THE EN1000.
SQUEEZE count
...............30 to 60 cycles.
WELD /HEAT count
...........02 to 03 cycles.
PERCENT CURRENT
..........50 to 60%.
HOLD count
..................10 to 15 cycles.
OFF count
....................00 cycles.
IMPULSES
...................01 (no impulses).
COOL count
..................00 cycles.
VALVE MODE
...............01 (valve #1).
CYCLE MODE
................00 (non repeat).
SLOPE MODE
................00 (no slope).
SLOPE COUNT
...............00 cycles.
7.
Set the welding transformer tap to LOW or a low tap switch setting.
8.
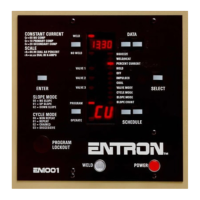
Be sure that the welding machine head is fully retracted. Turn on main power. The red
POWER light on the light panel at the top of the control should turn on. The
SCHEDULE SELECT and DATA displays should also come on at this time.
9.
Initiate the control. On installations with a two stage pilot switch, depress the first stage
only. Welding head or arms will close. Control will not sequence. Be sure that the
electrodes have closed together and then depress the second stage. The control will
sequence but will not weld, and then the head or arms will retract. On single stage
operation, closure of the pilot switch will cause the control to sequence. On foot operated
machines only, a switch on the mechanical linkage of the machine will initiate the
sequence.

 Loading...