5. Microinverter System Installation
Installing Envertech microinverter system involves several key steps. Each
step listed here is elaborated on the following pages.
Step 1. Verify voltage
Step 2. Mount microinverters onto the rack
Step 3. Ground the system
Step 4. Install a Wi-Fi antenna
Step 5. Fasten AC cables
Step 6. Connect to the grid
Step 7. Connect PV modules to microinverters
Step 8. Switch on the PV system
Step 9. WI-FI Configuration
Step 10. Monitoring through EVT400
Step 1. Verify that grid voltage and PV panel voltage are matching with
microinverter rating
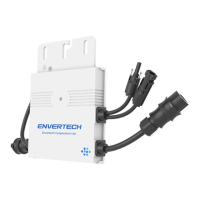
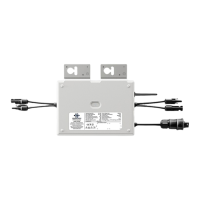
Step 2. Mount microinverters onto the rack
Mark out the estimated center of each PV module on the rack to facilitate
locating microinverters.
Mount all microinverters under modules to avoid rain and sun, with the
trademark facing downward.
Step 3. Ground the system
Microinverters and modules must be connected to the grounding
conductor in accordance with national standards. Fix the grounding wire
with screws to the microinverter’s grounding hole, so that the grounding of
microinverters can be realized.
You must install the microinverter system under connection neither
to the grid nor to the PV modules (or if not disconnected, the
modules should be shaded).