8
CASTERS AND WHEELS INSTALLED ONTO CART ASSEMBLY:
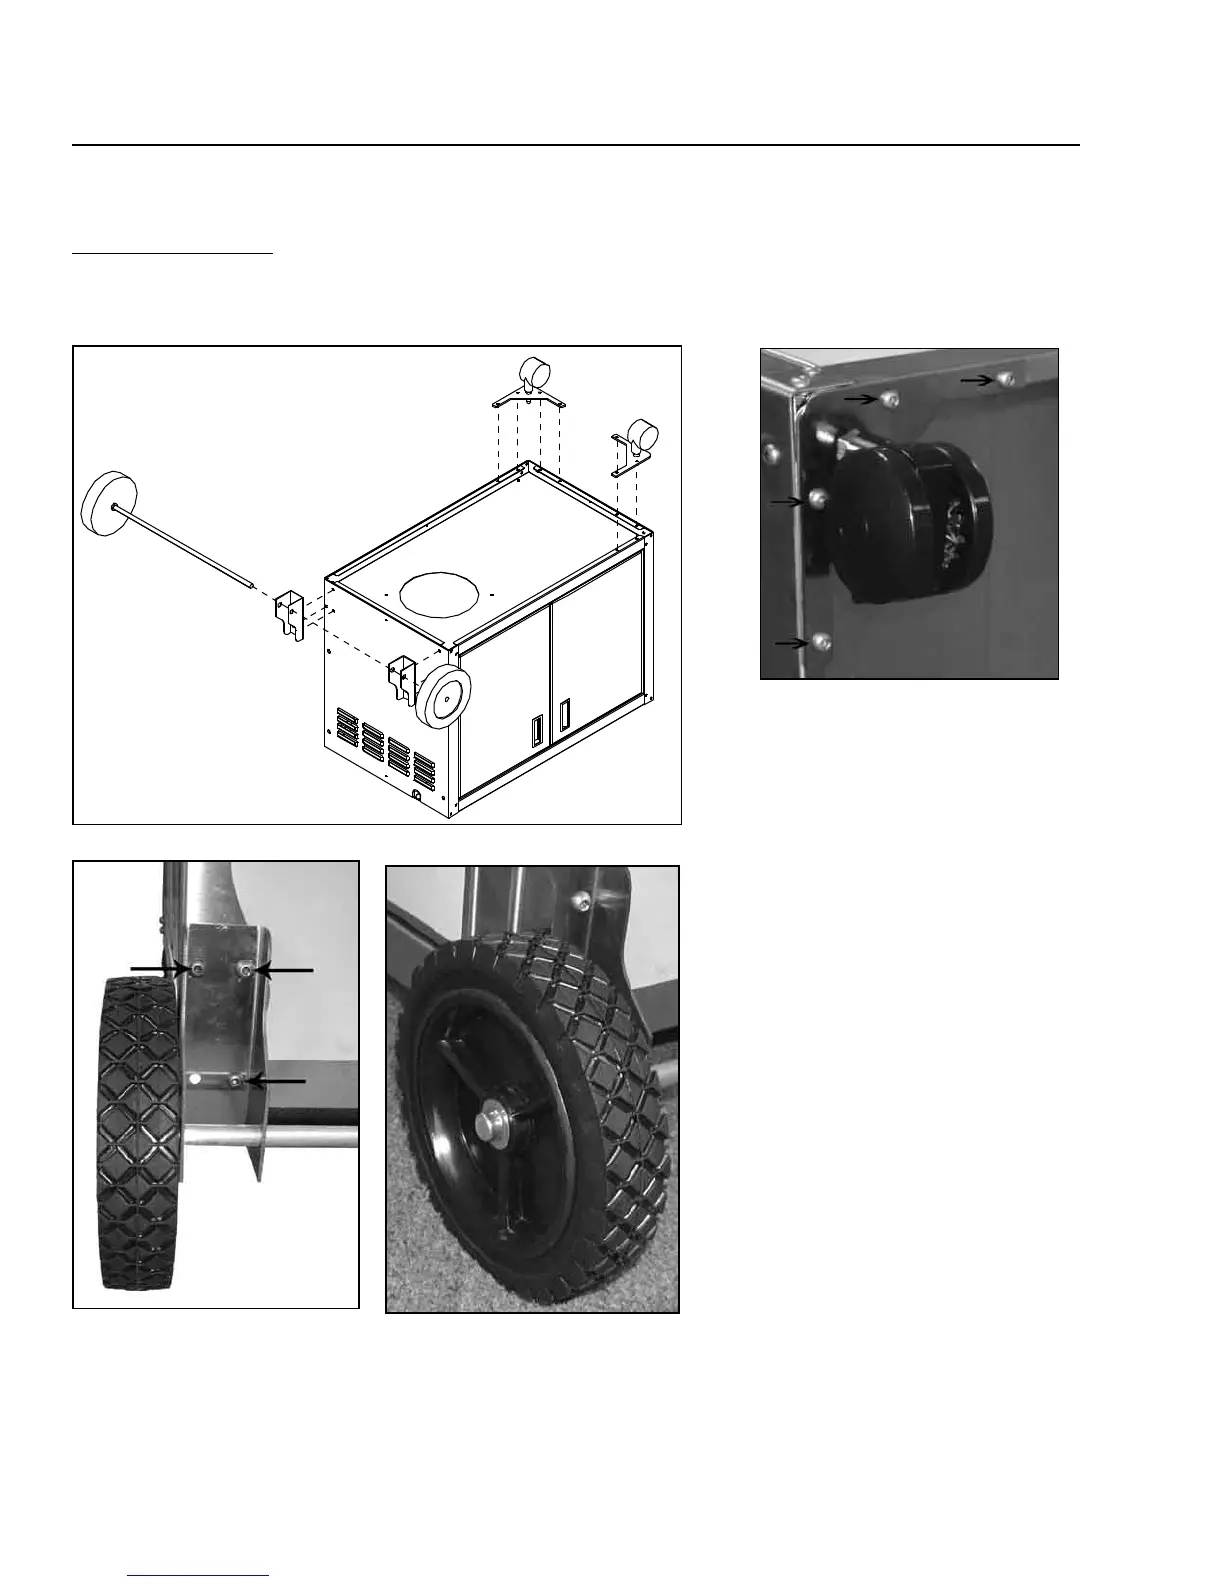
When the cart cabinet has been emptied the wheels and casters can be installed. Leave the cart body upside down;
this will make installing the wheels and casters easier.
Components Required:
● Pre-assembled cart ● (2) Plated caster assemblies ● Aluminum axle and (2) end caps
● (2) Stainless steel axle mount ● (2) BBQ wheels ● (14) ” x ” stainless steel bolts
● (14) ” stainless steel lock washers ● (14) ” stainless steel nuts
The casters must be installed on the bottom
left side of the cart body. Each caster requires
four (4) bolts, four (4) lock washers, and
four (4) nuts. Put the casters in place (see
Figure 13 & 14) and slide the bolts through
the holes in the caster brackets into the
holes in the bottom of the cart body. Open
cabinet doors and place a lock washer and a
nut onto each bolt. Using a ” socket or nut
driver and a
5
/32” Allen key, tighten all the
nuts and bolts.
The axel mounts must be installed on the
right side of the cart body. Each axel mount
requires three (3) bolts, three (3) lock
washers, and three (3) nuts. Put the axel
mounts in place with the holes for the axel
closest to the bottom of the cart body (see
Figure 13 & 15). Slide the bolts through the
holes in the mount into the holes in the side
of the cart body. Place a lock washer and a
nut onto each bolt. Using a ” socket or nut
driver and a
5
/32” Allen key tighten all the
nuts and bolts.
Before the wheels can be installed they must
be partially assembled. Press one wheel onto
Figure 13
Figure 14
Figure 15
Figure 16
an end of the axel so that approximately ” (1 cm) of the axel is out past the wheel. The side with the webbing on it
is to face out. A hammer or mallet may be needed to help put the wheels on the axel. Press an end cap all the way
onto the end of the axel with the wheel on it; ensure the wheel is butted up against the end cap (see Figure 16).
Slide the axel through the holes in both axel mounts; it may be a tight t so turn the axel while pressing it through
the holes. Press the other wheel, then the end cap, onto the free end of the axel.

 Loading...