+1.800.343.5319 or +1.843.881.6560 envexp.com Environmental Express • 13
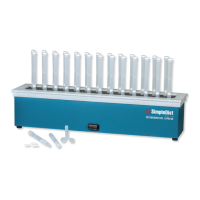
SimpleDist® Micro Heating Block: Operation & Instruction Manual Distillation Methods
Total Phenol Distillation with the SimpleDist® Micro Heating Block
5.0 Procedure
5.1 Set the temperature of the heating block to 130°C and allow the heat to stabilize. This
should take approximately 30 minutes. If all reagents are ready to use this should be
sufcient time to set up and prepare a full batch of 20 samples and all necessary QC.
5.2 Adjust the pH of all samples, QC, and standards to about 4 using sodium hydroxide or
sulfuric acid solutions as necessary. If the amount of acid or base required changes the
volume by more than 1%, stronger solutions can be made and utilized.
5.3 Place one collector tube for each sample, standard, QC, or other aliquot needing to
be distilled in a test tube rack with the “Measure” end up. No trapping solution is
necessary for phenol distillation. Cap the tubes with one membrane and cap. Ensure
that the membrane is not torn and shows a visible edge all the way around the tube.
5.4 Place one sample tube for each sample, standard, QC, or other aliquot needing to be
distilled in a test tube rack and add 6.0 mL of sample/standard to each tube. The tubes
may be labeled with permanent ink to aid in sample identication. Do not add any
label to the tube as this will interfere with the t in the block as well as heat transfer
during the distillation process. If solid samples are being distilled, add 0.5 to 1.0 g of
the sample to the tube along with approximately 5 mL of reagent water. Samples high
in organic content such as sludge should tend toward the lower sample mass while
samples that are relatively free of organic material can use the higher end.
5.5 Immediately place the ‘Distill’ end of a lled and capped collector tube (Step 5.2) over
the open end of the sample tube. Press the two pieces together to form a rough t.
You will not be able to hand press a tight seal.
5.6 Place the distillation unit in the tube press. Hold the collection tube by the break joint
to give support during the sealing procedure. Firmly press the two pieces together with
one motion. The collection tube should be ush with the ring around the edge of the
sample tube. If the pieces are at a visible angle the assembly will not t all the way in
the block.
5.7 Repeat Steps 5.5 and 5.6 for all prepared sample and collection tubes.
5.8 Place each assembled and pressed distillation unit in the preheated block. Ensure
that the unit is completely inserted in the block by having the ring on the “Distill” side
of the tube ush against the surface of the block. (Note: Heat resistant gloves may be
necessary during this stage.)
5.9 After 90 minutes of distillation time, remove the rst distillation unit from the block.
(Note: Heat and chemical resistant gloves are needed for Steps 5.9 and 5.10)
5.10 Immediately after removing the unit from the block, hold it over a chemical disposal
container and pull the sample tube off of the collection tube. This is best done by
twisting the two pieces in opposite directions while simultaneously pulling them apart.
Rocking the sample tube from side to side may not separate the pieces in time. The
sample tube must be removed within 4 seconds of the unit being removed from
the block. Otherwise the distillate could suck back into the sample tube and cause the
sample to be lost.
5.11 Drop the sample tube and any remaining liquid into the disposal container. Place
the collection tube with the ‘Measure’ end (the capped end) down in a test tube rack.
Repeat Steps 5.9 through 5.11 for all distilled tubes.