16000 - X-Axis Replacement
6
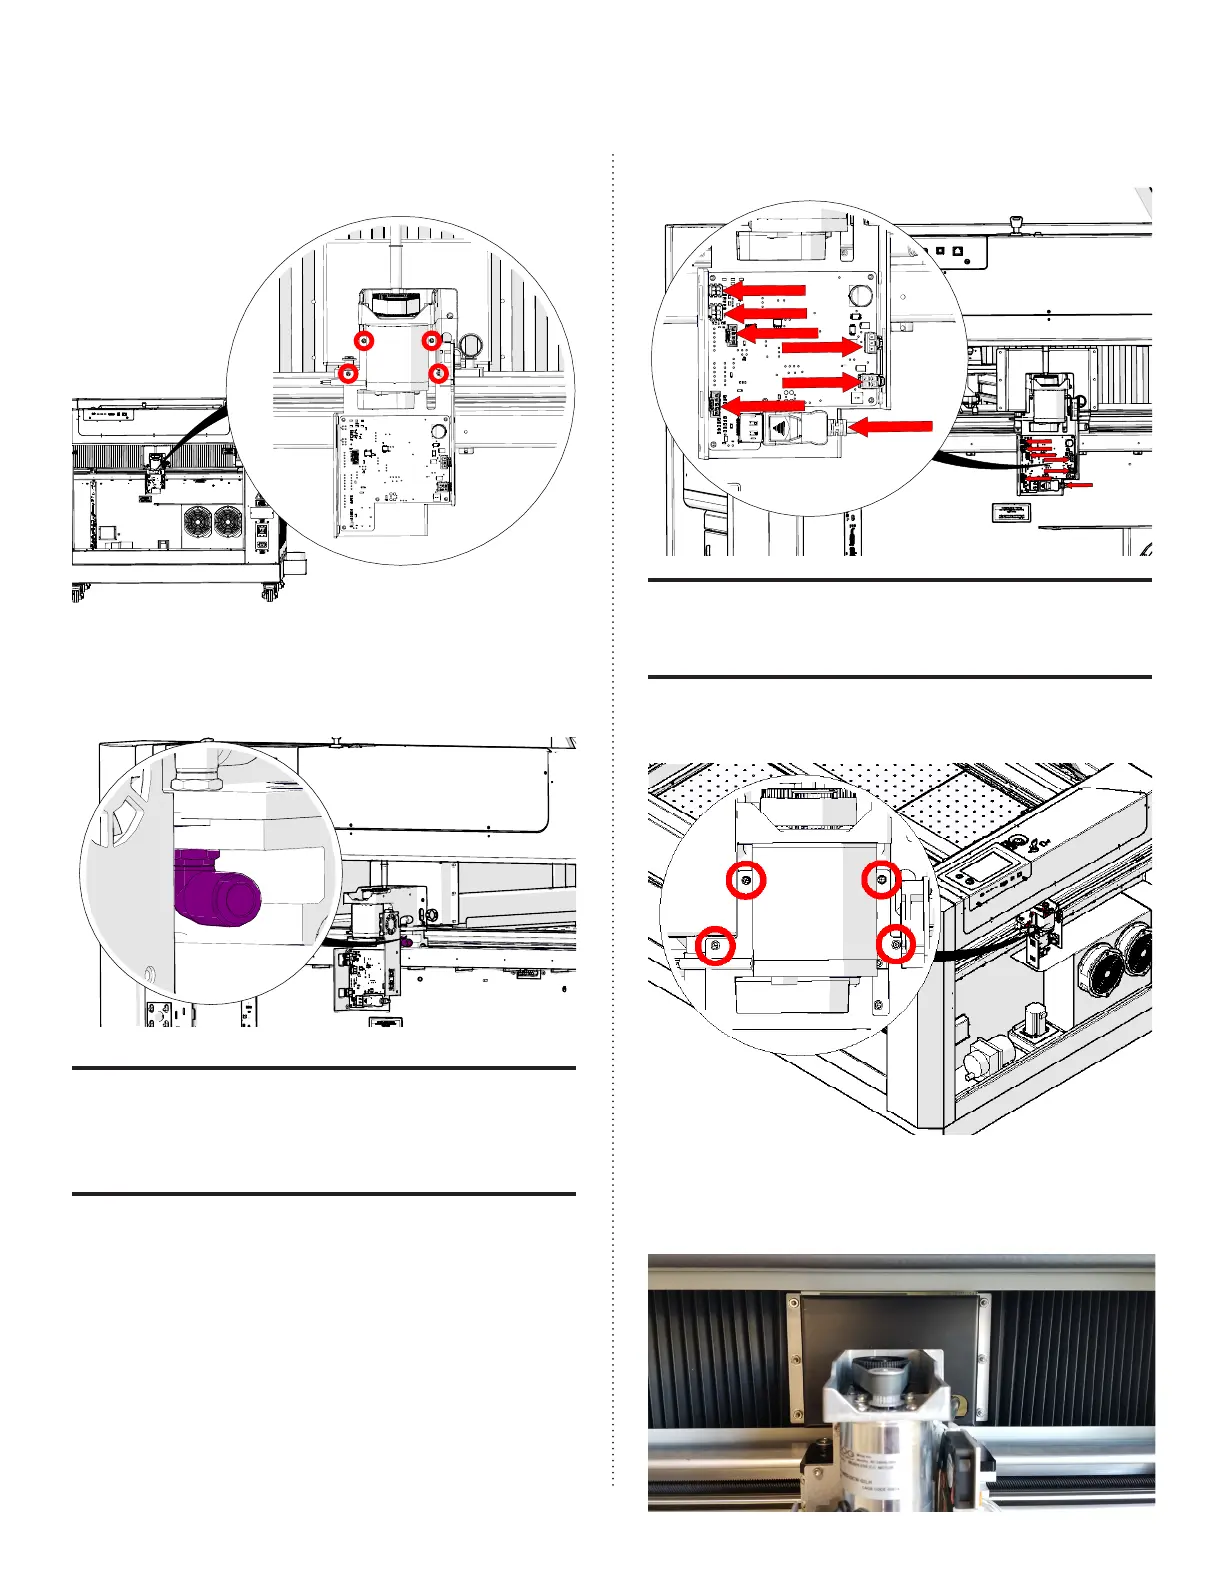
5. Install and tighten the four (4) 7/64”
hex screws that hold the x-axis drive
board housing:
6. Reconnect the air tubing to the elbow
fitting at the right side of the x-axis
assembly:
To reconnect the air tubing into the re-
taining fixture, simply insert the tubing
into the collar. To ensure that it is securely
connected, gently pull on the tubing.
7. Reconnect the seven (7) electrical
connectors from the drive board:
The electrical connectors on the drive
board are all unique and will only fit into
one receptacle.
8. Install the x-axis drive board cover
and tighten the four (4) Phillips screws:
9. Install the backing plate and bellows.
Install and tighten the six (6) 5/16” nuts
that hold them in place:

 Loading...


