PRO 32 & 48 X-AXIS ASSEMBLY
6
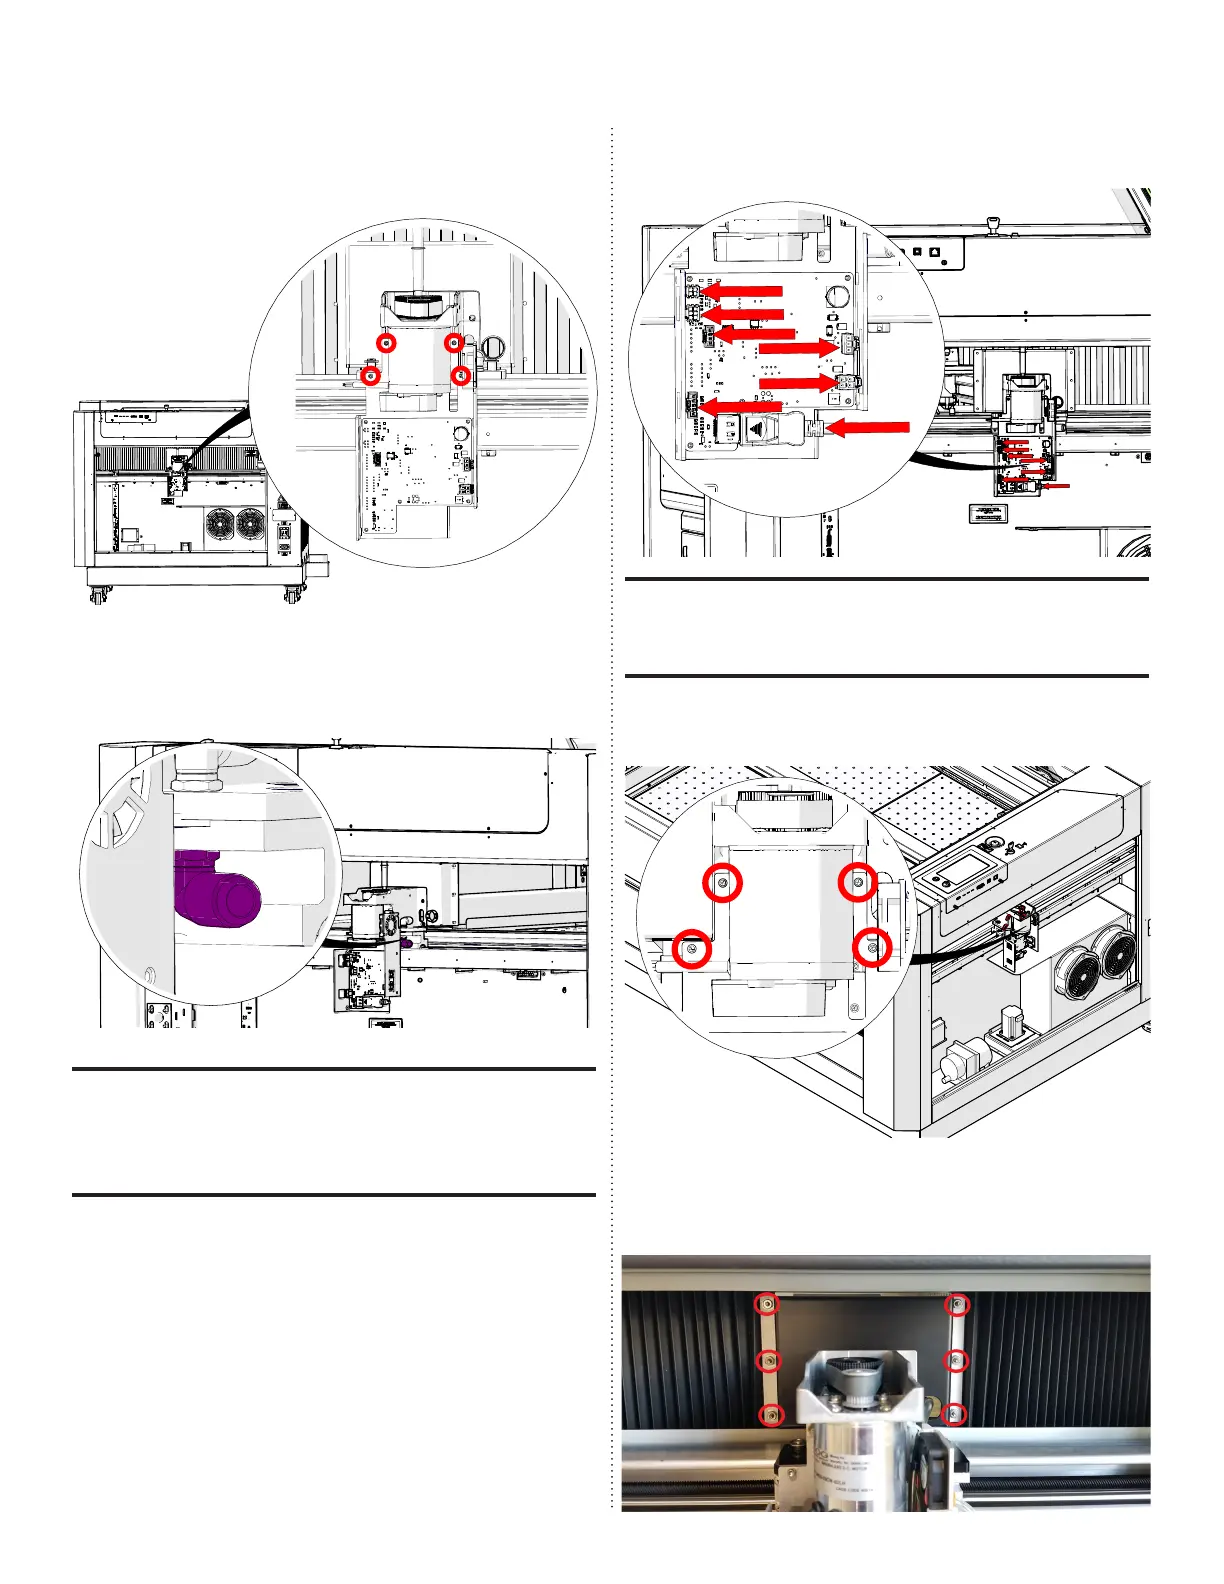
7. Reconnect the seven (7) electrical
connectors from the drive board:
The electrical connectors on the drive
board are all unique and will only fit into
one receptacle.
8. Install the x-axis drive board cover and
tighten the four (4) Phillips screws:
9. Install the backing plate and bellows
and tighten the six (6) 5/16” nuts that hold
them in place:
5. Install and tighten the four (4) 7/64” hex
screws that hold the x-axis drive board
housing:
6. Reconnect the air tubing to the elbow
fitting at the right side of the x-axis
assembly:
To reconnect the air tubing into the retain-
ing fixture, simply insert the tubing into the
collar. To ensure that it is securely connect-
ed, gently pull on the tubing.
 Loading...


