PRO 32 & 48 X-AXIS ASSEMBLY
7
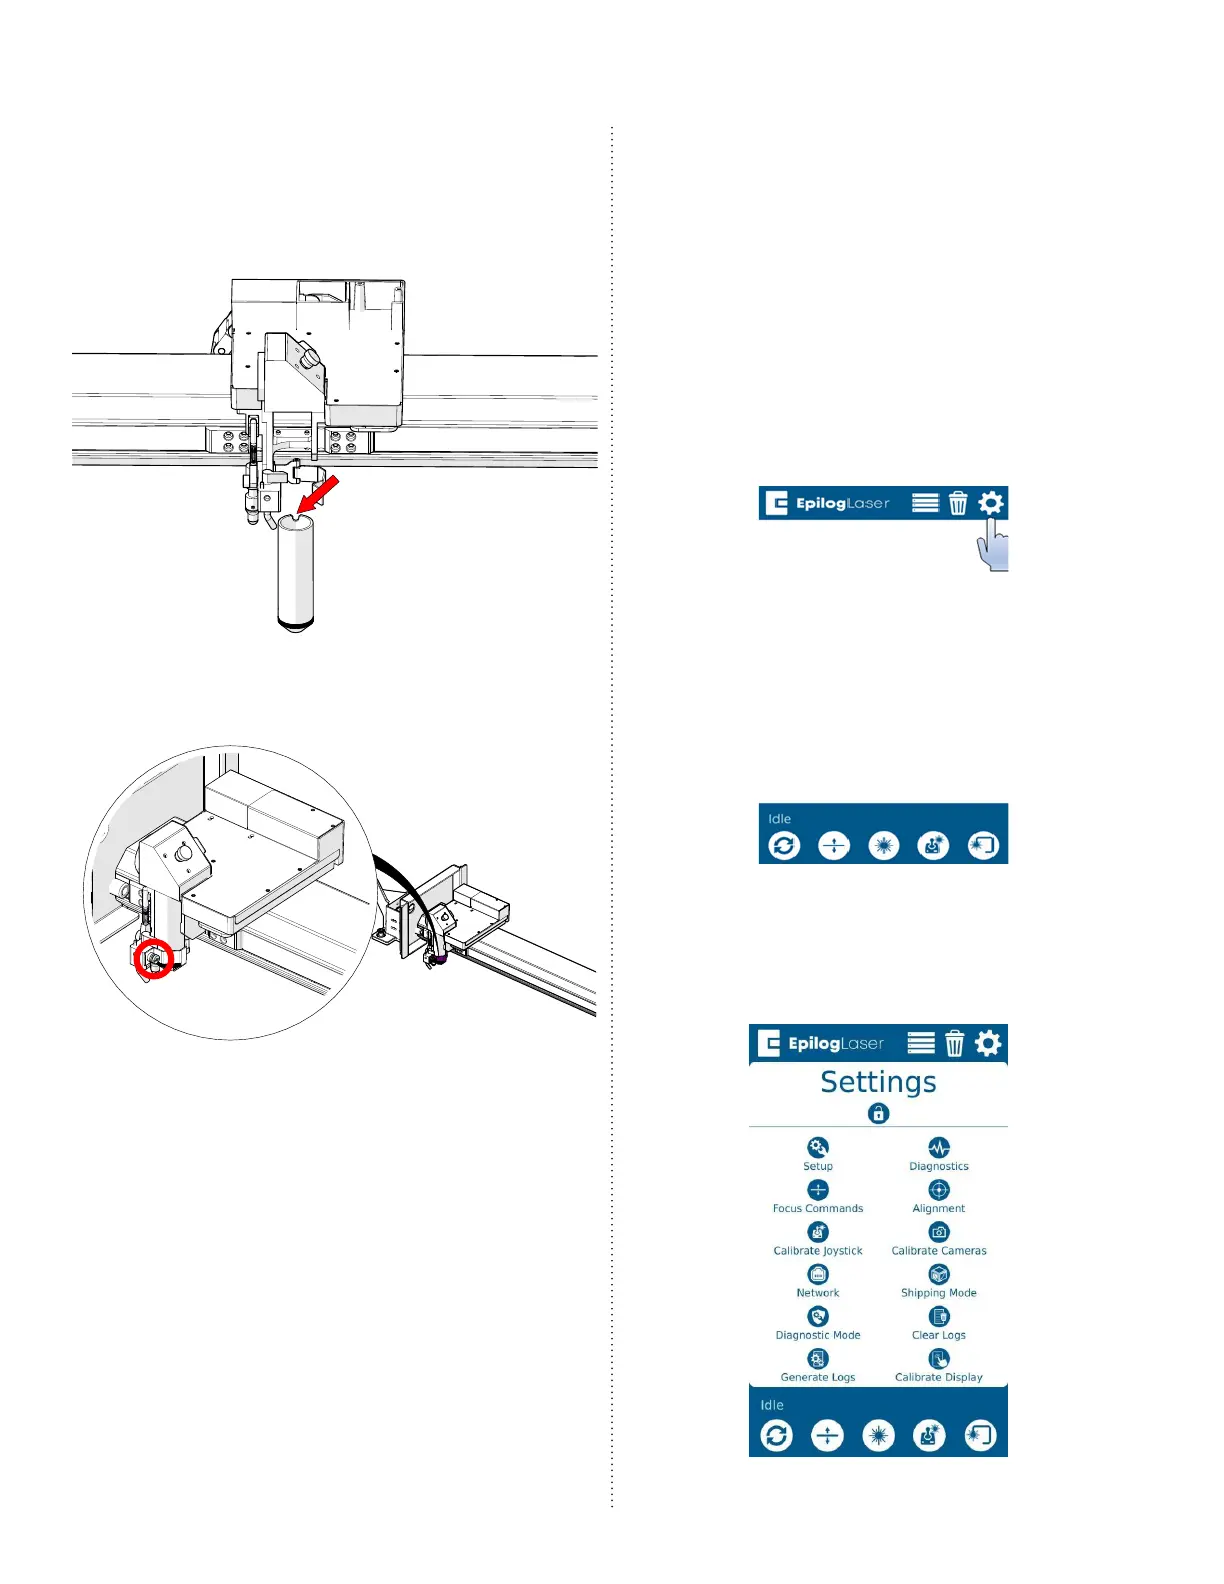
10. Position the lens tube in the lens
assembly, ensuring that the notch in
the tube faces the rear of the engraver.
Make sure to hold the lens tube aer
inserting to ensure that it does not fall:
11. Tighten the Phillips screw on the lens
tube retaining collar:
12. Replace both the le and right panels
of the engraver.
13. Reconnect the engraver to power and
boot up the machine, ensuring proper
boot sequence.
Updates and Calibrations
The x-axis assembly contains many
components, including circuit boards,
cameras, and a motor. Further procedures
are required.
Updating the Carriage Camera
1. On the display, press the gear icon to
enter the Settings menu:
2. Press and hold the word “Settings” that
appears at the touch of the touchpad
to gain access to the Advanced
Settings menu:
 Loading...


