EasyManuals Logo

Epilog Laser MINI User Manual

Epilog Laser MINI
17 pages
To Next Page IconTo Next Page
To Previous Page IconTo Previous Page
Page #6 background imageLoading...
Page #6 background image
Epilog Laser Tube Upgrade
Mini / Helix
Revision Date: 9/27/2013 pg. 6 of 17
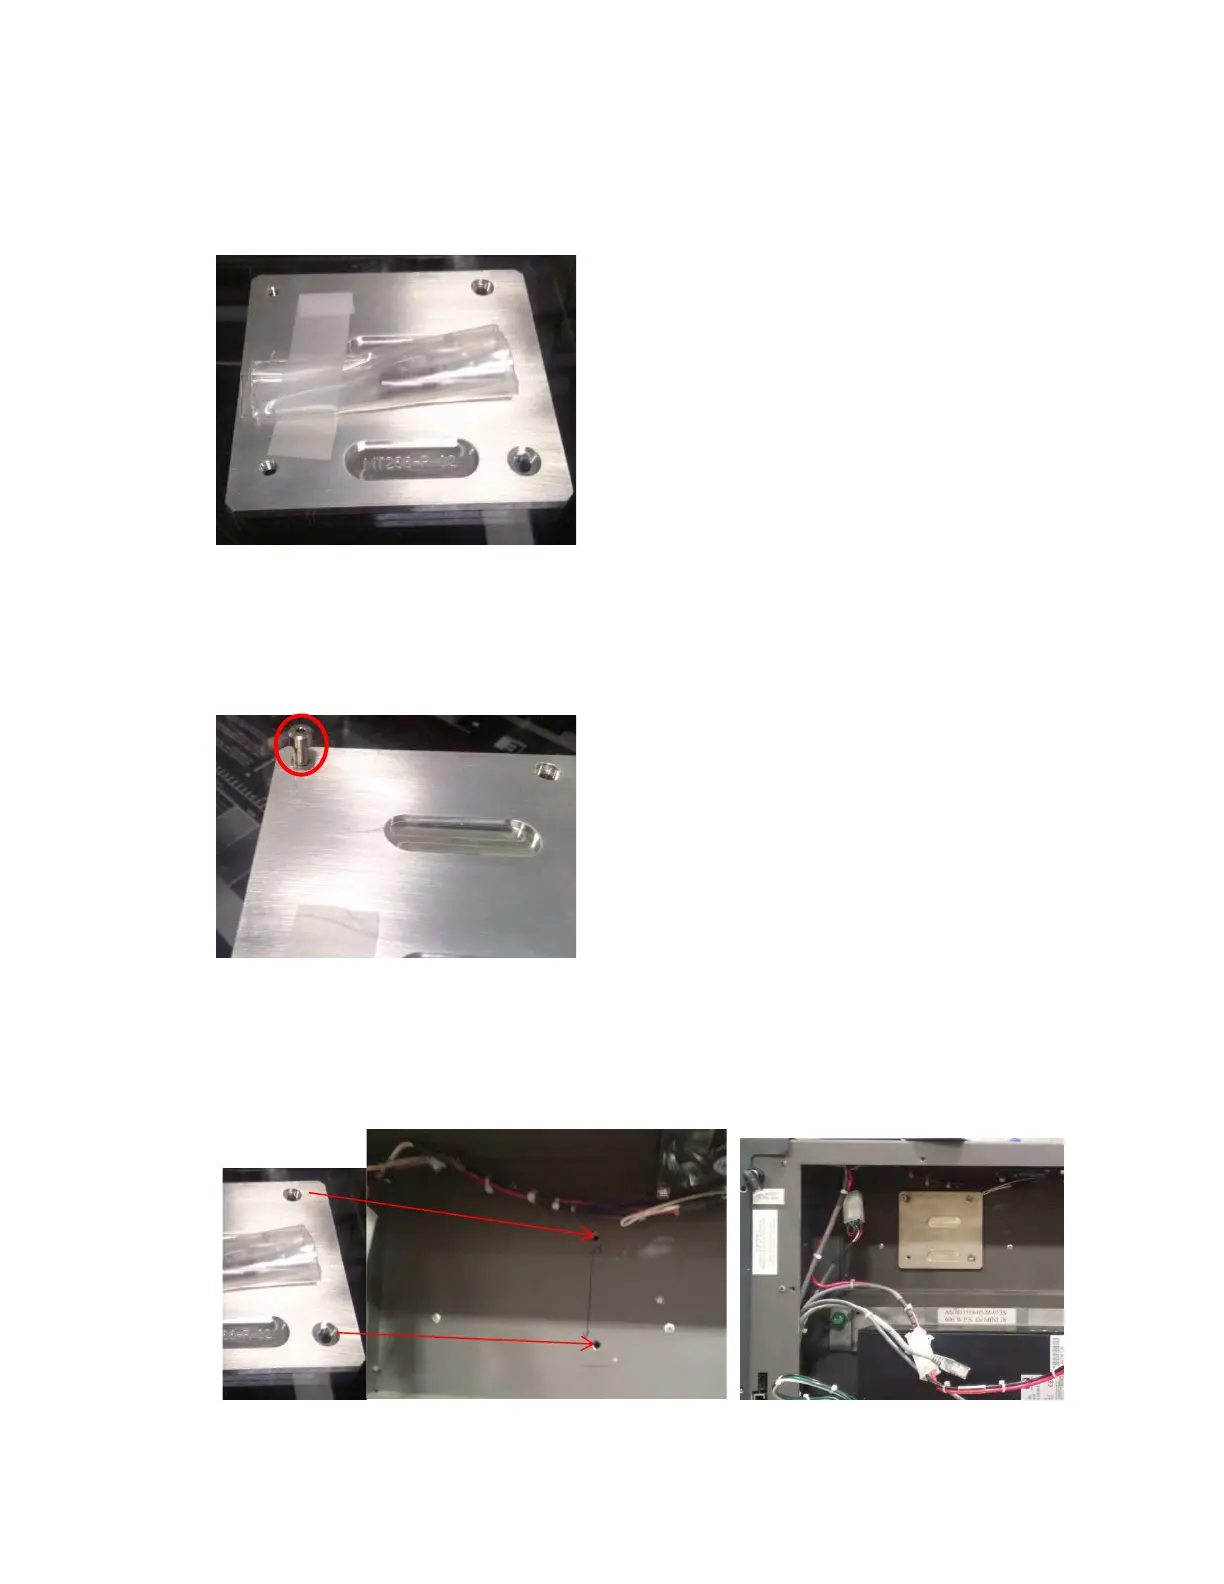
Step 3:
Locate the MT266 adapter bracket that came with the upgrade kit.
Step 4:
Install the new Shoulder Screw and washer (that came packaged with the
MT266) into the top left hand corner of the MT266 Adapter Bracket.
Step 5:
Align the two screw holes on the right hand side of the adapter bracket, with the
screw holes on the engraver. Fasten with the provided screws.

Other manuals for Epilog Laser MINI

Questions and Answers:

Question and Answer IconNeed help?

Do you have a question about the Epilog Laser MINI and is the answer not in the manual?

Epilog Laser MINI Specifications

General IconGeneral
CoolingAir-cooled
Laser Wattage Options30, 40, 50 or 60 watts CO2
Laser TypeCO2
ResolutionUp to 1200 DPI
ConnectivityUSB
Software CompatibilityCorelDRAW, Adobe Illustrator, AutoCAD
Operating ModesRaster, Vector
Supported File FormatsAI, BMP, DXF, EPS, GIF, JPG, PNG
Power Requirements110V or 220V

Related product manuals