This document is an installation manual for Episode® architectural speakers, providing instructions for setup, connection, securing, and fine-tuning. The manual covers various speaker models, including in-ceiling (IC) and in-wall (IW) speakers, as well as LCR (Left, Center, Right) models, and offers guidance for both new and existing construction installations.
Function Description:
Episode® architectural speakers are designed to deliver high-quality sound for various audio setups, integrating seamlessly into residential or commercial environments by being installed directly into walls or ceilings. The speakers are engineered for real-life sound reproduction, offering flexibility in sound adjustment to suit different room acoustics and user preferences. They feature robust mounting mechanisms for secure installation and adjustable tweeters for directing sound.
Important Technical Specifications:
Cutout Dimensions and Mounting Depth:
The manual provides detailed dimensions for various speaker models, essential for precise installation.
-
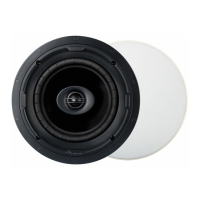
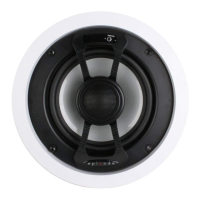
In-Ceiling Speakers:
- IC-6* (For POINT-6 models, refer to IC-8 cutout dimensions):
- Cutout Dimension: 8.3"
- Mounting Depth (No Enclosure): 3.6"
- Mounting Depth (With Enclosure): 6.2"
- IC-8:
- Cutout Dimension: 9.7"
- Mounting Depth (No Enclosure): 3.7"
- Mounting Depth (With Enclosure): 6.6"
-
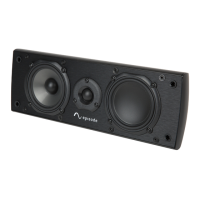
In-Wall Speakers:
- IW-6:
- Cutout Dimension: 11.7" x 7.6"
- Mounting Depth (No Enclosure): 3.6"
- Mounting Depth (With Enclosure): 3.8"
- IW-8:
- Cutout Dimension: 13.7" x 9.0"
- Mounting Depth (No Enclosure): 3.6"
- Mounting Depth (With Enclosure): 3.8"
- LCR:
- Cutout Dimension: 14.4" x 7.6"
- Mounting Depth (No Enclosure): 3.6"
- Mounting Depth (With Enclosure): 3.8"
Wiring Configurations:
The speakers support both single voice coil and dual voice coil wiring.
- Single Voice Coil: Connects to a single amplifier output with positive (+) and negative (-) terminals.
- Dual Voice Coil: Connects to two amplifier outputs (Amp Left and Amp Right), each with its own positive (+) and negative (-) terminals. This configuration is typically used for speakers designed to handle stereo signals from a single unit.
The manual illustrates different tweeter types with specific adjustment capabilities:
- Ball & Socket Tweeter:
- Rotate: -180° to +180°
- Tilt: ±12°
- Precision Tweeter:
- Rotate: -180° to +180°
- Tilt: ±15°
- Rotate Only Tweeter:
- Tilt Only Tweeter:
- Tilt: 12° Left to 12° Right
Sound Adjustment Switches:
- Treble/Bass Switch: Adjusts sound response by ±1.5dB. Default setting is +1.5dB.
- Bipole/Dipole Switch (Surround Only): Selects between BI (in-phase output for direct sound) and DI (out-of-phase output for reverberating sound).
- Dialogue Enhancement Switch (LCR Only): Selects ON for enhanced dialogue and clear speech, or OFF.
Usage Features:
Installation:
- New Construction: Utilizes Episode® pre-construction brackets (sold separately) for precise speaker placement before drywall installation. Wiring should be secured within reach of the bracket.
- Existing Construction: Requires cutting a cutout in the drywall using the supplied template. The manual suggests a two-step cutting process:
- Cut drywall at a 45° angle to allow for easy "plugging" if an obstruction is encountered.
- If no obstructions, cut drywall at a 90° angle.
- Insert the speaker into the cutout.
Connection:
- Strip approximately 1/4" of insulation from each conductor.
- Insert conductors into speaker terminals, ensuring no wire strands protrude.
- Maintain proper polarity (+ to + and – to –) for all speakers to the amplifier.
- Specific wiring instructions are provided for dual voice coil speakers.
Securing:
- Engage and Tighten:
- Insert the speaker into the opening.
- Turn each dog screw one-quarter turn clockwise to engage the spring mechanism. This holds the speaker in place, allowing hands-free tightening.
- Continue tightening until resistance is felt, but do not overtighten. A low-torque setting is recommended if using a drill.
- Disengage and Remove:
- Important: Dogs must be engaged and tightened before attempting removal.
- Turn each dog screw counter-clockwise until the dog returns to its original parked position.
- Once disengaged, the speaker can be easily removed from the ceiling or wall.
Fine Tuning:
- Adjusting the Tweeter:
- Remove the protective installation cover by pulling up on the perforated hole.
- Depending on the speaker model, the tweeter can be tilted and/or rotated to direct sound as desired.
- Important: Do not turn any tweeter past 360° to prevent damage.
- Adjusting the Sound Switches:
- Switches on the speaker face allow for sound adjustments.
- Treble/Bass: For furnished rooms, setting to '+' (1.5dB increase) is recommended. For more open spaces, setting to '–' (1.5dB decrease) is recommended.
- Bipole/Dipole (Surround Only): For spacious rooms with balanced speaker arrangement, 'BI' (in-phase) is recommended for direct sound. For varied arrangements, 'DI' (out-of-phase) is recommended for reverberating sound.
- Dialogue Enhancement (LCR Only): 'ON' enhances dialogue and speech clarity.
Maintenance Features:
Lifetime Warranty:
- Episode® speakers come with a Lifetime Warranty covering parts and labor for defects in material or workmanship under normal use.
- The warranty does not cover products that have been abused, modified, or disassembled.
- Products requiring repair under warranty must be returned to SnapAV or a designated service center with prior notification and an assigned Return Authorization (RA) number.
Technical Support:
- Direct technical support is available via phone (866-838-5052) or e-mail (techsupport@snapav.com).
- Users are encouraged to visit SnapAV.com for additional support documentation, system design ideas, and wiring recommendations.