3) Push ink button on printer to move head into ink change position, then UNPLUG printer from power.
4) Remove carriage lid and cartridges from printer. You must break one of the side tabs to remove lid.
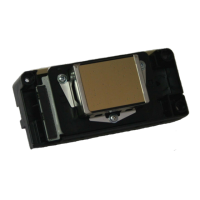
5) Piezography ink users: Clean color ink off points in print head. Using Q-tips and PiezoFlush or warm
distilled water, wipe each point carefully in a circular motion with a slightly damp Q-tip then absorb any
liquid using dry Q-tips. This is to avoid color staining in your CIS dampers and B&W prints. Note:
photos below are not specific to the 1400, but this cleaning procedure is the same for all desktop printer
models.
6) Install chips into cartridge carriage with supports (shown below). Make sure to push chips and
supports down all the way for tight connection with sensors.
11/5/09 © Vermont PhotoInkjet Page 2 of 6