
A
andrew70Sep 8, 2025
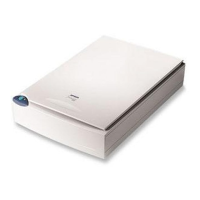
What to do if the main board is defective in my Epson 610?
- KKatherine SolisSep 8, 2025
If the main board of your Epson Scanner is defective, replace it.
What to do if the main board is defective in my Epson 610?
If the main board of your Epson Scanner is defective, replace it.
What to do if CN5 on the main board is disconnected in my Epson 610?
If CN5 on the main board of your Epson Scanner is disconnected, connect CN5 on the main board properly.
What to do if CN1 or CN2 on the CCD sensor board is disconnected in my Epson 610 Scanner?
If CN1 or CN2 on the CCD sensor board of your Epson Scanner is disconnected, connect CN1 or CN2 on the CCD sensor board properly.
What to do if the connector for the lamp is not properly connected to the inverter board in my Epson Scanner?
If the connector for the lamp is not properly connected to the inverter board in your Epson Scanner, connect the connector properly.
What to do if the lamp is defective in my Epson 610?
If the lamp in your Epson Scanner is defective, replace it.
What to do if the inverter board is defective in my Epson 610?
If the inverter board in your Epson Scanner is defective, replace it.
Details the copyright information for the service manual.
Signals a precaution that, if ignored, could result in serious or fatal personal injury.
Signals a precaution that, if ignored, could result in damage to equipment.
Details the revision history of the manual.
Lists the major features of the EPSON color image scanner Perfection 610.
Details general, electrical, EMC, environmental, reliability, and operating specifications.
Provides specifications for the USB interface, including connector pin assignments.
Lists the command codes supported by the scanner for control and operation.
Explains how the scanner lamp indicates different operating conditions.
Describes error types, causes, and remedies using the lamp indicator.
Shows the dimensions and origin point of the scanner's scanning area.
Explains the functions and operating principles of the scanner's engine, including carriage and drive mechanisms.
Details the power supply circuit board specifications and protection circuits.
Describes the CPU and major ICs managing signal correction, image processing, and control functions.
Introduces the troubleshooting procedures covered in this chapter.
Explains how the scanner detects abnormalities and indicates errors using the lamp.
Lists common scanner problems, their causes, and references to detailed resolution tables.
Safety warnings and handling advice before disassembling or assembling the scanner.
Lists necessary tools with part numbers for servicing the scanner.
Details screw specifications and appearances used in the scanner for assembly.
Step-by-step instructions for taking the scanner apart, starting with the carriage lock.
States that the scanner requires no adjustment after part replacement or servicing.
Provides instructions for cleaning outer cases and the document glass to maintain image quality.
Details recommended grease types and lubrication points for the carriage unit mechanism.
Shows how different scanner components are interconnected through various boards.
Summarizes connector information, including pin numbers and destinations for boards.
Lists all parts with reference numbers and provides exploded diagrams for assembly/disassembly.
| Scanner Type | Flatbed |
|---|---|
| Color Depth | 48-bit |
| Grayscale Depth | 16-bit |
| Maximum Document Size | 8.5 x 11.7 inches |
| Interface | USB 2.0 |
| Connectivity | USB |