Image Shape
71
gg Related Links
• "Correcting the Image Shape with Quick Corner" p.64
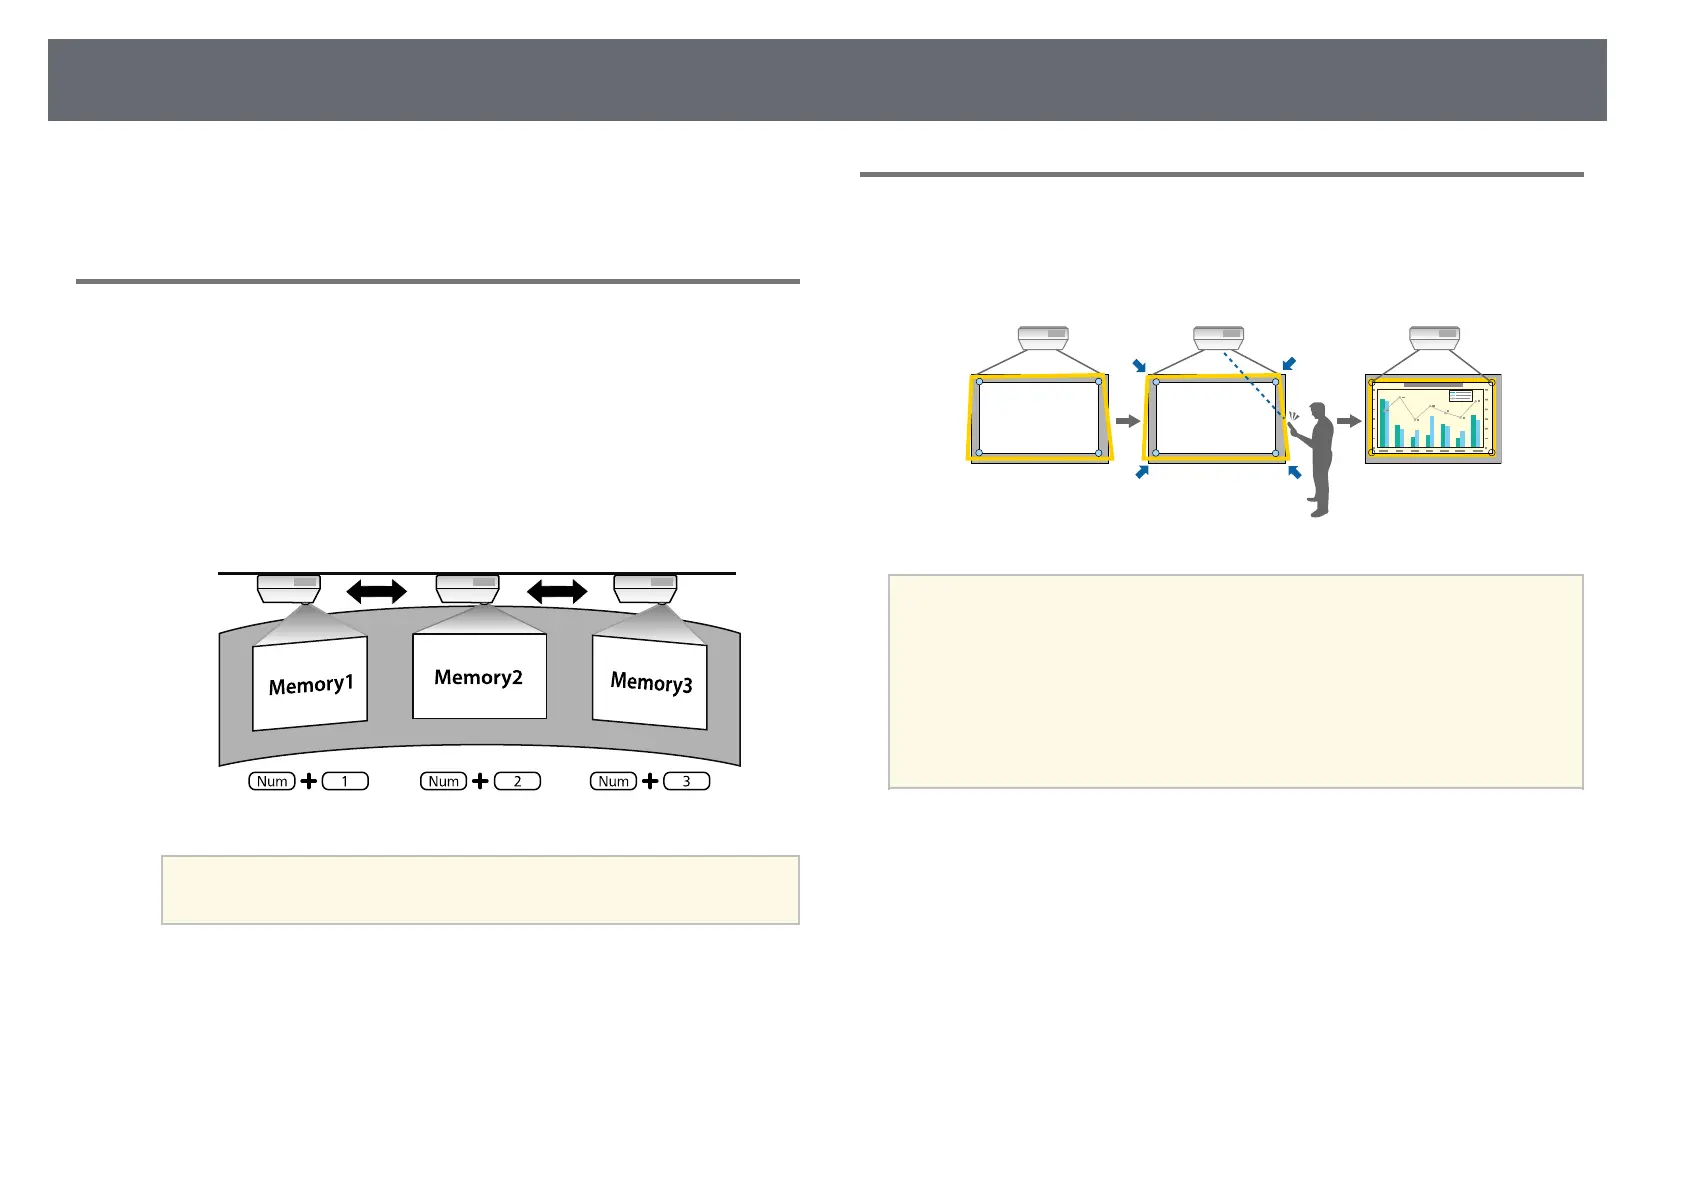
Loading Image Shape Setting from Memory
You can load the image shape settings you selected and saved to the
projector's memory and apply them to the current image.
a
Turn on the projector and display an image.
b
Hold down the [Num] button on the remote control, and then press
the numeric button (1, 2, or 3) that matches the number of the saved
setting.
a
The illustration above is only an example.
c
When you have finished loading the settings, follow the on-screen
instructions.
Correcting Image Shape with Corner Markers
If you have installed corner markers on the projection surface, you can use the
projector's Auto Screen Adjustment setting to correct the shape of an image
automatically (EB‑735Fi/EB‑725Wi).
a
• The Auto Screen Adjustment may not work properly depending on
the surface of the projected screen. You can perform the Auto Screen
Adjustment in the following situations:
• The screen surface is flat.
• The projection surface is not patterned or dirty and there are no
other obstructions on the screen surface.
• Before performing the Auto Screen Adjustment, set the screen type
setting. The adjustments reset when you change the Screen Type.
Auto Screen Adjustment can correct projected image distortion in these
conditions:
• Screen size is 100 inches or less
• Projection angle is within about 1° of squarely facing the projection surface
in all directions
a
Turn on the projector and display an image.