6
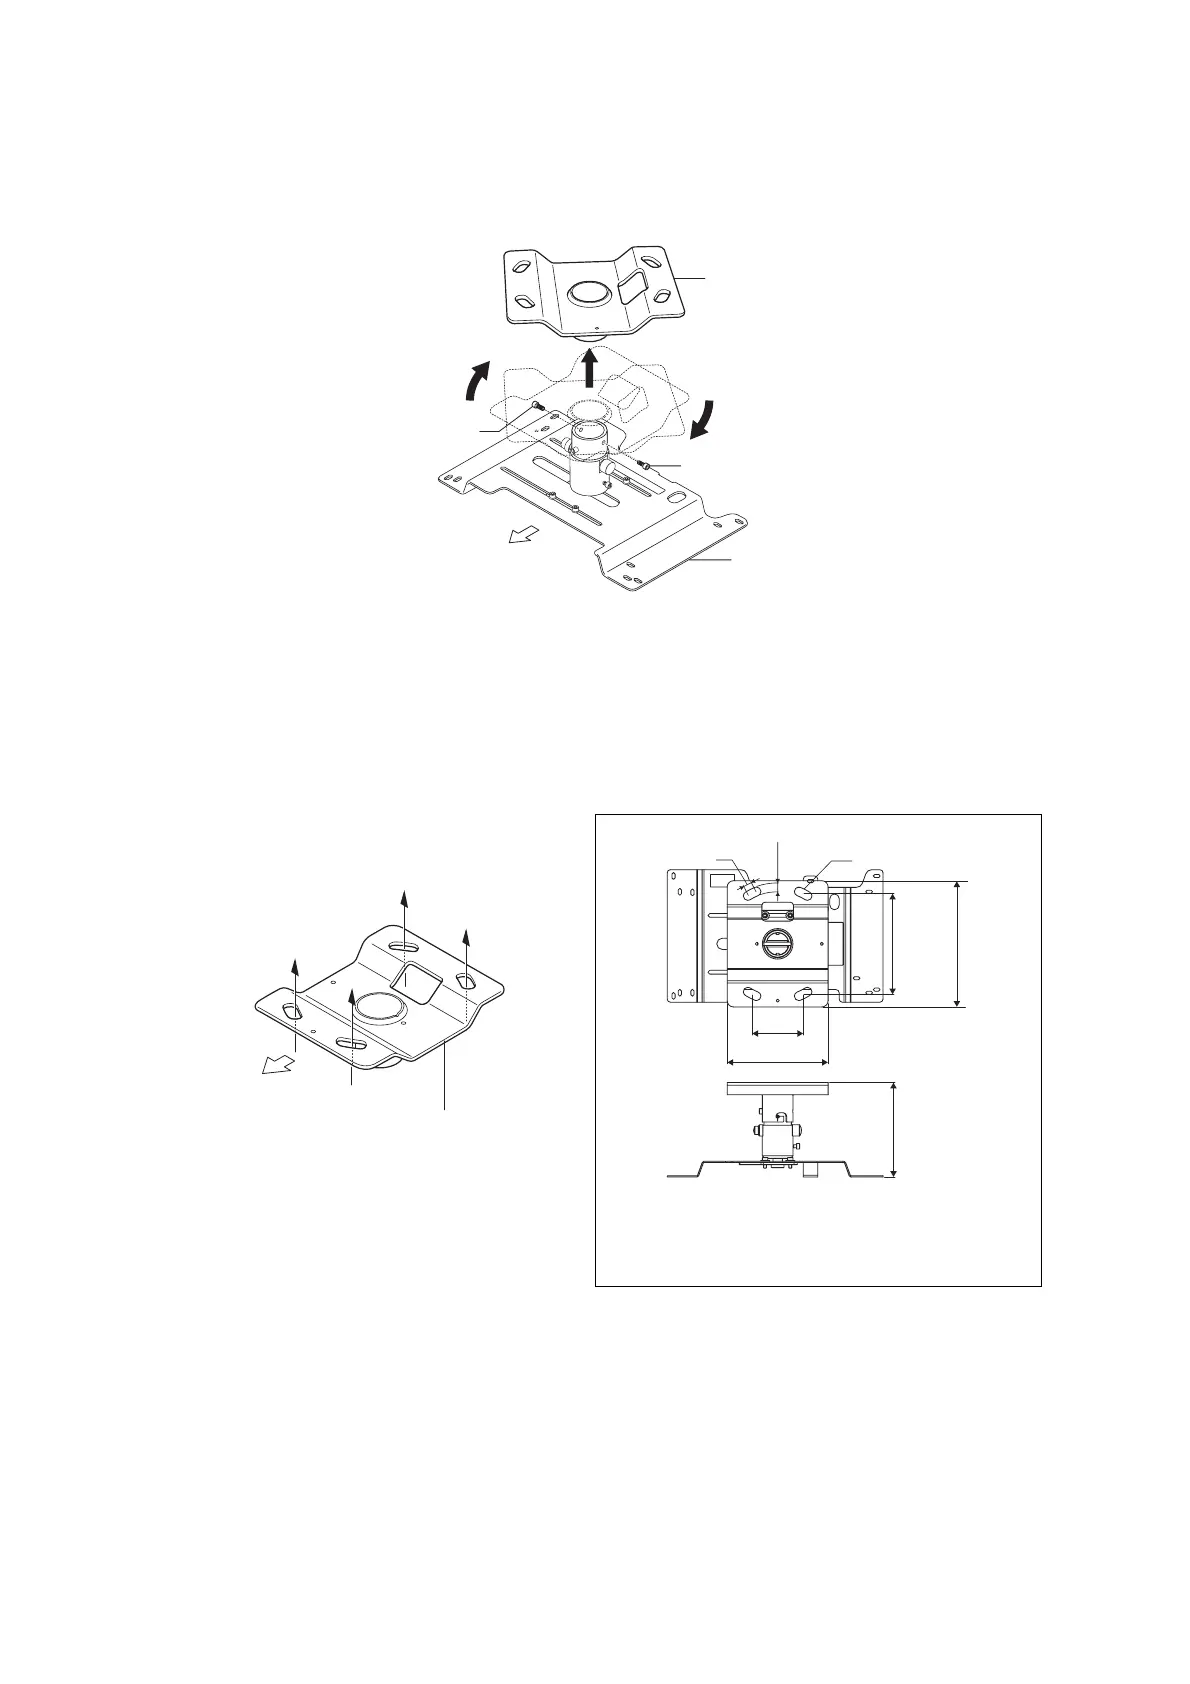
(2) Remove the two plate securing screws with the hexagon wrench and
remove the ceiling plate from the projector plate.
Rotate the ceiling plate about 30 degrees to the right and lift it.
2-2 Fitting the Ceiling Plate to the Ceiling
(1) Secure the ceiling plate to the ceiling by putting screws or nuts through
the four oblong holes.
• When installing the ceiling mount on a concrete ceiling, use anchors and bolts.
→ For details, see "3 Installing on a Concrete Ceiling" on page 10.
• To adjust the height of where the projector is installed, purchase a separate
extension pipe with height adjustment function.
→ For details, see "4 Extension Pipe" on page 11.
Plate securing screw
Ceiling plate
Projector lens side
Plate securing screw
Projector plate
Ceiling contact area dimensions (mm)
16
14
Oblong holes
159 200
81
160
150
• The illustration shows ELPMB22.
ELPMB23 has the same dimensions.
Projector lens
side
Ceiling plate
 Loading...