❏ For maximum ink efficiency, only remove an ink
cartridge when you are ready to replace it. Ink
cartridges with low ink status may not be used when
reinserted.
❏ Do not open the ink cartridge package until you are
ready to install it in the product. The cartridge is
vacuum packed to maintain its reliability. If you
leave a cartridge unpacked for a long time before
using it, normal printing may not be possible.
❏ Install all ink cartridges; otherwise, you cannot
print.
Replacing an ink cartridge
Note:
❏ Make sure that the CD/DVD tray is not inserted in
the product and that the P light is on, but not
flashing.
❏ Do not shake cartridges after opening the package,
as they may leak.
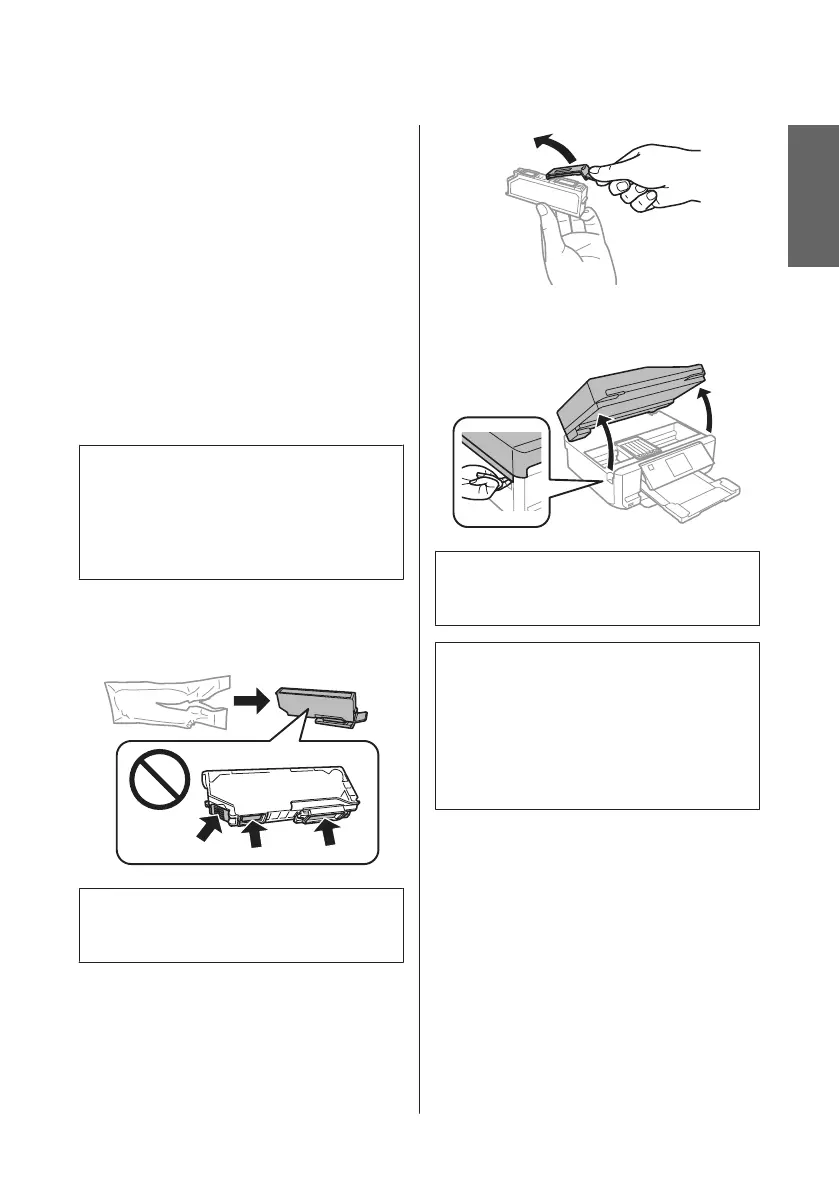
A
Remove the ink cartridge from its package and
then remove the cap from the bottom of the
cartridge.
Note:
Do not touch the sections shown in the illustration. Doing
so may prevent normal operation and printing.
B
Open the scanner unit. The ink cartridge holder
moves to the ink cartridge replacement position.
c
Important:
Do not touch the flat white cable connected to the
ink cartridge holder.
Note:
❏ If the ink cartridge holder does not move to the ink
cartridge replacement position, follow the
instruction below.
Home > Setup > Maintenance > Ink Cartridge
Replacement
❏ Do not move the ink cartridge holder by hand;
otherwise, you may damage the product.
English
Basic Guide
Replacing Ink Cartridges
19

 Loading...