EasyManua.ls Logo

Epson Perfection 2480 User Manual

Epson Perfection 2480
8 pages
To Next Page IconTo Next Page
Page #1 background imageLoading...
Page #1 background image
Epson Perfection 2480 Photo
Epson Perfection 2580 Photo
Unpack Your Scanner
1 Make sure you have all the parts shown below for your Epson scanner:
2 Remove all the packing tape, but leave the large stickers in place until
you are instructed to remove them.
Note: The illustrations on this sheet show the Perfection 2580 Photo scanner,
but the instructions are the same for the Perfection 2480 Photo except
where noted.
Install the Software
Wait! You must install your software before connecting the scanner to
your computer. The installation process may take several minutes. Be sure
to close all open programs and turn off any virus protection programs.
Note: The software works with Windows
®
98SE, Me, 2000, and XP, and
Macintosh
®
OS 9.1 to 9.2.2 and OS X 10.2.x and 10.3.x.
1 Insert the scanner software CD-ROM in the CD-ROM or DVD drive. The
installer starts automatically in Windows; on a Macintosh, the EPSON
folder opens.
If it doesn’t start or the folder doesn’t open, do the following:
Windows XP: Click Start, click My Computer, then
double-click Epson.
Windows 98, Me, and 2000: Double-click My Computer, then
double-click Epson.
Macintosh: Double-click the Epson CD-ROM icon.
2 If youre using Mac
®
OS X, double-click the Mac OS X folder, then
double-click the Epson icon.
If youre using Mac OS 9.x, double-click the Epson icon.
3 Click Continue, then read the license agreement and click Agree.
4 At the Software Installation screen, click Install. Enter your Macintosh
Administrator name and password as necessary during installation.
5 Follow the on-screen instructions to install each program. Click Next or
Finish (Windows) or Install or Quit (Macintosh) as needed. Note that
Epson Smart Panel™ installs in several steps.
Note: If youre installing on Macintosh OS 9.x, you may see a prompt to
update your Carbon Library. After installing it and restarting your system,
double-click the Epson icon, then click Install to continue.
6 At the end of the installation, click Exit.
7 At the Product Registration screen, register your scanner as instructed.
Restoring Color in Photos
If you have faded photos, slides, or
negatives, you can use the Color
Restoration setting in your software to
bring them back to life.
Start Epson Scan and select Home
Mode or Professional Mode in the
Mode box at the top of the screen.
Select your settings and click
the Preview button at the
bottom of the screen.
Select the Color Restoration
checkbox. (In Home Mode,
click the Image Adjustments
button first. In Professional
Mode, scroll to the bottom of
the screen.)
For complete steps, see your
on-screen Reference Guide.
Note: You can also use the
Color Restoration feature in
the Epson Smart Panel copy
utility. See the on-screen help
in the copy utility for details.
®®
®®
Scanner
CD-ROM with Epson Scan
driver, software, and
on-screen manuals
USB cable
Film and slide
holder
AC adapter and
power cord
Perfection 2480 Photo
CD-ROM with Epson Scan
driver, software, and
on-screen manuals
USB cable
Scanner
Slide holder
AC adapter and
power cord
Perfection 2580 Photo
IMPORTANT!
Leave the sticker
in place until you
are instructed to
remove it
Start Here
4048777-00 XXX

Other manuals for Epson Perfection 2480

Question and Answer IconNeed help?

Do you have a question about the Epson Perfection 2480 and is the answer not in the manual?

Epson Perfection 2480 Specifications

General IconGeneral
Optical Resolution2400 dpi
Max Document Size8.5 x 11.7 inches
InterfaceUSB 2.0
Scanner TypeFlatbed
Maximum Resolution12800 x 12800 dpi
Color Depth48-bit
Light SourceCold cathode fluorescent lamp
CompatibilityWindows, Mac

Summary

Unpack Your Scanner

Perfection 2480 Photo Parts

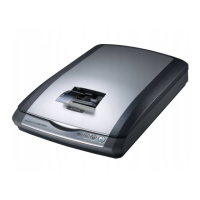
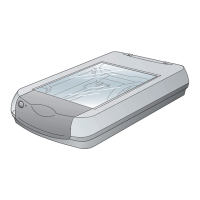
Lists components included with the Epson Perfection 2480 Photo scanner.

Perfection 2580 Photo Parts

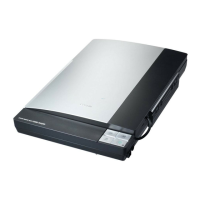
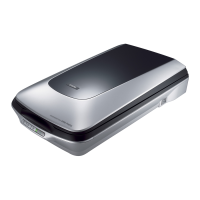
Lists components included with the Epson Perfection 2580 Photo scanner.

Packing Tape and Stickers Handling

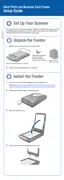
Instructions on handling packing tape and important stickers during unpacking.

Install the Software

Software Installation Steps

Detailed steps for installing software on various operating systems and final setup procedures.

Connect the Scanner

Scanner Connection Procedure

Final connection steps, status indicators, and post-connection actions for the scanner.

Scanner Basics

Performing Your First Scan

Step-by-step guide to performing an initial scan using the Start button and Epson Smart Panel.

Saving Scanned Images

Instructions for selecting save location, file name, and format for scanned images.

Using Scanner Buttons

Overview of scanner buttons and their functions for initiating scans.

Restoring Color in Photos

Guide to using software features for restoring color in faded photos, slides, or negatives.

Scanning Film or Slides

Perfection 2480 Photo Film/Slide Scanning

Procedure for scanning film negatives and slides using the Perfection 2480 Photo.

Perfection 2580 Photo 35mm Negative Scanning

Instructions for scanning 35mm negatives using the automatic film loader on the Perfection 2580 Photo.

Scanning a Slide

Procedure for scanning a 35mm slide using the scanner glass on compatible models.

Troubleshooting Common Problems

Interpreting Scanner Status Lights

Explanation of scanner status light colors and their meanings.

Resolving Installation and Scanning Issues

Solutions for common problems like New Hardware Wizard, scanning errors, or inability to scan film.

Questions and Support

Accessing On-Screen Guides and Help

Guidance on using the on-screen reference guide and software help features.

Epson Technical Support Resources

Information on how to contact Epson support via web, automated phone, or customer service.

Software Support Contacts

Contact details for technical support for included software applications like Epson Scan and Smart Panel.

Related product manuals