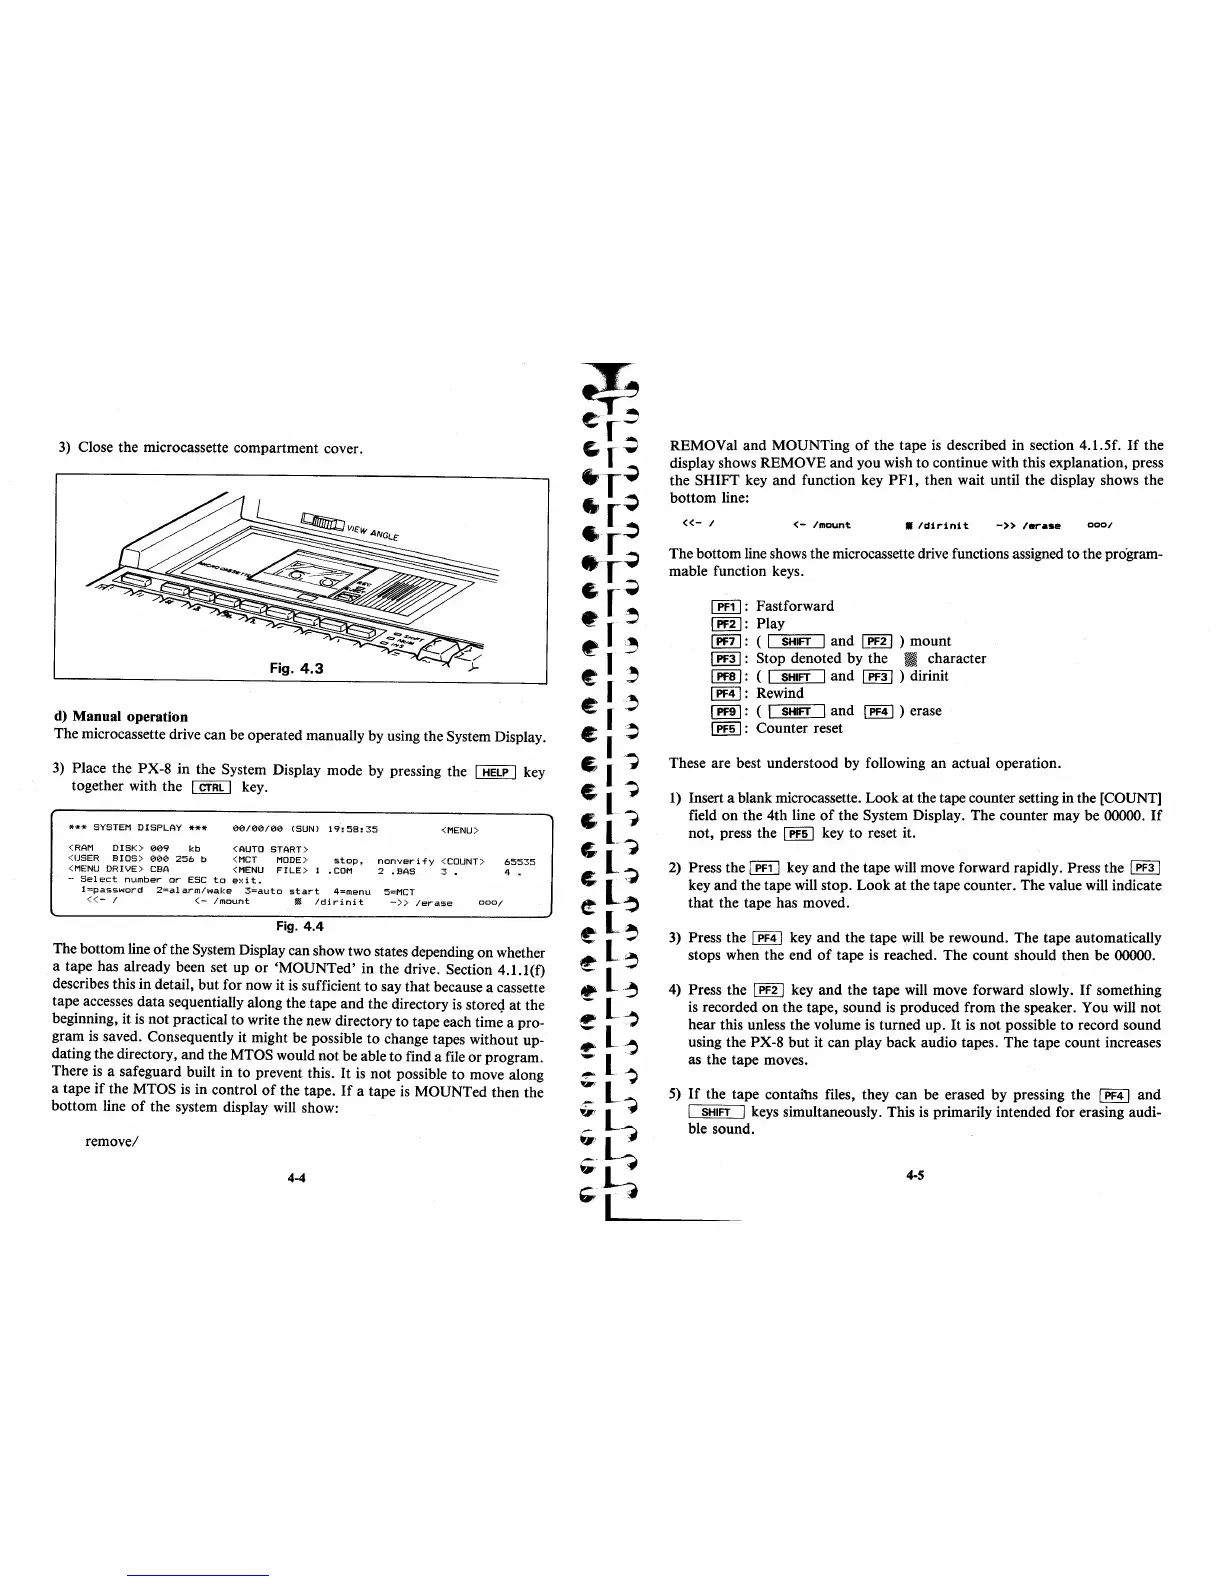
3)
Close the microcassette compartment cover.
Fig.
4.3
d)
Manual operation
The microcassette drive can be operated manually by using the System Display.
3)
Place the PX-8 in the System Display mode by pressing the 1
HELP
I key
together with the
1
CTRL
1 key.
***
SYSTEM
DISPLAY ***
<RAM
DISK)
009
kb
<USER
BIOS)
000
256
b
<MENU
DRIVE>
CBA
00/00/00
(SUN)
19,58,35
<MENU)
(AUTO
START>
(MCT
MODE>
stop,
nonver-ify
<COUNT>
65535
(MENU
FILE>
1
.COM
2 .BAS
3.
4
-
Select
number
or- ESC
to
exit
..
l=password
2=alarm/wake
3=auto
start
4=menu
5=MCT
«-
I
<-
Imount
fi
Idir-init
-»
ler-ase
0001
Fig.
4.4
The bottom line
of
the System Display can show two states depending on whether
a tape has already been set up or 'MOUNTed' in the drive. Section 4.1.1(f)
describes this in detail, but for now it
is
sufficient to say that because a cassette
tape accesses data sequentially along the
tape
and the directory
is
storeg at the
beginning, it
is
not practical to write the new directory to tape each time a pro-
gram
is
saved. Consequently it might be possible
to
change tapes without up-
dating the directory, and the MTOS would not be able to find a file or program.
There
is
a safeguard built in to prevent this.
It
is
not possible to move along
a tape
if
the MTOS
is
in control
of
the tape.
If
a tape
is
MOUNTed then the
bottom line
of
the system display will show:
remove/
4-4
REMOVal and MOUNTing
of
the tape
is
described in section 4.1.5f.
If
the
display shows REMOVE and you wish to continue with this explanation, press
the SHIFT key and function key PF1, then wait until the display shows the
bottom line:
«-I
<-
Imount
./dirinit
-»
lerase
0001
The bottom line shows the microcassette drive functions assigned to the program-
mable function keys.
1
PF1
I:
Fastforward
1 PF21: Play
1 PF7
I:
(
'I
"'-::S::-:H=IFT=---I
and 1
PF2
I ) mount
1 PF3 I: Stop denoted by the m character
1 PF8
I:
(I
SHIFT
I and I
PF3
I ) dirinit
I PF4 I: Rewind
I PF9 I:
(I
SHIFT
I and I PF4 I ) erase
I
PF5
I: Counter reset
These are best understood by following an actual operation.
1)
Insert a blank microcassette. Look at the tape counter setting in the [COUNT]
field
on
the 4th line
of
the System Display. The counter may be 00000.
If
not, press the I PF5 I key
to
reset it.
2) Press the
[fIT]
key and the tape
will
move forward rapidly. Press the 1
PF31
key and the tape will stop. Look
at
the tape counter. The value will indicate
that the tape has moved.
3)
Press the
[PF4J
key and the tape will be rewound. The tape automatically
stops when the end
of
tape
is
reached. The count should then be 00000.
4)
Press the 1
PF21
key and the tape will move forward slowly.
If
something
is
recorded
on
the tape, sound
is
produced from the speaker. You will not
hear this unless the volume
is
turned up.
It
is
not possible to record sound
using the PX-8 but
it
can play back audio tapes. The tape count increases
as the tape moves.
5)
If
the tape contaihs files, they can be erased by pressing the 1
PF4
I and
1
SHIFT
I keys simultaneously. This
is
primarily intended for erasing audi-
ble sound.
4-5