Do you have a question about the Epson HX-20 and is the answer not in the manual?
Instructions not to open the HX-20 unit to avoid damage and voiding warranty.
Guidance on keeping the dummy cartridge to protect the HX-20's connectors from damage.
Warning against removing the system bus cover to protect against electrical hazards.
Caution regarding the internal circuit cover, advising against self-removal to prevent damage.
Instruction to use only the specified AC adapter for charging HX-20 batteries.
Advice on battery charging limits to prevent damage and maintain battery life.
Warning against pulling paper during printer operation to prevent damage.
Guidance on connecting compatible external devices to ensure proper function and warranty.
Precautions against dropping, shaking, or improper packing of the HX-20.
Instructions for operating the HX-20 within specified humidity limits to prevent performance issues.
Guidelines for operating and storing the HX-20 within specified temperature ranges.
Steps for unboxing the HX-20, identifying included components, and retaining packing materials.
Instructions for charging the HX-20's nickel-cadmium batteries before first use for optimal performance.
Steps to prepare the built-in microprinter for operation, including loading paper and ribbon.
Detailed instructions on how to carefully remove the printer cover using finger pressure.
Procedure for loading a new roll of printer paper into the HX-20's paper compartment.
Steps to reattach the printer cover after loading paper and ribbon.
Guide on inserting the L-shaped ink ribbon cartridge into the printer compartment.
How to adjust the LCD screen's angle for optimal readability by repositioning the unit or using the adjustment knob.
Procedure to initialize the HX-20's memory and set the internal calendar clock for first-time use.
Instructions for changing the keyboard's character set using DIP switches for international users.
Instructions on how to power on the HX-20 using the ON-OFF switch.
How the HX-20 displays a menu of available jobs upon startup and how to navigate it.
Method for selecting and initiating tasks or programs listed in the HX-20's menu.
Explanation of the virtual screen concept and how the LCD acts as a window to it.
Introduction to the cursor symbol, its movement using arrow keys, and its role in text editing.
How text scrolls on the screen when the cursor reaches the edge, and using SCRN key for scrolling.
Procedure to return the cursor to the upper-left corner of the virtual screen.
Method to erase the entire virtual screen and reset the cursor using a single key.
Basic instructions for entering text, character placement, and cursor movement during typing.
Explanation of how to switch between uppercase and lowercase typing modes.
Instructions for activating numeric mode to use keys as a calculator keypad.
Method for editing existing text by overwriting characters with new input.
Procedures for deleting characters individually or in groups using the DEL key.
How to enter insert mode to add text without overwriting existing content.
Detailed explanation of using SHIFT and CAPS LOCK for case switching and text input.
Explanation of key behavior and available characters in numeric mode.
How to generate special graphic symbols using the GRPH key in uppercase mode.
Procedure to create a hard copy of the LCD screen display using the printer and function keys.
Overview of specialized function keys (PAUSE, MENU, BREAK, PF1-PF5) and their general uses.
Guide for connecting the HX-20 to external cassette recorders for data storage and retrieval.
Instructions for connecting the HX-20 to external devices via RS-232 interface, including pin assignments.
Information on connecting a bar code reader to the HX-20 via its dedicated port.
Troubleshooting steps for the issue where the HX-20 screen remains active despite the OFF switch position.
Procedure for resolving garbled menu displays, often involving re-initializing the system.
Guidance on contacting an Epson dealer for unresolved issues not covered in the manual.
Basic advice on storing the HX-20 for short periods, with no special precautions needed.
Instructions for storing the HX-20 for moderate durations, including turning it off.
Precautions for long-term storage, including charging batteries and saving data to prevent memory loss.
Technical details on the HX-20's microprocessor configuration and communication methods.
| Manufacturer | Epson |
|---|---|
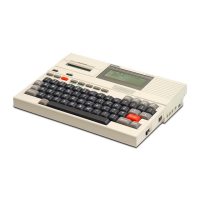
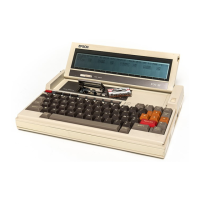
| Model | HX-20 |
| Category | Laptop |
| Release Year | 1981 |
| CPU | Hitachi 6301 |
| CPU Speed | 0.614 MHz |
| ROM | 32 KB |
| RAM | 16 KB |
| Storage | Microcassette |
| Battery | Ni-Cd |
| Battery Life | 50 hours |
| Weight | 1.6 kg |
| Power | AC adapter |
| Ports | RS-232C |