7)
Finally return the silver coloured flap to its original position and replace
the outer plastic cover.
8)
Turn the power back on.
9)
If
you are on the MENU page, press the 1 ESC 1 key to go
to
the
CP
1M
com-
mand line. From the
CP
1M
command line carry out a warm boot by press-
ing
1
CTRL
1-
[g
or the 1
STOP
1 key.
10)
The programs can be loaded from drive
B:
if
the ROM has been placed
in ROM socket
1,
and from drive C:
if
placed into ROM socket 2. The
assignment
of
the sockets to different drives, can be changed using the CON-
FIG
program described in Chapter
3.
<!>
WARNING:
. Only pick up the
ROM
by the plastic
carrier.
Do not touch the metal
pins
of
the
ROM
with
your fingers. This
can
cause
the pins to
cor-
rode,
and could
also
destroy the program contained
in
the ROM.
b) Using the ROM as a disk to contain data
or
BASIC programs.
Some application programs may use data which
is
provided in ROM form. The
manual which comes with the program will describe how
to
use this data. The
program will have a command
or
specifically prompt you
to
change the ROM.
Alternatively the manual may tell you
to
change the ROM in order to run the
BASIC program.
If
the program
is
a BASIC program you can use it from ROM
as follows:
1)
When you have loaded BASIC, switch the computer
off
in the continue
mode by switching the power
off
while pressing the 1
CTRL
I key.
2) Remove the BASIC ROM, and insert the program ROM as in steps 4 to
7
of
the description
of
changing the ROM.
3)
Switch the power back on.
4) From the BASIC command line type the RESET command followed by
the
[RffiTFfN]
key.
5)
You can now load the program
or
data from the ROM, treating it as any
other drive.
4-18
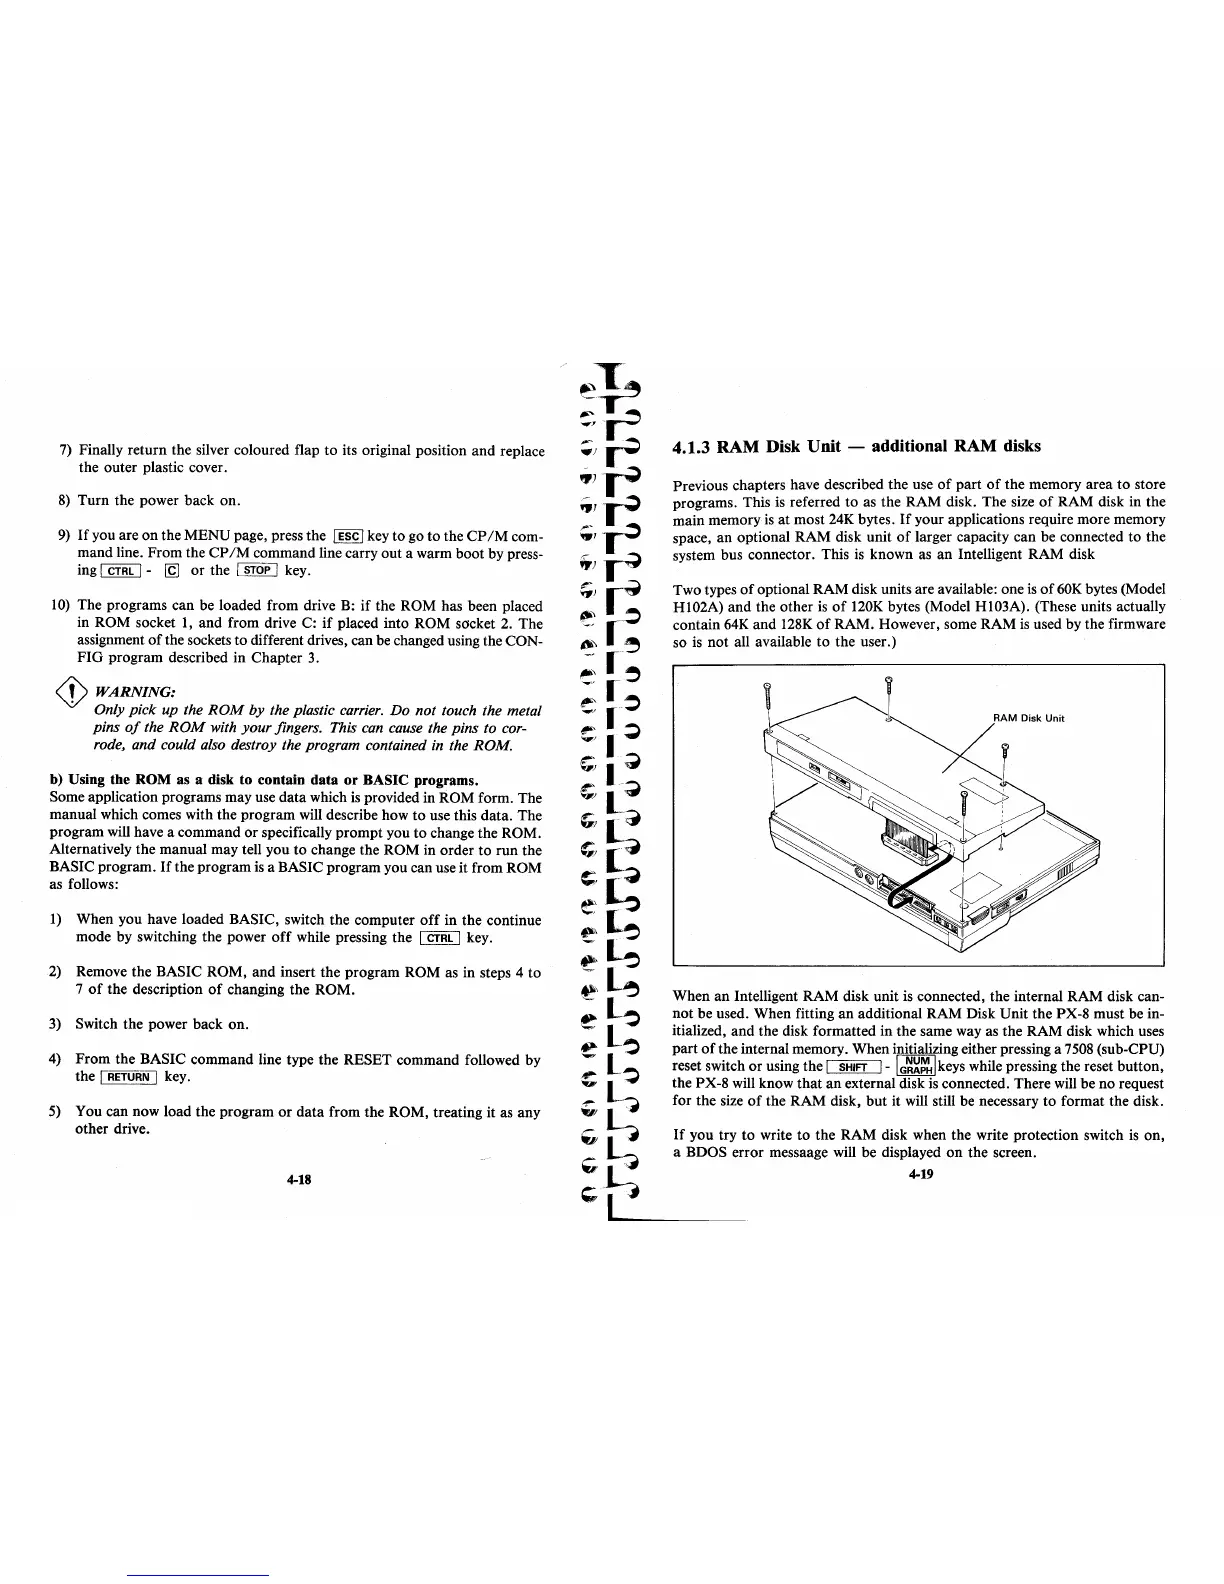
4.1.3
RAM
Disk Unit - additional
RAM
disks
Previous chapters have described the use
of
part
of
the memory area
to
store
programs. This
is
referred to as the RAM disk. The size
of
RAM disk in the
main memory
is
at
most
24K
bytes.
If
your applications require more memory
space,
an
optional RAM disk unit
of
larger capacity can be connected to the
system bus connector. This
is
known as an Intelligent RAM disk
Two types
of
optional RAM disk units are available: one
is
of
60K
bytes (Model
HI02A) and the other
is
of
120K bytes (Model HI03A). (These units actually
contain
64K
and
128K
of
RAM. However, some RAM
is
used by the firmware
so
is
not all available to the user.)
When an Intelligent RAM disk unit
is
connected, the internal RAM disk can-
not be used. When fitting an additional RAM Disk Unit the PX-8 must be in-
itialized, and the disk formatted in the same way as the RAM disk which uses
part
of
the internal memory. When initializing either pressing a
7508
(sub-CPU)
reset switch or using the
I
SHIFT
1-
IG~~~lkeys
while pressing the reset button,
the PX-8 will know that an external disk
is
connected. There
will
be no request
for the size
of
the RAM disk,
but
it will still be necessary to format the disk.
If
you try to write to the RAM disk when the write protection switch
is
on,
a BDOS error messaage will be displayed
on
the screen.
4-19