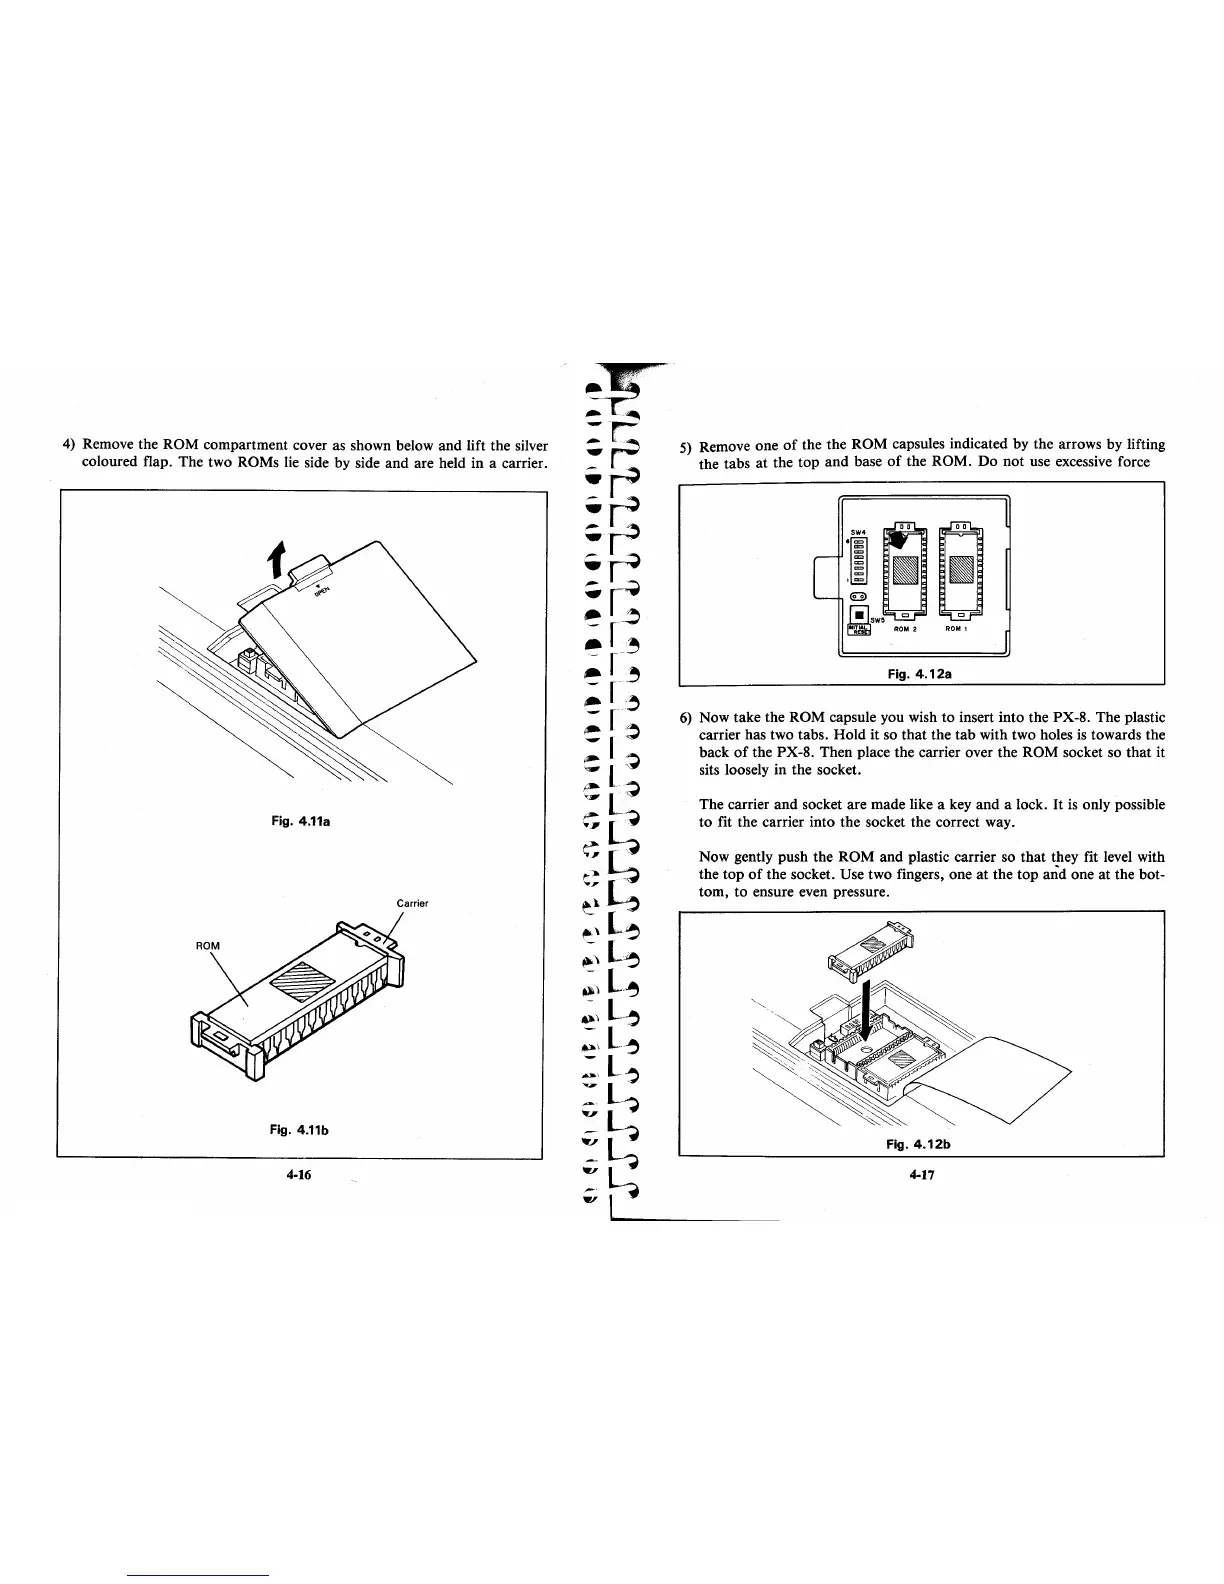
4)
Remove the ROM compartment cover as shown below and lift the silver
coloured flap. The two ROMs lie side by side and are held in a carrier.
Fig.4.11a
Carrier
Fig.4.11b
4-16
5)
Remove one
of
the the ROM capsules indicated by the arrows by lifting
the tabs
at
the top and base
of
the ROM. Do not use excessive force
SW4
:!
II
II
~SW5
c
~
ROM
2 ROM 1
Fig.4.12a
6)
Now take the ROM capsule you wish
to
insert into the PX-S. The plastic
carrier has two tabs. Hold it so that the tab with two holes
is
towards the
back
of
the PX-S. Then place the carrier over the ROM socket so that it
sits loosely in the socket.
The carrier and socket are made like a key and a lock.
It
is
only possible
to
fit the carrier into the socket the correct way.
Now gently push the ROM and plastic carrier so that they fit level with
the top
of
the socket. Use two fingers, one
at
the top and one
at
the bot-
tom, to ensure even pressure.
Fig.4.12b
4-17