Epson Stylus Photo RX595 Series
5/07 9
Placing an Original CD/DVD on the
Scanner Glass
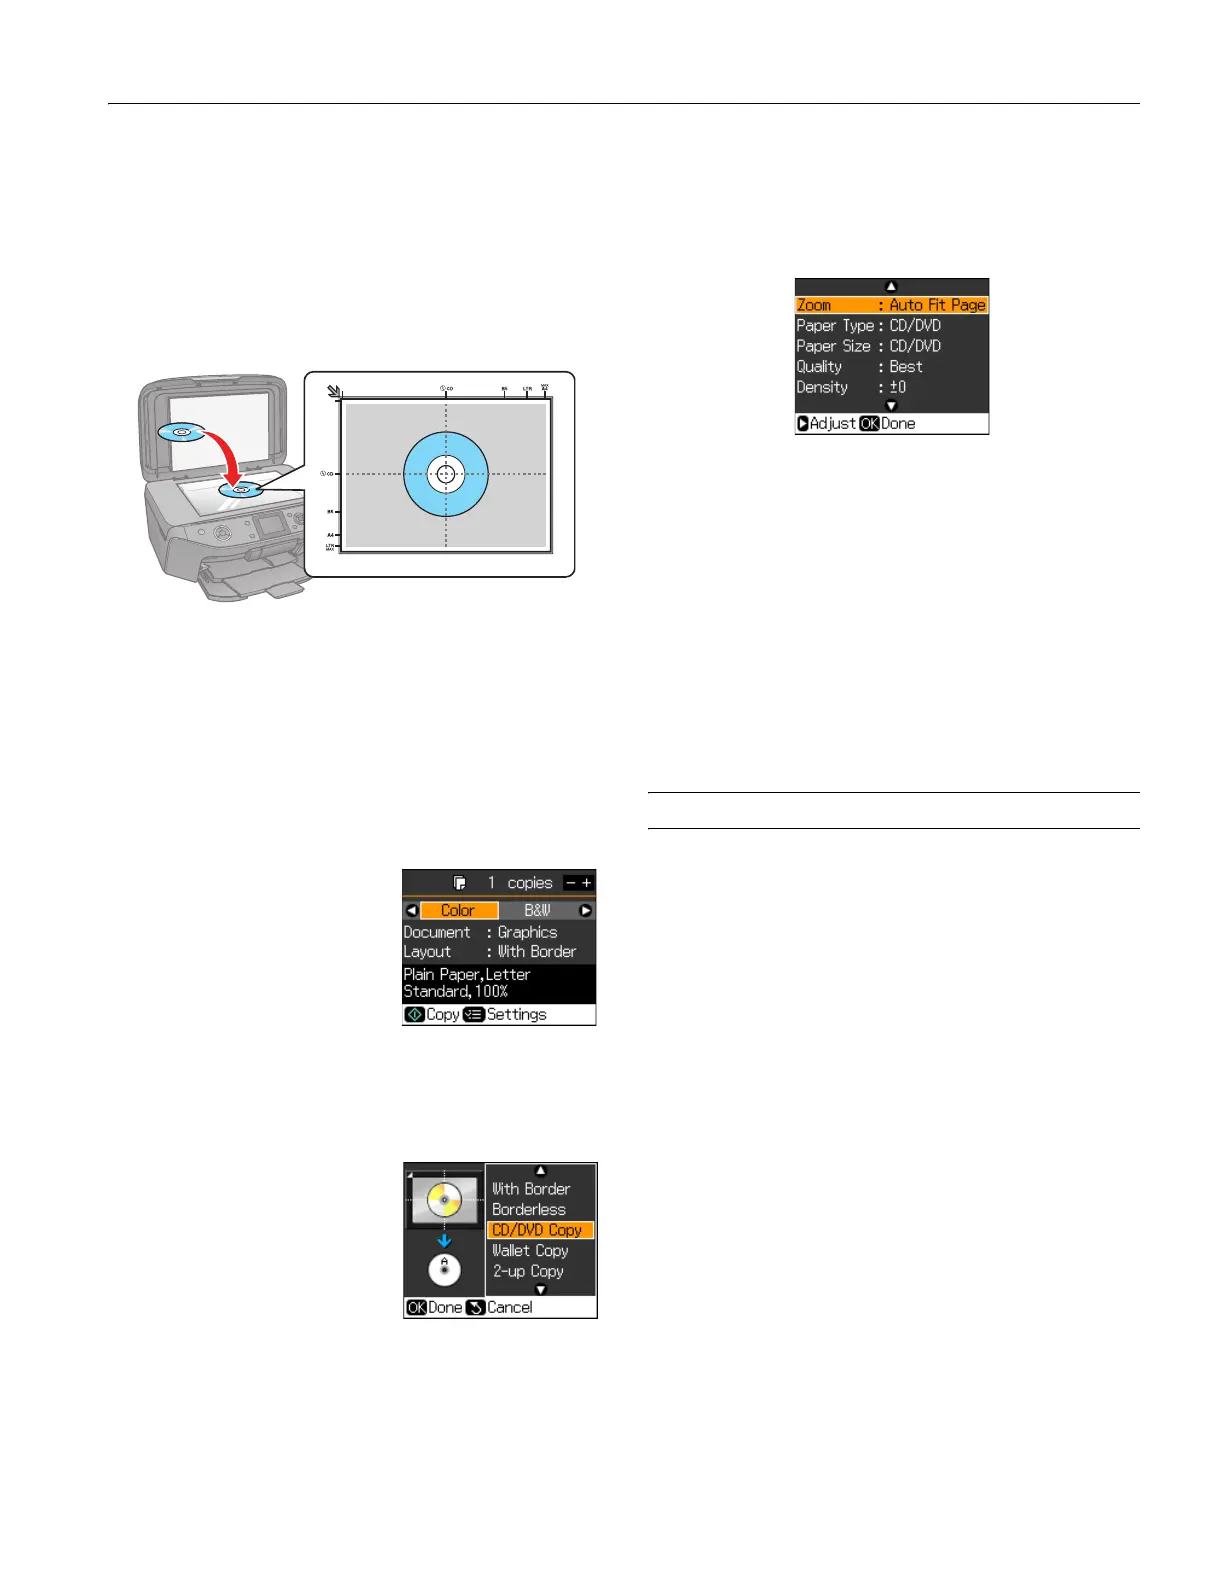
You can place a CD/DVD label-side-down on the scanner
glass and copy the label onto an ink jet-printable CD/DVD.
1. Open the document cover.
2. Place your original CD/DVD label-side-down in the center
of the scanner glass as shown below.
3. Close the document cover gently to keep your CD/DVD in
place.
Copy Your Label Design Onto a CD/DVD
1. Load your CD/DVD as described on page 8 (or plain paper
to check your design; see page 5) into the RX595 Series.
2. Place your original printed photo, illustration, or document
(see page 6), or your CD/DVD (see the previous section) on
the scanner glass.
3. Press the
Copy button to enter
copy mode, if necessary.
4. To print more than 1 copy,
press
+ or – to select the number
(up to 99).
5. Press l or r to select
Color or
B&W copies.
6. Press d, then press r to change the document type, if
necessary. Select
Graphics for illustrations or Photo for
photos. (Do not select
Text when copying onto a
CD/DVD.)
7. Press d, then press r to change
the layout to
CD/DVD Copy.
8. Press
OK.
9. To copy your design onto a CD
or DVD, press x
Start.
To copy a test label onto plain
paper, or to adjust the position
or ink density of the label, press
x
Menu and see the next
section.
CD/DVD Print Settings
To copy a test label onto plain paper, or to adjust the position
or ink density of the label, press x
Menu. (Zoom, Paper Size,
and
Quality are set automatically for CD/DVD printing.)
❏ To print a test label, select
Paper Type and choose Plain
Paper.
❏ To adjust the ink density if ink smears on your printed
CD/DVD, select
Density and choose a lower density
setting. Adjusting the ink density may be necessary for each
brand of disc you use due to differences in ink absorption
quality by disc manufacturers.
❏ To adjust the amount of image expansion, select
Expansion and choose Standard, Min, or Mid.
❏ To adjust the position of the image on your discs, select
CD
Inner-Outer and adjust the distance from the center and
edge of your discs.
Printing on a CD or DVD
You can use your RX595 Series to print a design directly onto
ink jet-printable CDs or DVDs to create a custom label. You
can print on CD/DVDs using the Epson Print CD computer
software that came with your RX595 Series, or using the
RX595 Series control panel. See the on-screen User’s Guide for
instructions.

 Loading...


