Epson Stylus Photo PX650/TX650/TX659/PX660/PX660 Premium/Artisan 635 Revision C
DISASSEMBLY AND ASSEMBLY Removal of Exterior Parts 75
Confidential
4.2.9 Middle Housing
Parts/Components need to be removed in advance
Upper Housing / Scanner Unit / Panel Unit / M/B Cover / Main Board Unit / Waste Ink
Tray Assy
Removal procedure
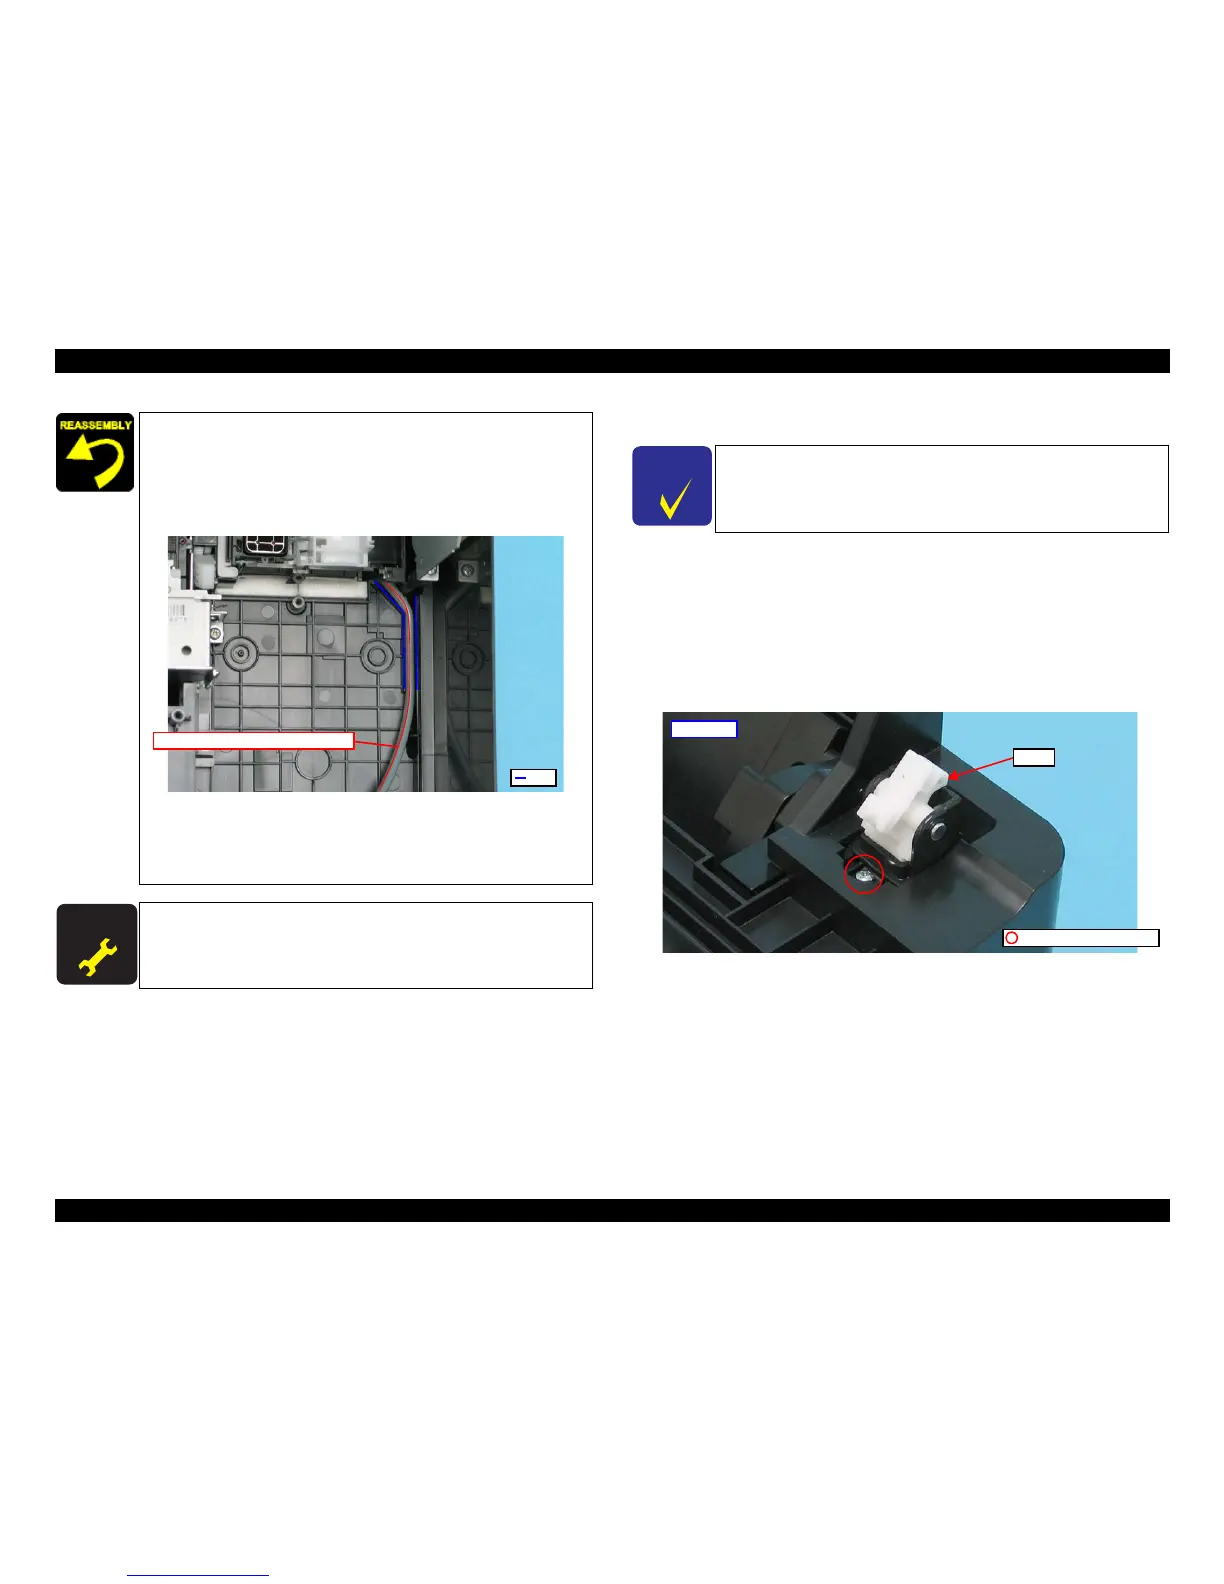
1. Remove the screw that secure the hinge, and remove the hinge from the Middle
Housing.
Figure 4-30. Removing the Hinge
When connecting the Waste Ink Tube, be careful of the following:
Do not press the Waste Ink Tube when installing the Waste
Ink Tray Assy. Otherwise, the ink may leak.
Route the Waste Ink Tube with red line facing up through the
rib of the Lower Housing without any twisting.
Figure 4-29. Routing the Waste Ink Tube
Wipe the ink off the joint area of the tube, if any. With ink left
adhering to the joint area, the tube cannot be connected firmly
and may come off easily.
After removing/replacing the Waste Ink Tray Assy, make the
specified adjustments. (See Chapter 5 "ADJUSTMENT".)
If you do not intend to replace the Middle Housing, you can
remove the Middle Housing together with the Main Board Unit
and the Card Slot Cover.
 Loading...


