EasyManuals Logo

Epson Stylus Photo TX659 User Manual

Epson Stylus Photo TX659
166 pages
To Next Page IconTo Next Page
To Previous Page IconTo Previous Page
Page #83 background imageLoading...
Page #83 background image
Epson Stylus Photo PX650/TX650/TX659/PX660/PX660 Premium/Artisan 635 Revision C
DISASSEMBLY AND ASSEMBLY Removing the Circuit Boards 83
Confidential
4.3.3 Power Supply Board
Parts/Components need to be removed in advance
Upper Housing / Scanner Unit / Panel Unit / M/B Cover / Waste Ink Tray Assy /
Middle Housing / Printer Mechanism
Removal procedure
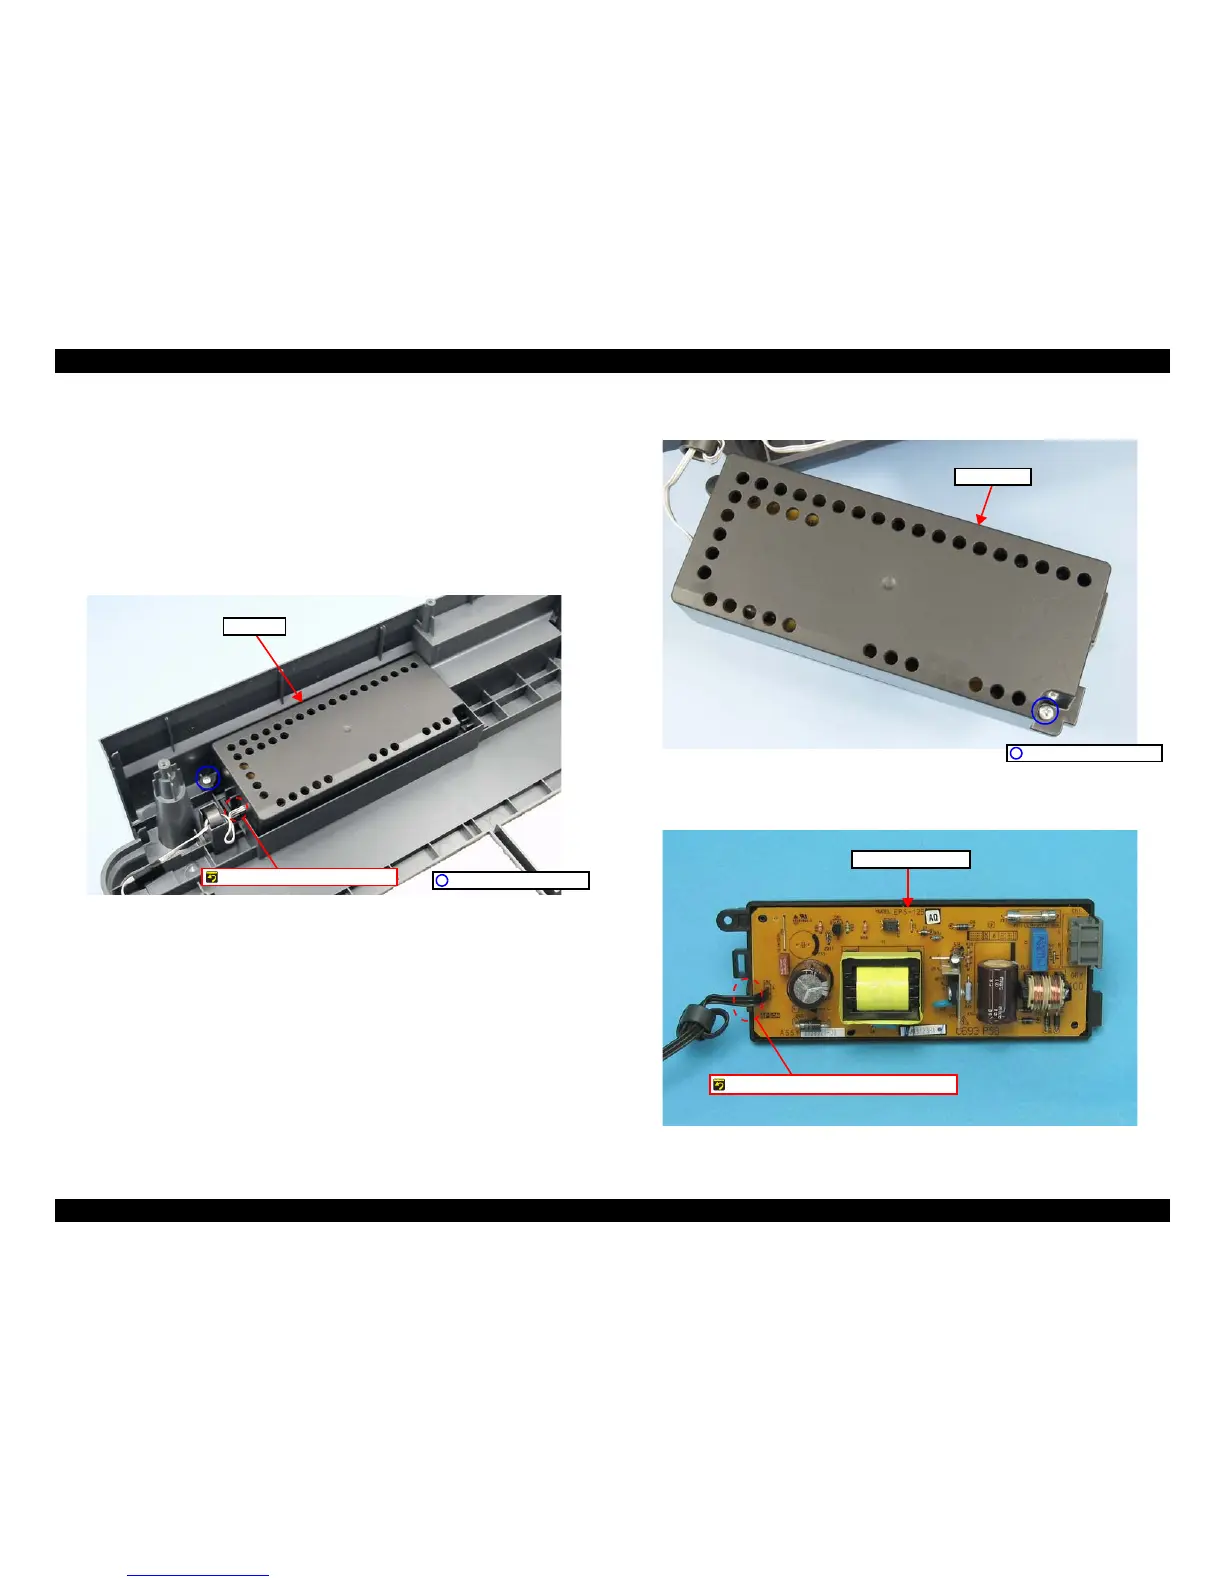
1. Remove the screw that secure the P/S Assy, and remove the P/S Assy from the
Lower Housing.
Figure 4-48. Removing the P/S Assy
2. Remove the screw, and remove the P/S Cover.
Figure 4-49. Removing the Power Supply Board (1)
3. Remove the Power Supply Board.
Figure 4-50. Removing the Power Supply Board (2)
P/S Assy
Pull out the connector from here.
C.B.P. 3x10 (6±1 Kgfcm)
P/S Cover
Power Supply Board
Route the P/S Connector Cable on the rib.

Table of Contents

Questions and Answers:

Question and Answer IconNeed help?

Do you have a question about the Epson Stylus Photo TX659 and is the answer not in the manual?

Epson Stylus Photo TX659 Specifications

General IconGeneral
BrandEpson
ModelStylus Photo TX659
CategoryPrinter
LanguageEnglish

Related product manuals